

Chapter 1
5 minGet in and look around
Picacho keeps one person — your character — looking the same in every image and video you make. This chapter gets you an account and shows you the room you'll be working in.
Start on the homepage
Go to picacho.ai and click Get started. There's also Log in and Sign up in the top right — every one of those buttons lands on the same form.

Fill in the form
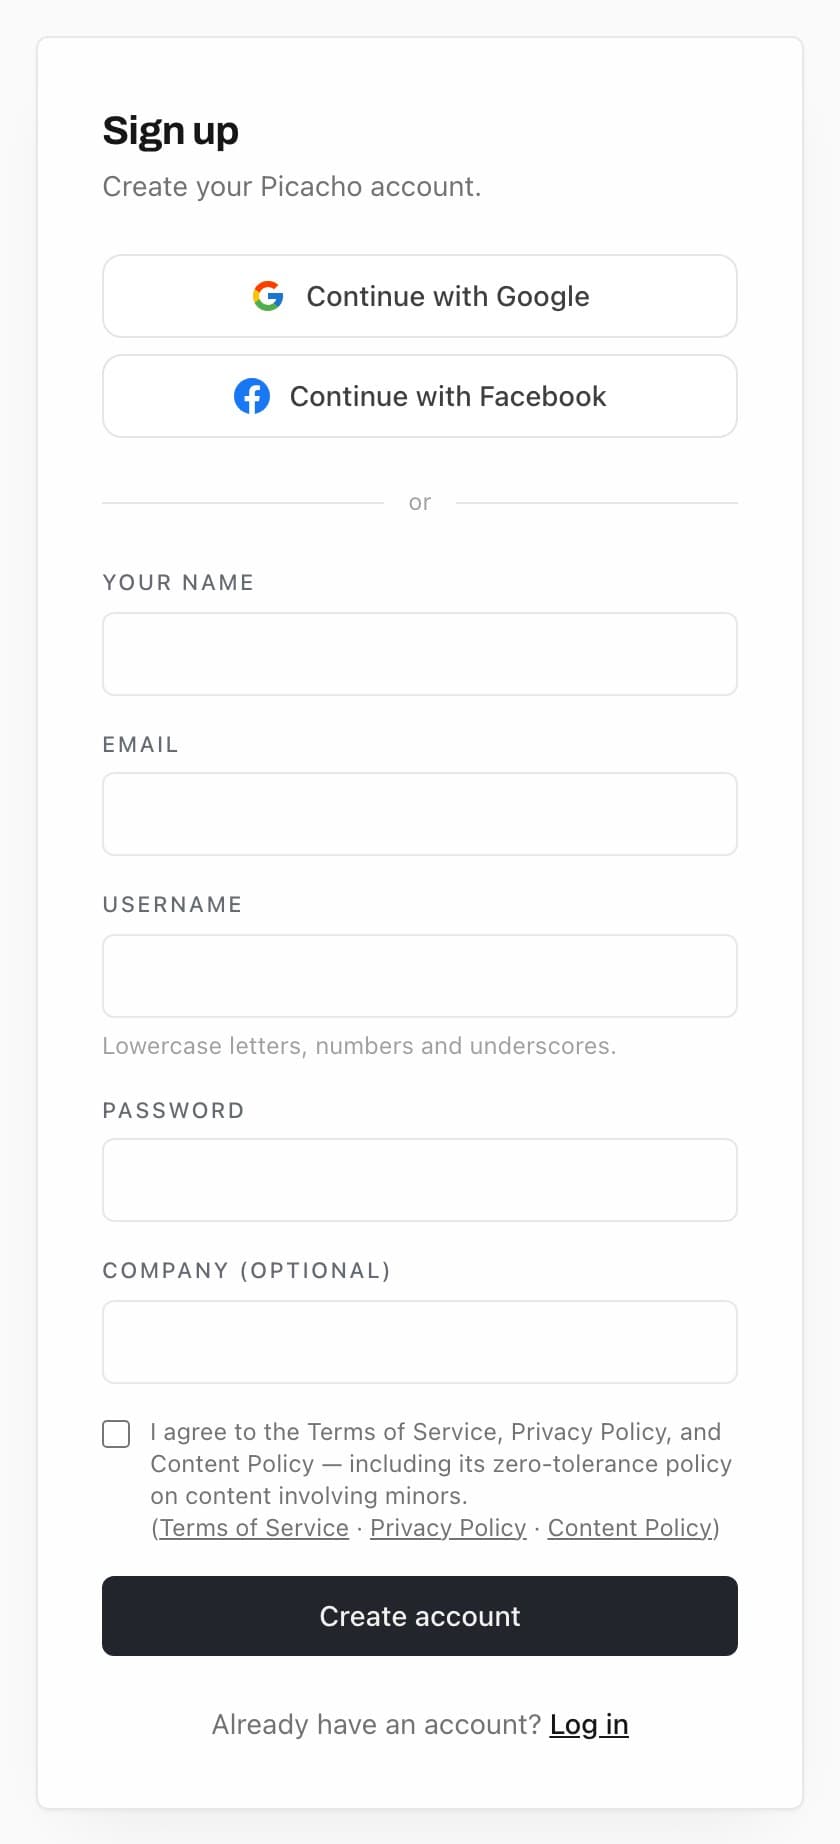
Five fields: your name, your email, a username, a password, and your company if you have one. The username is the name other people see, and it's what your invite link is built from — the line underneath tells you whether the one you typed is free. Then tick the box and click Create account.
Confirm your email
We send you a link. Open it on the same device you signed up on — it signs you in and drops you straight into the app, so there's no need to come back to this tab.

Your first screen
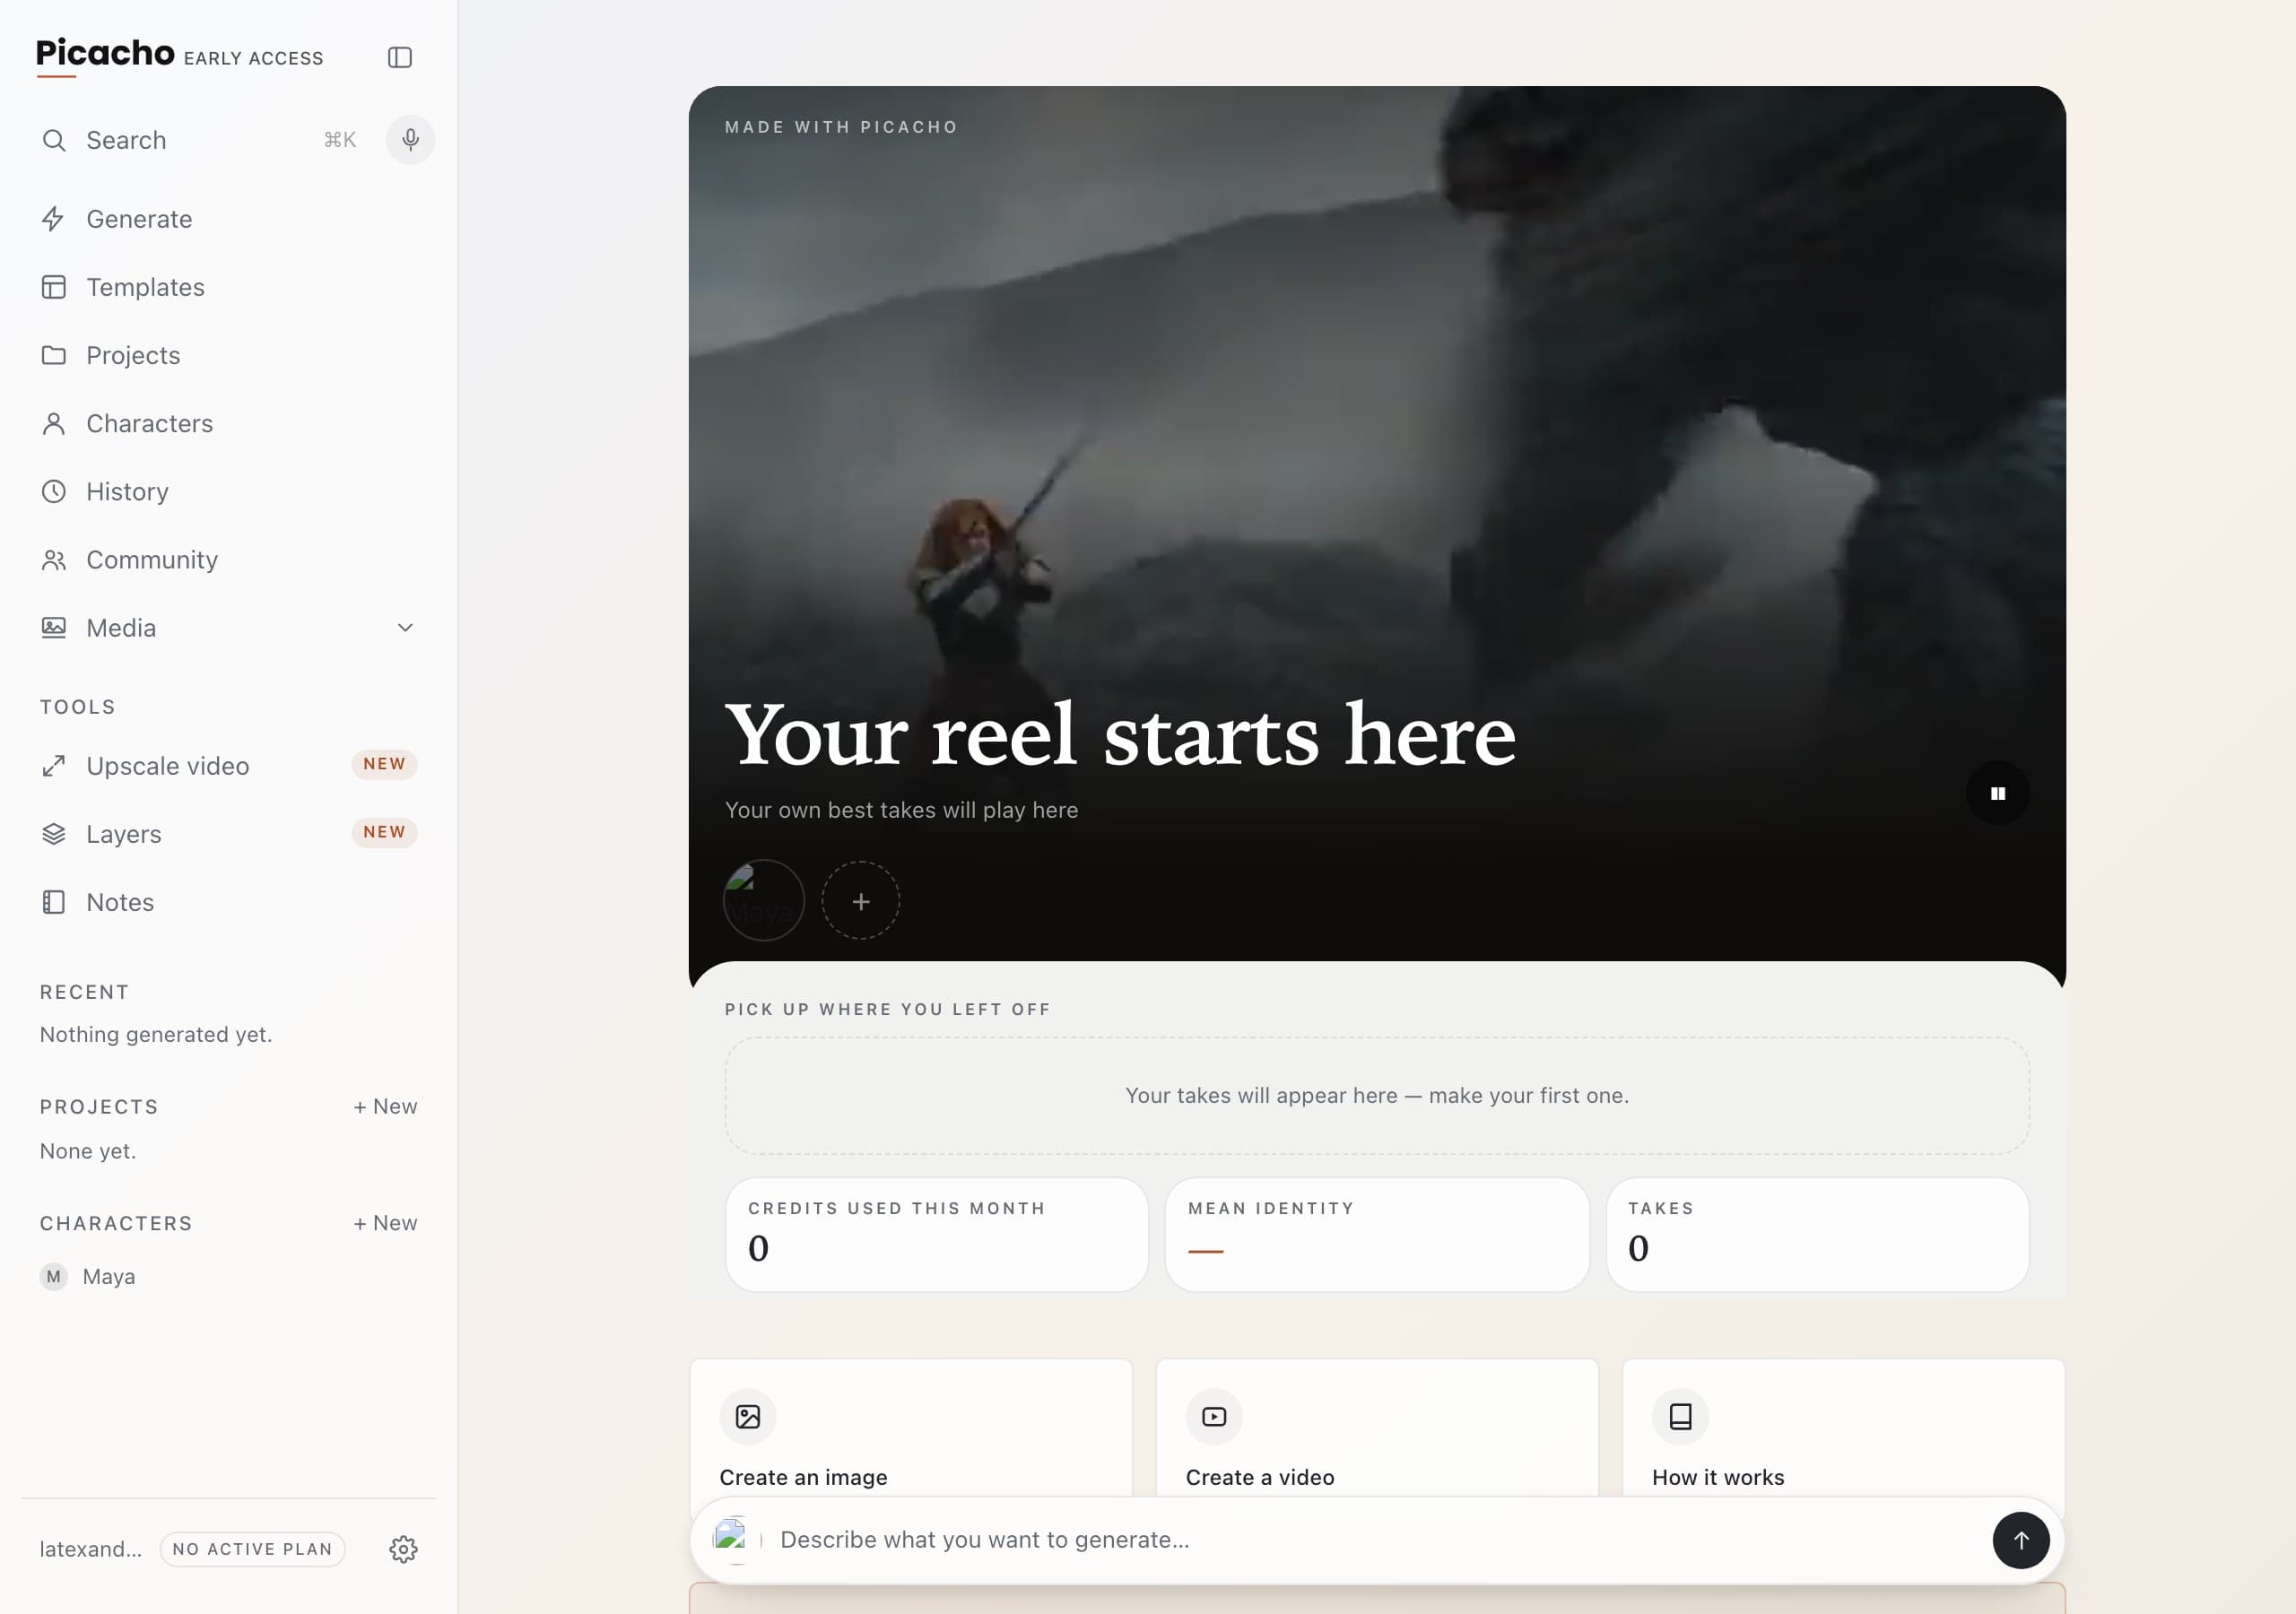
You land on your dashboard. It's nearly empty on purpose: a reel playing at the top, three cards — Create an image, Create a video, How it works — and, once you scroll down past the reel, a box that rises at the bottom to type in. The counters read zero because you haven't made anything yet.
The tour that opens by itself
On your first visit a short walkthrough points at the things you'll need, one at a time, with a counter so you know how far in you are. Skip closes it and nothing is lost — you can replay it from the gear menu whenever you like.
The sidebar is the whole app
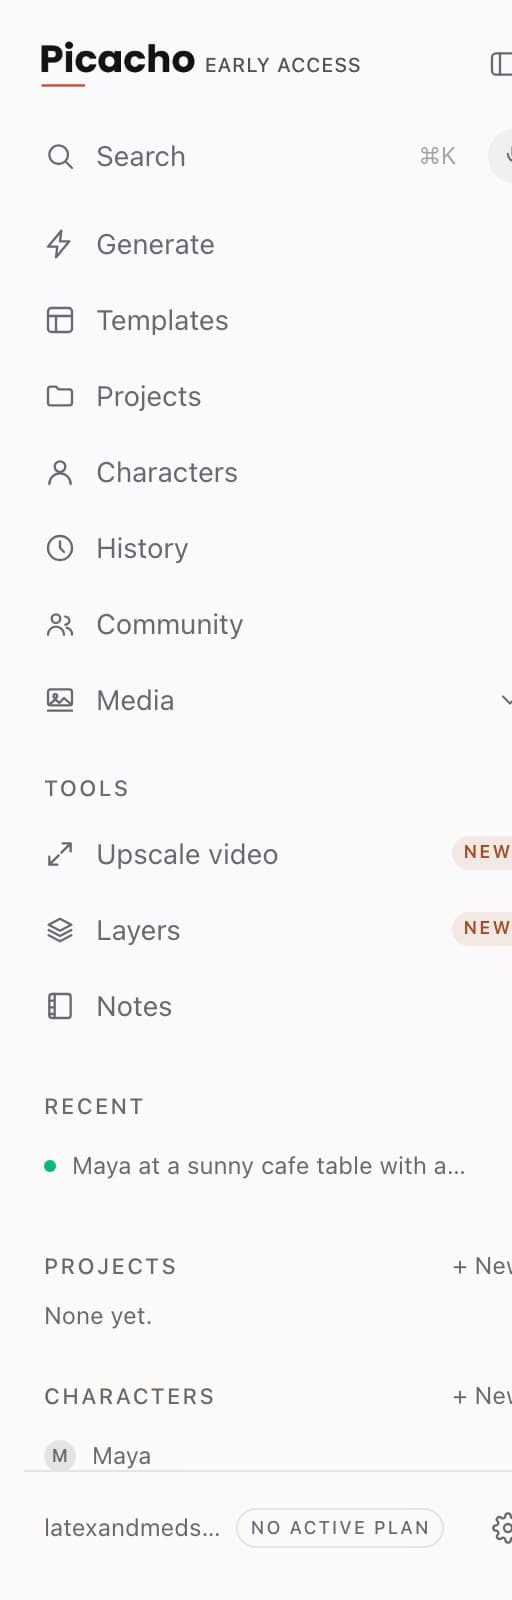
Generate is where you make things. Characters holds your cast, History everything you've made, Templates and Community are for ideas. Media opens into Images and Videos, and Tools has Upscale video, Layers and Notes. The gear at the very bottom opens settings, your plan, and this course again.
Chapter 2
10 minMake your character
A character is a name, a few photos and a few fixed details. Picacho locks that face into everything you make afterwards, so this is the one part worth doing slowly. We'll build one called Maya.
Open Characters
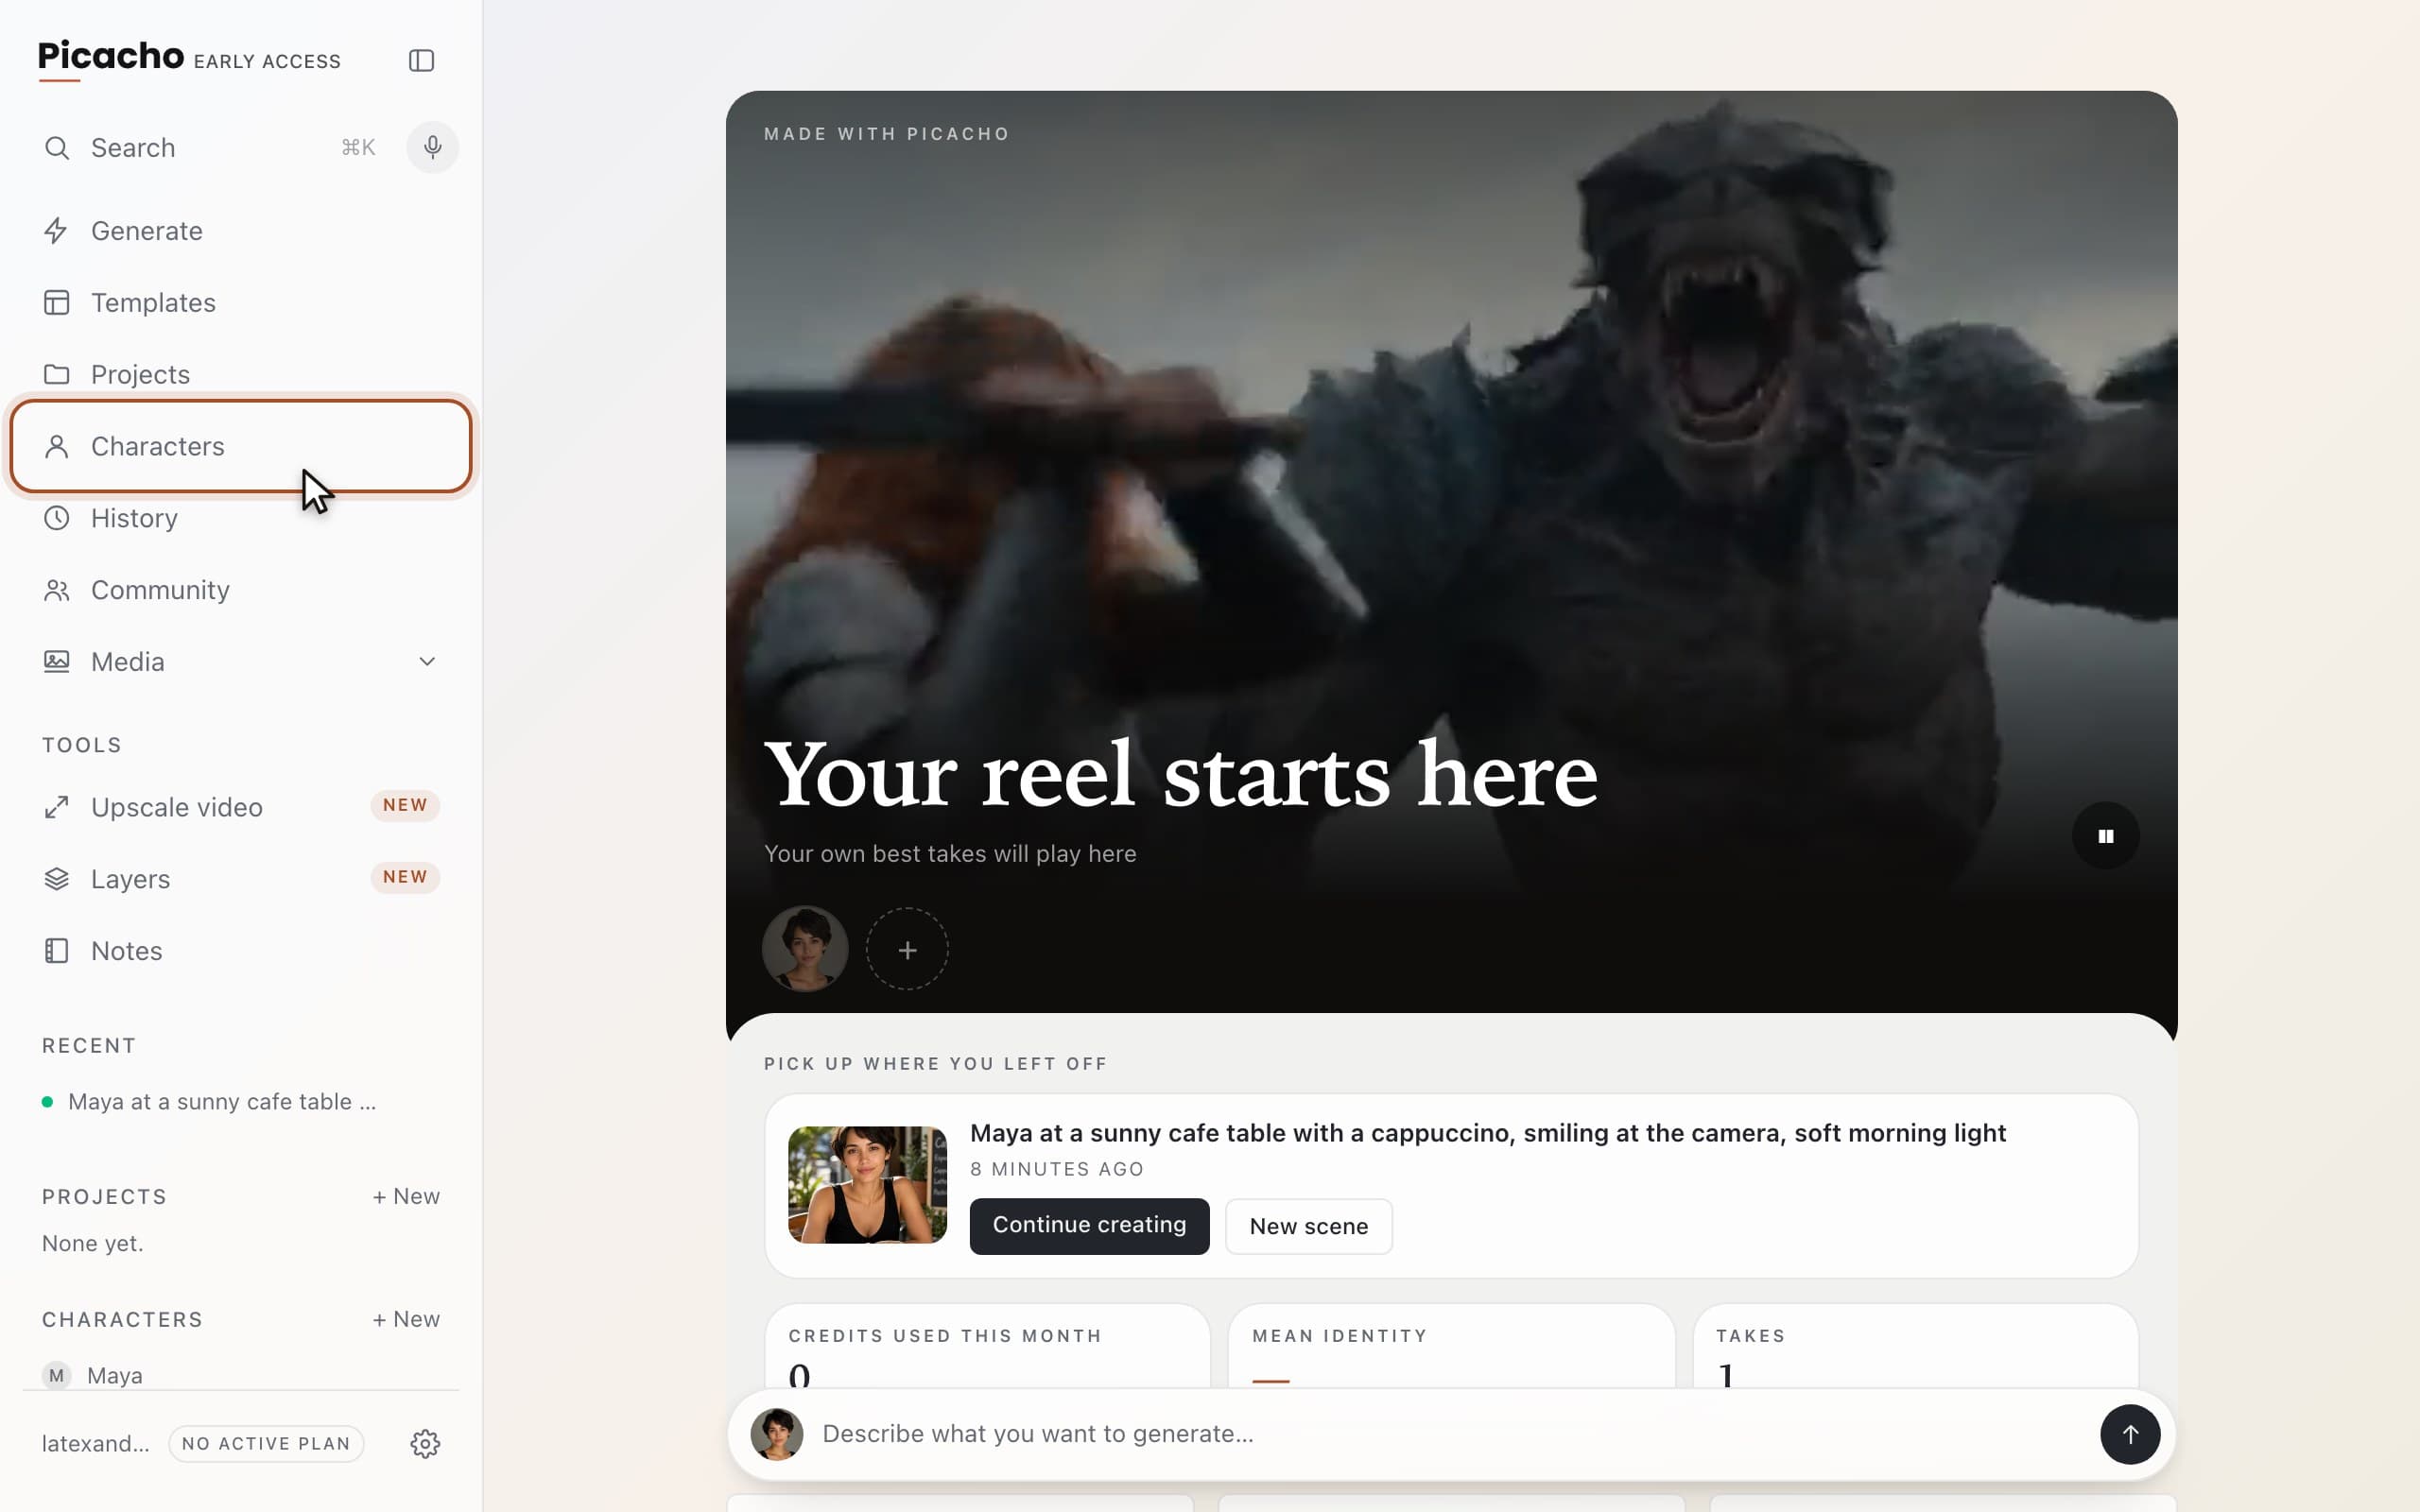
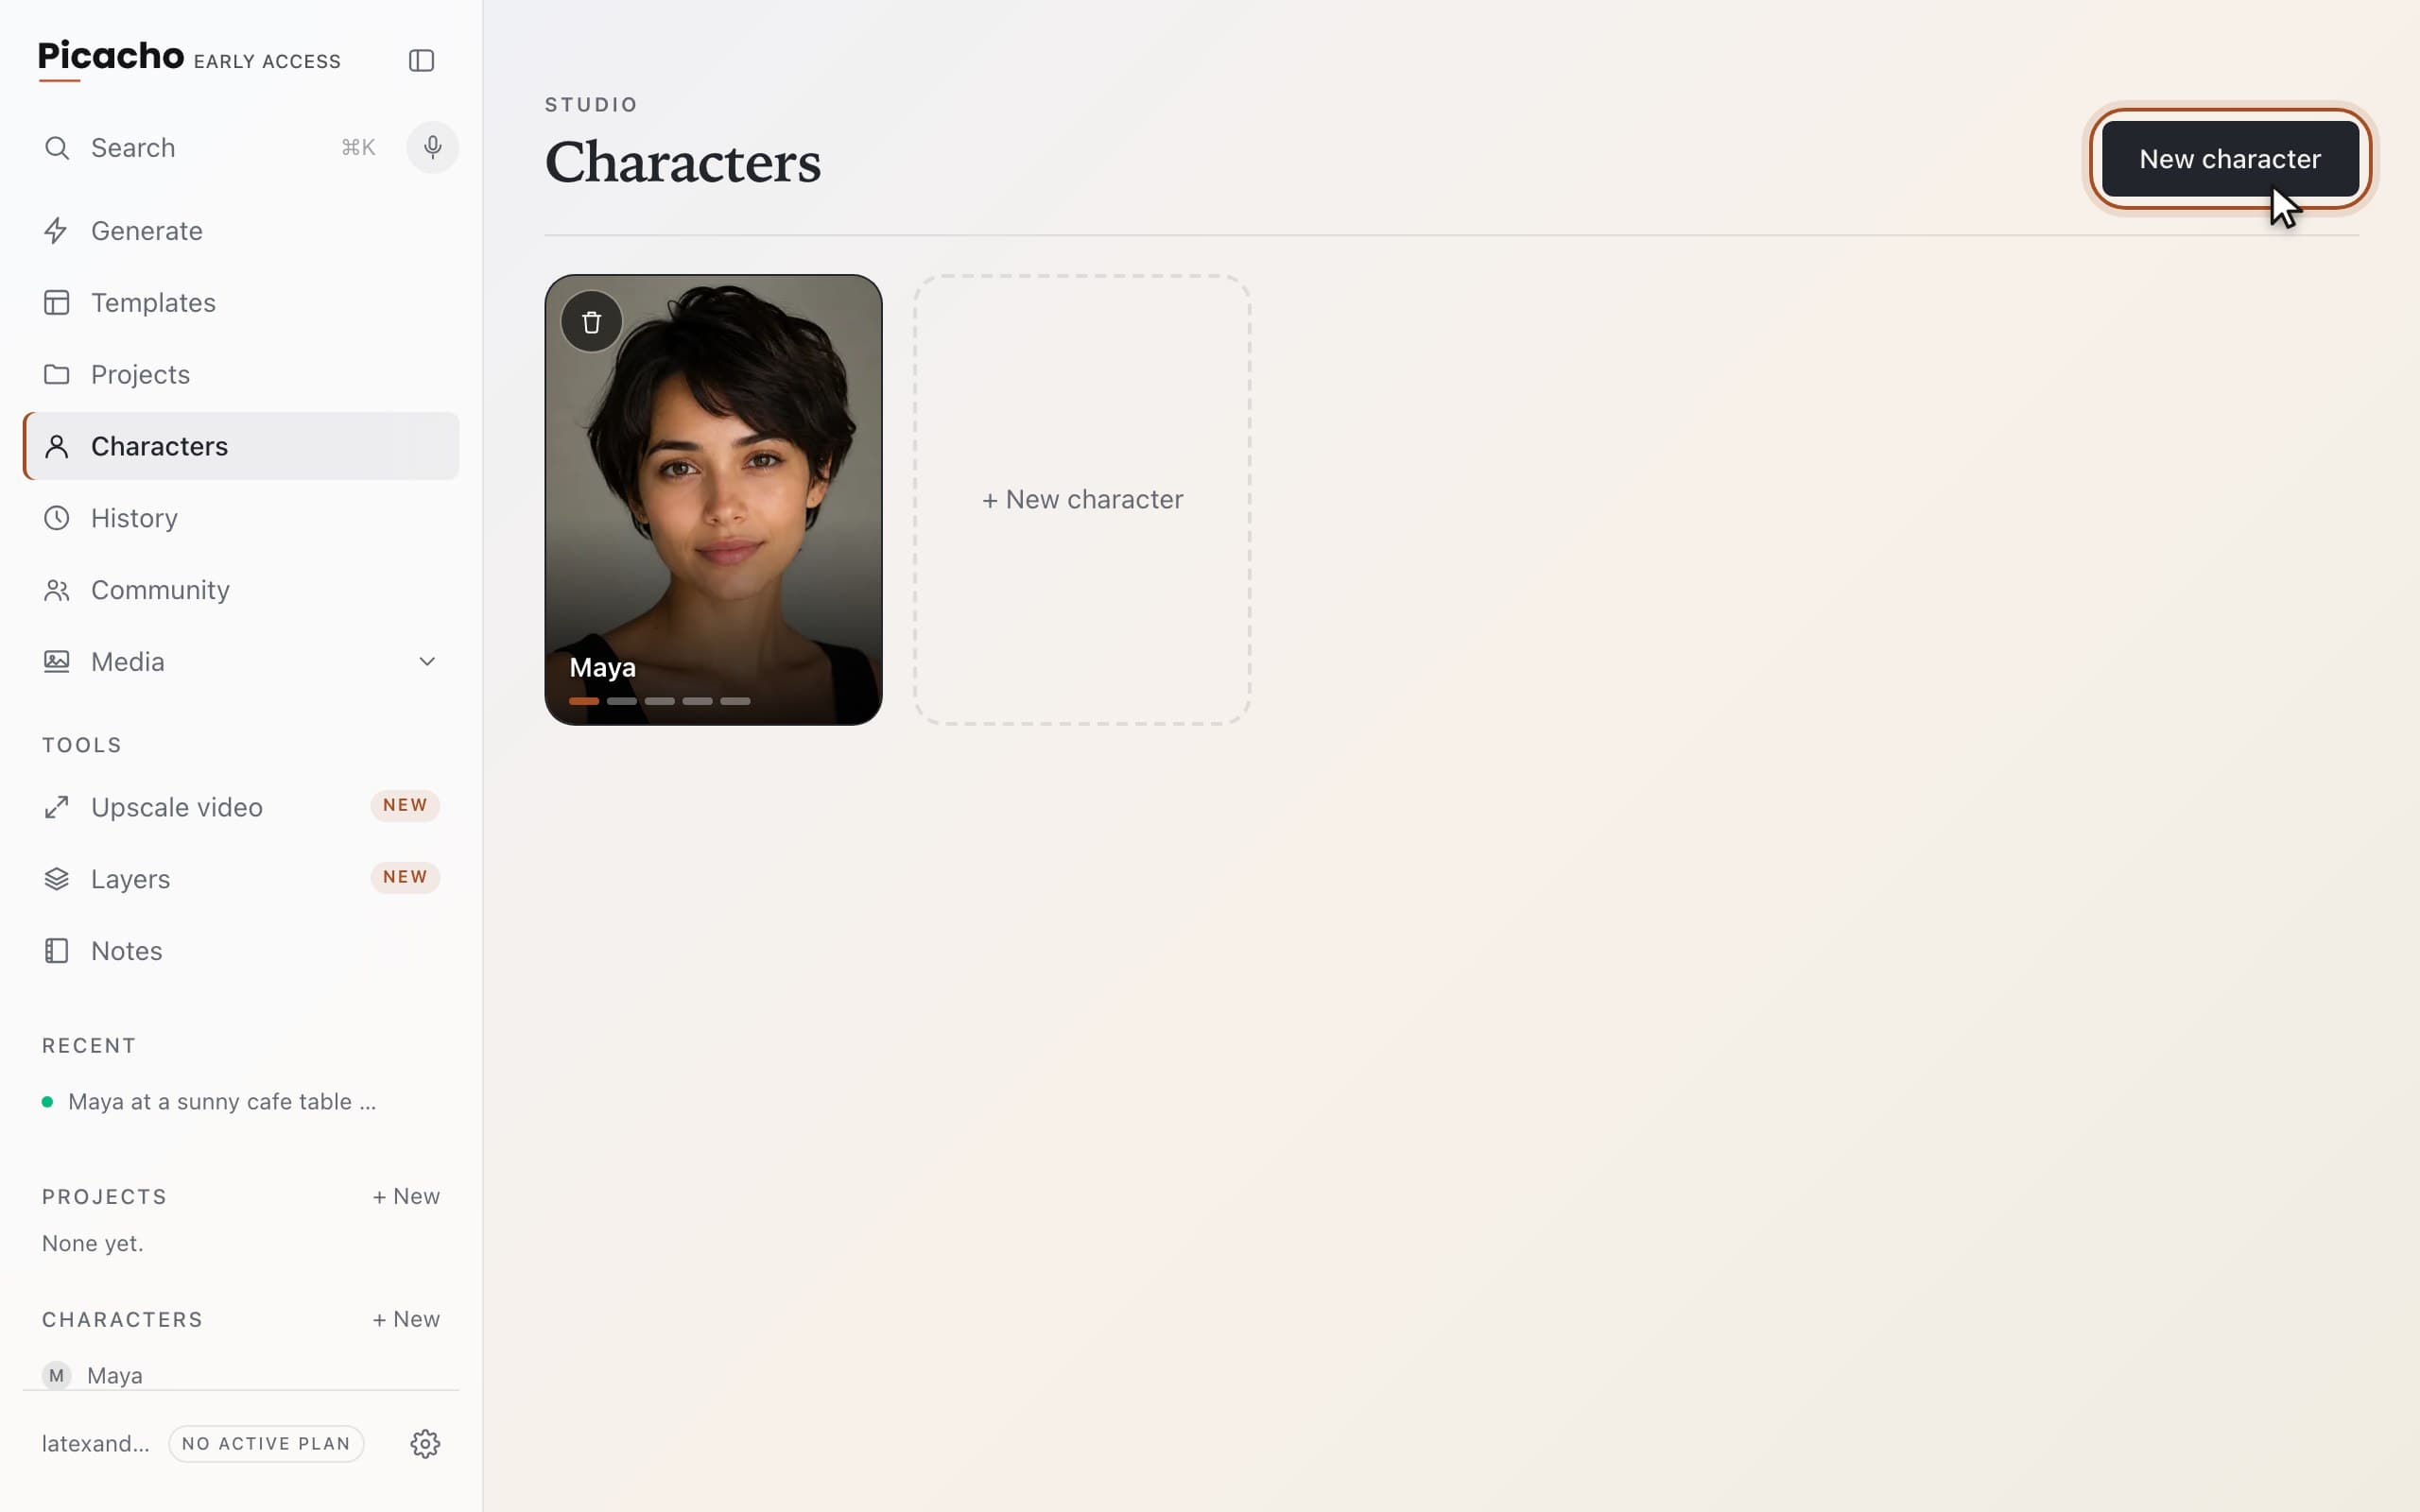
Click Characters in the sidebar. This is your cast — a wall of everyone you've made. On day one it's empty.
Start a new one
Click New character at the top right, or the dashed tile on the wall. Both open the same form.
Name them
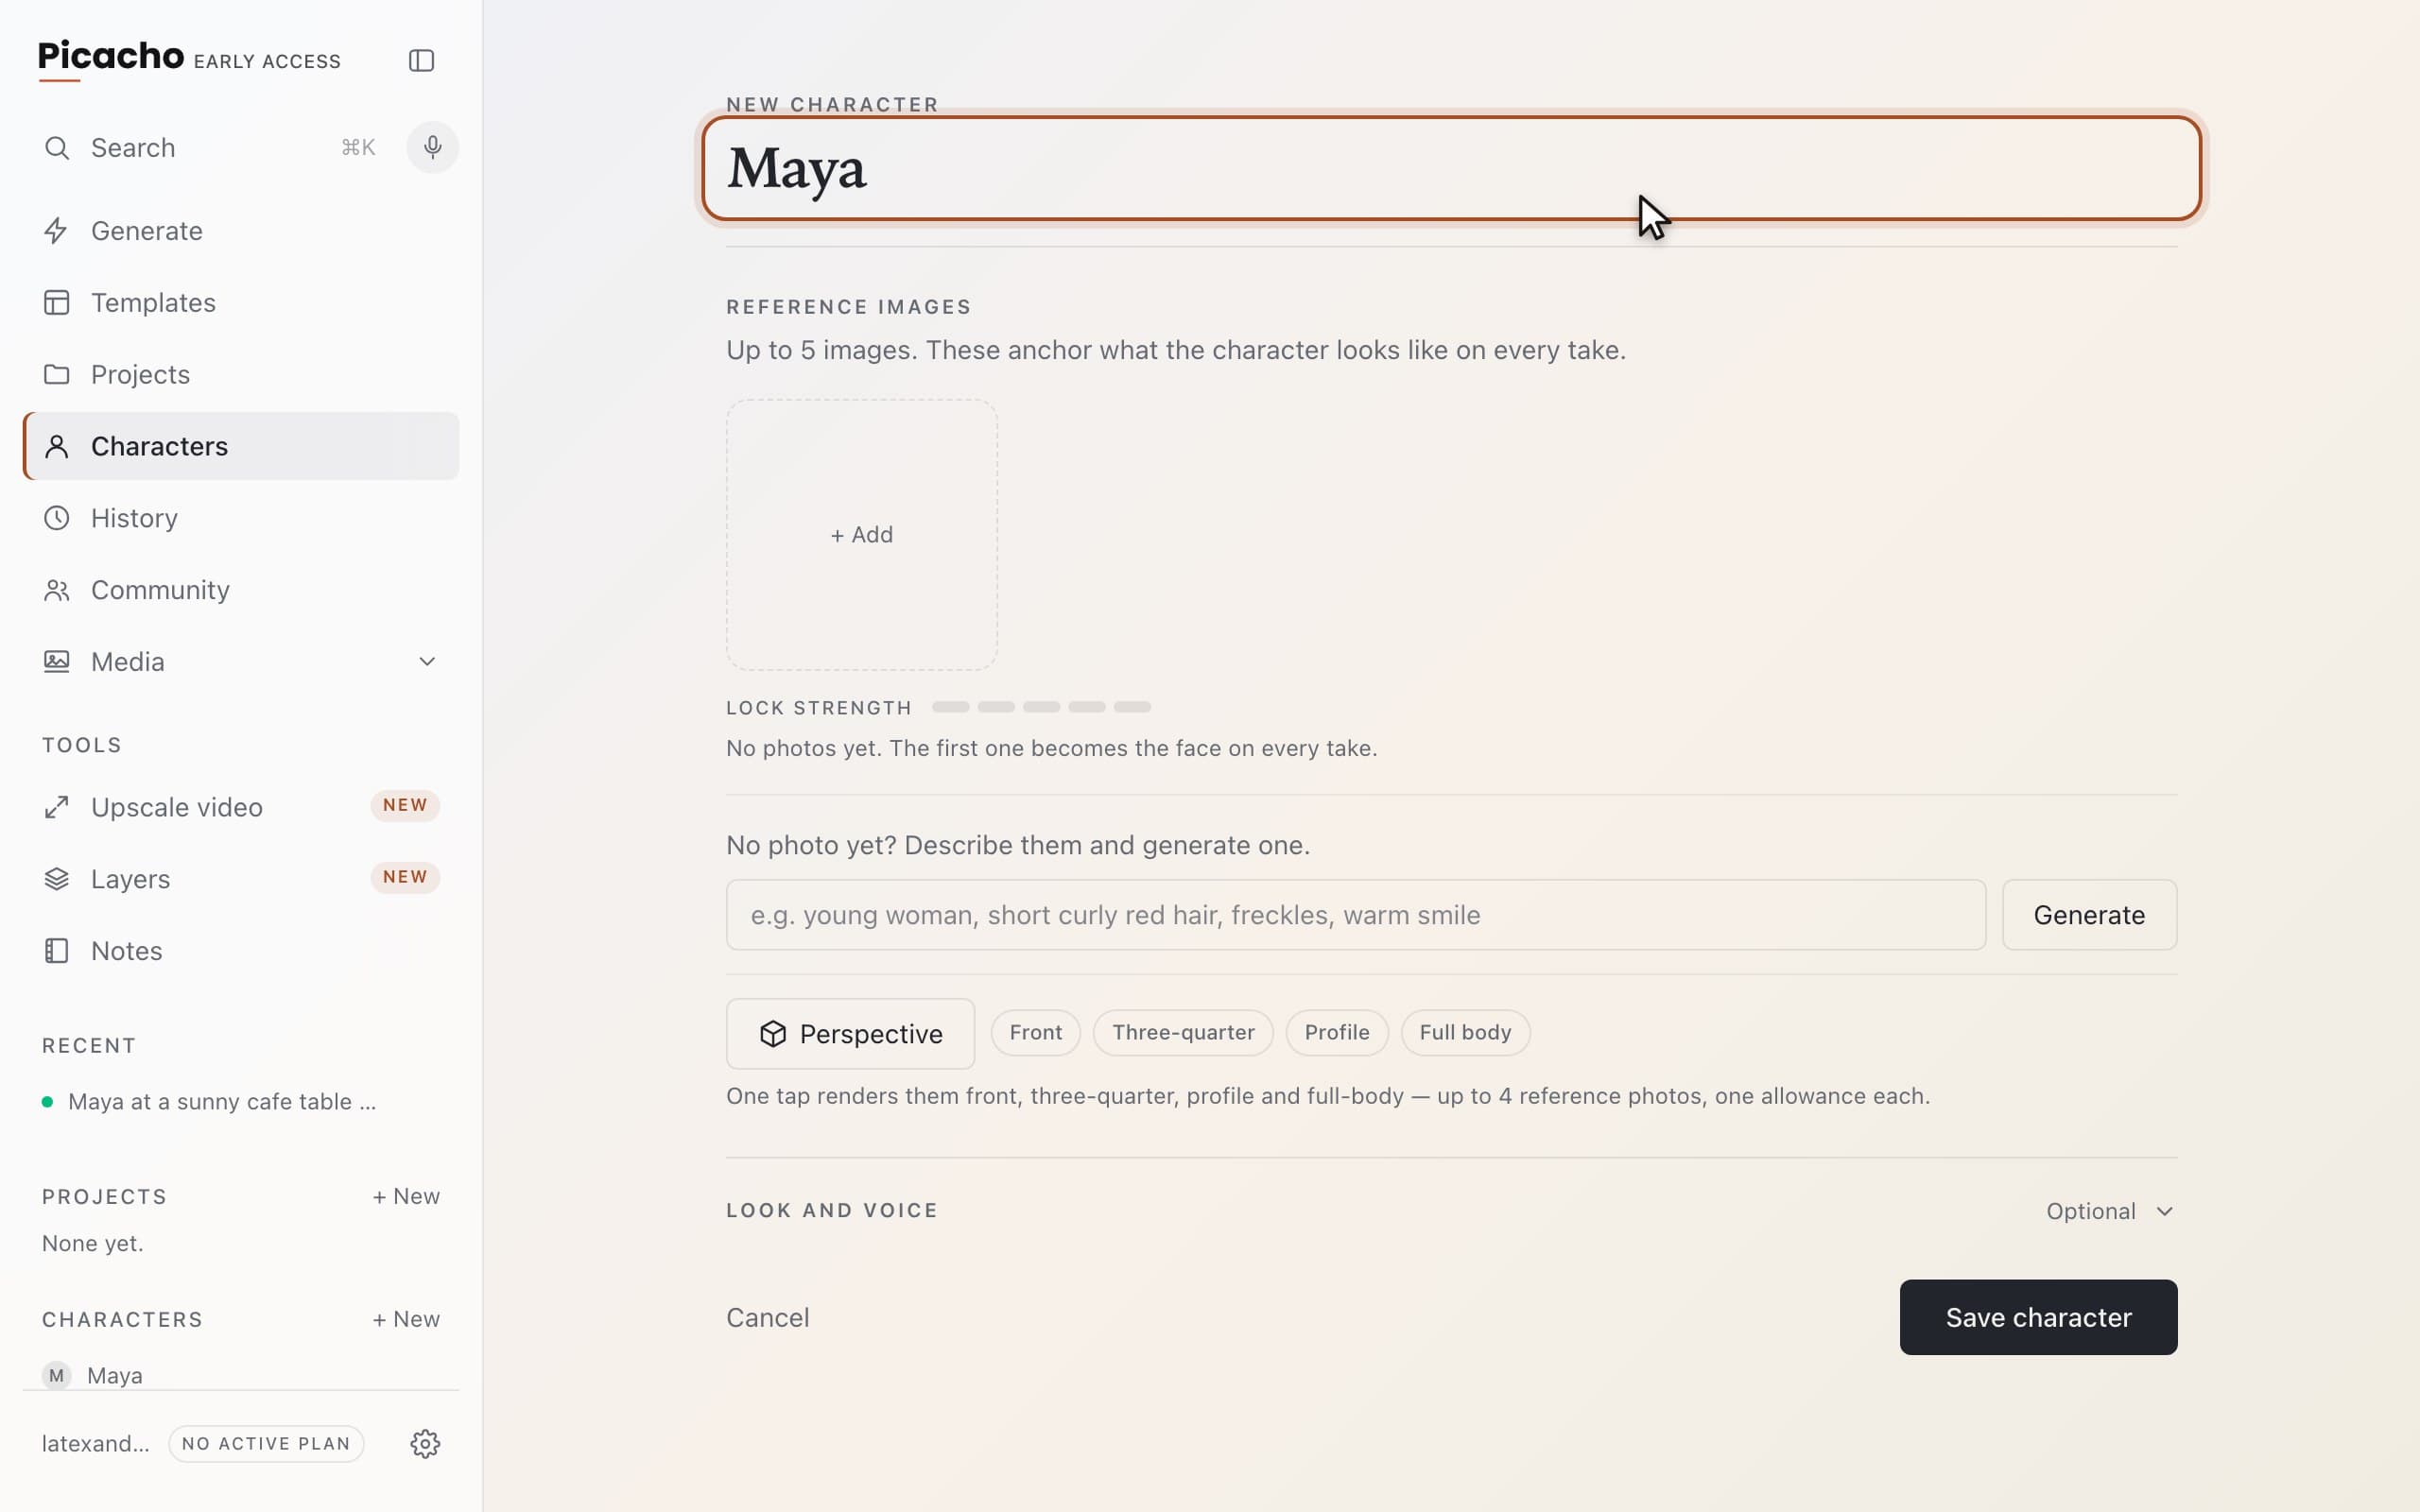
The big line at the top of the form is the name. That's the only thing you truly have to fill in — everything below it makes the face hold better.
Give them a face
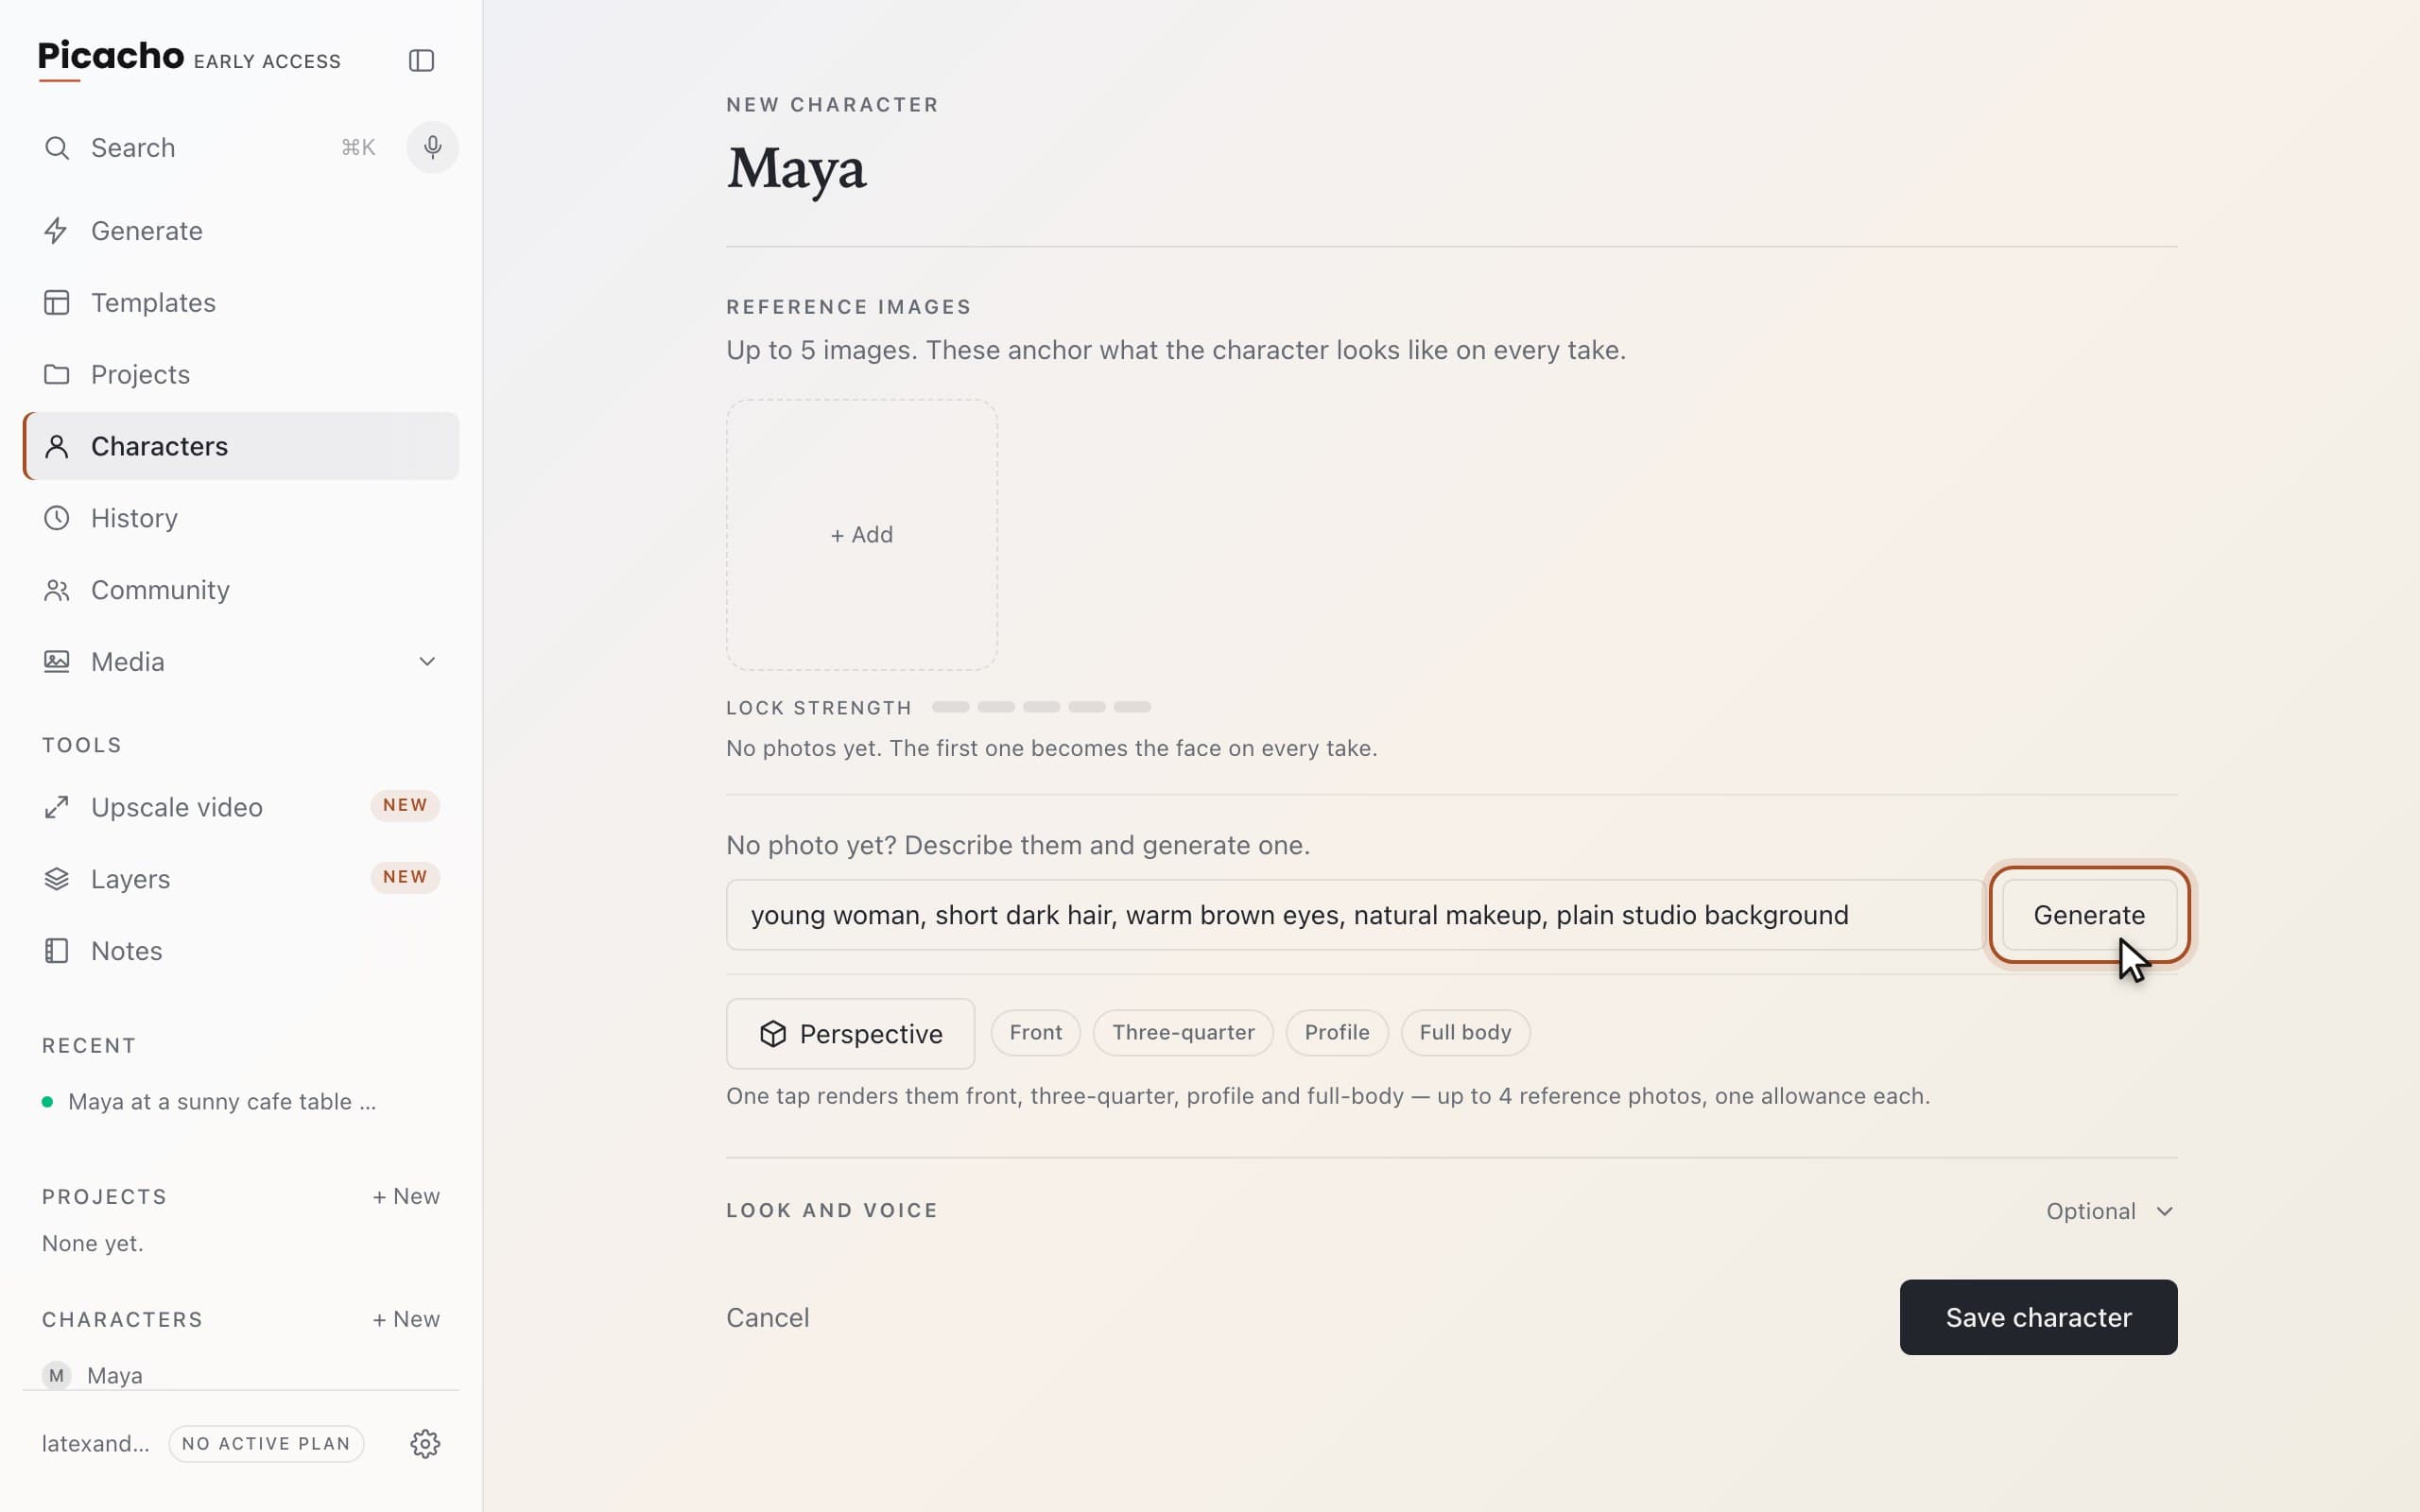
Under Reference images you can click + Add to upload photos from your device — up to five, and uploading is always free. No photos? Describe the person in the box and click Generate. A free account gets two AI-made character photos in total.
Your identity photo
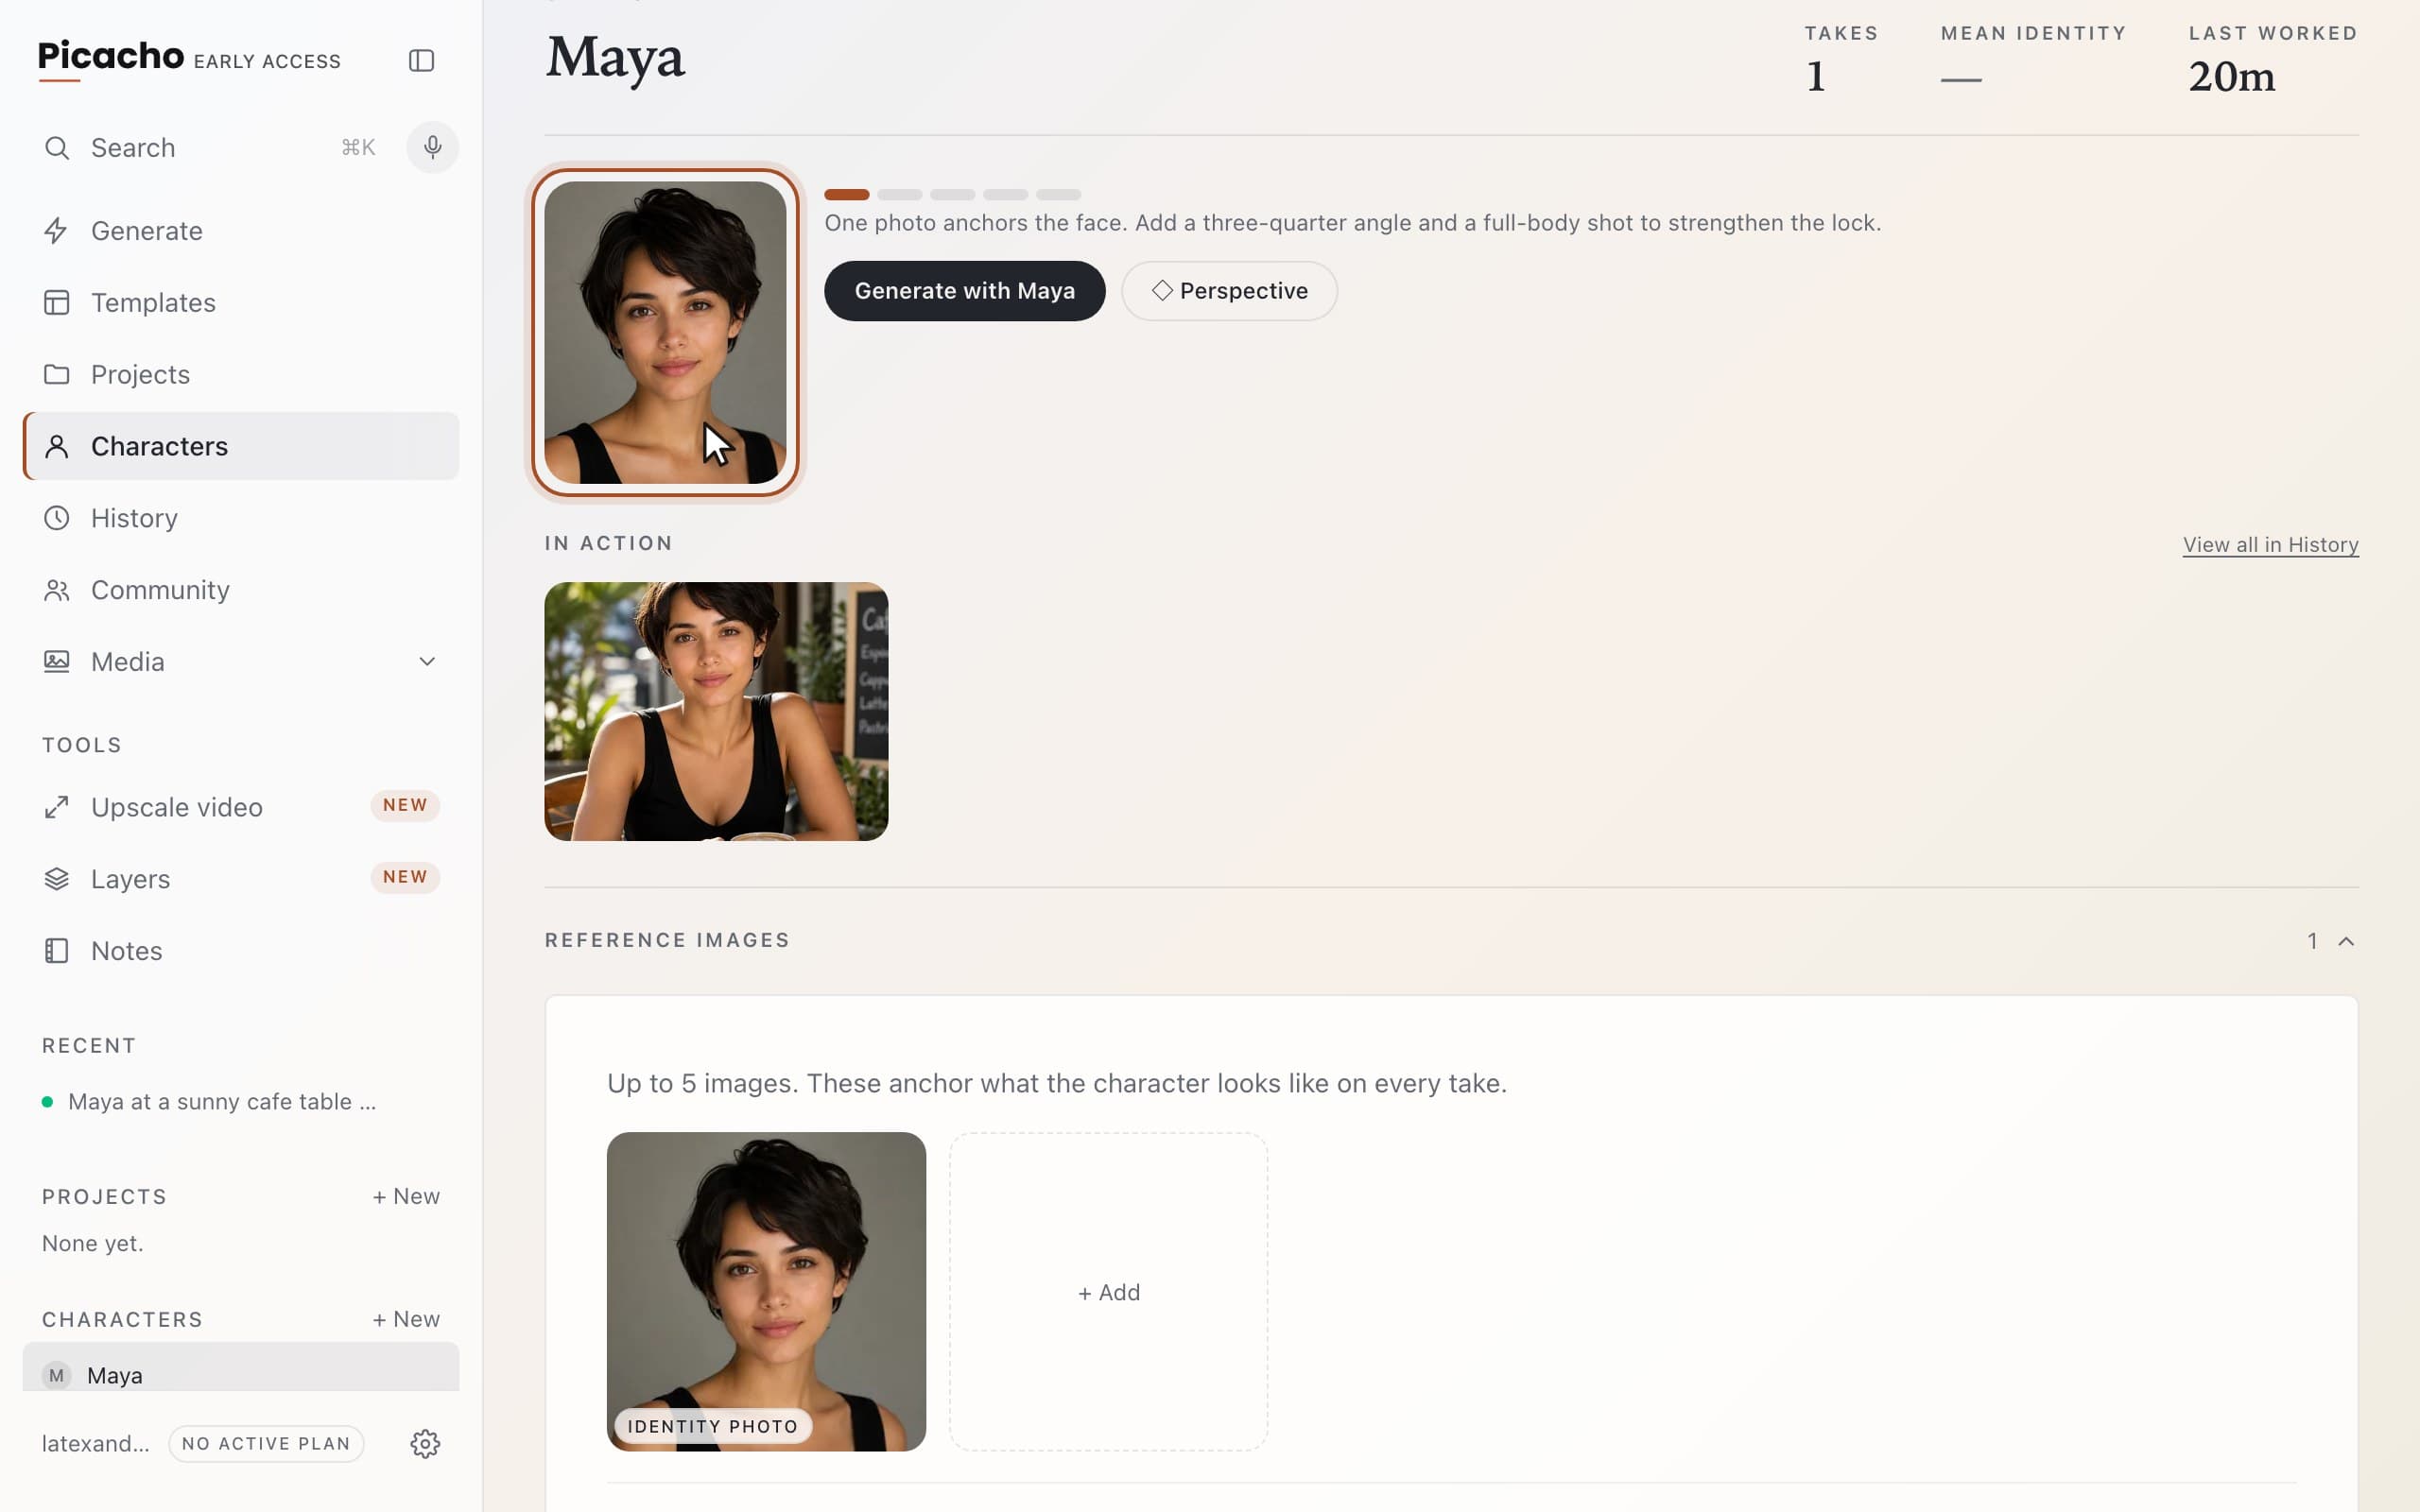
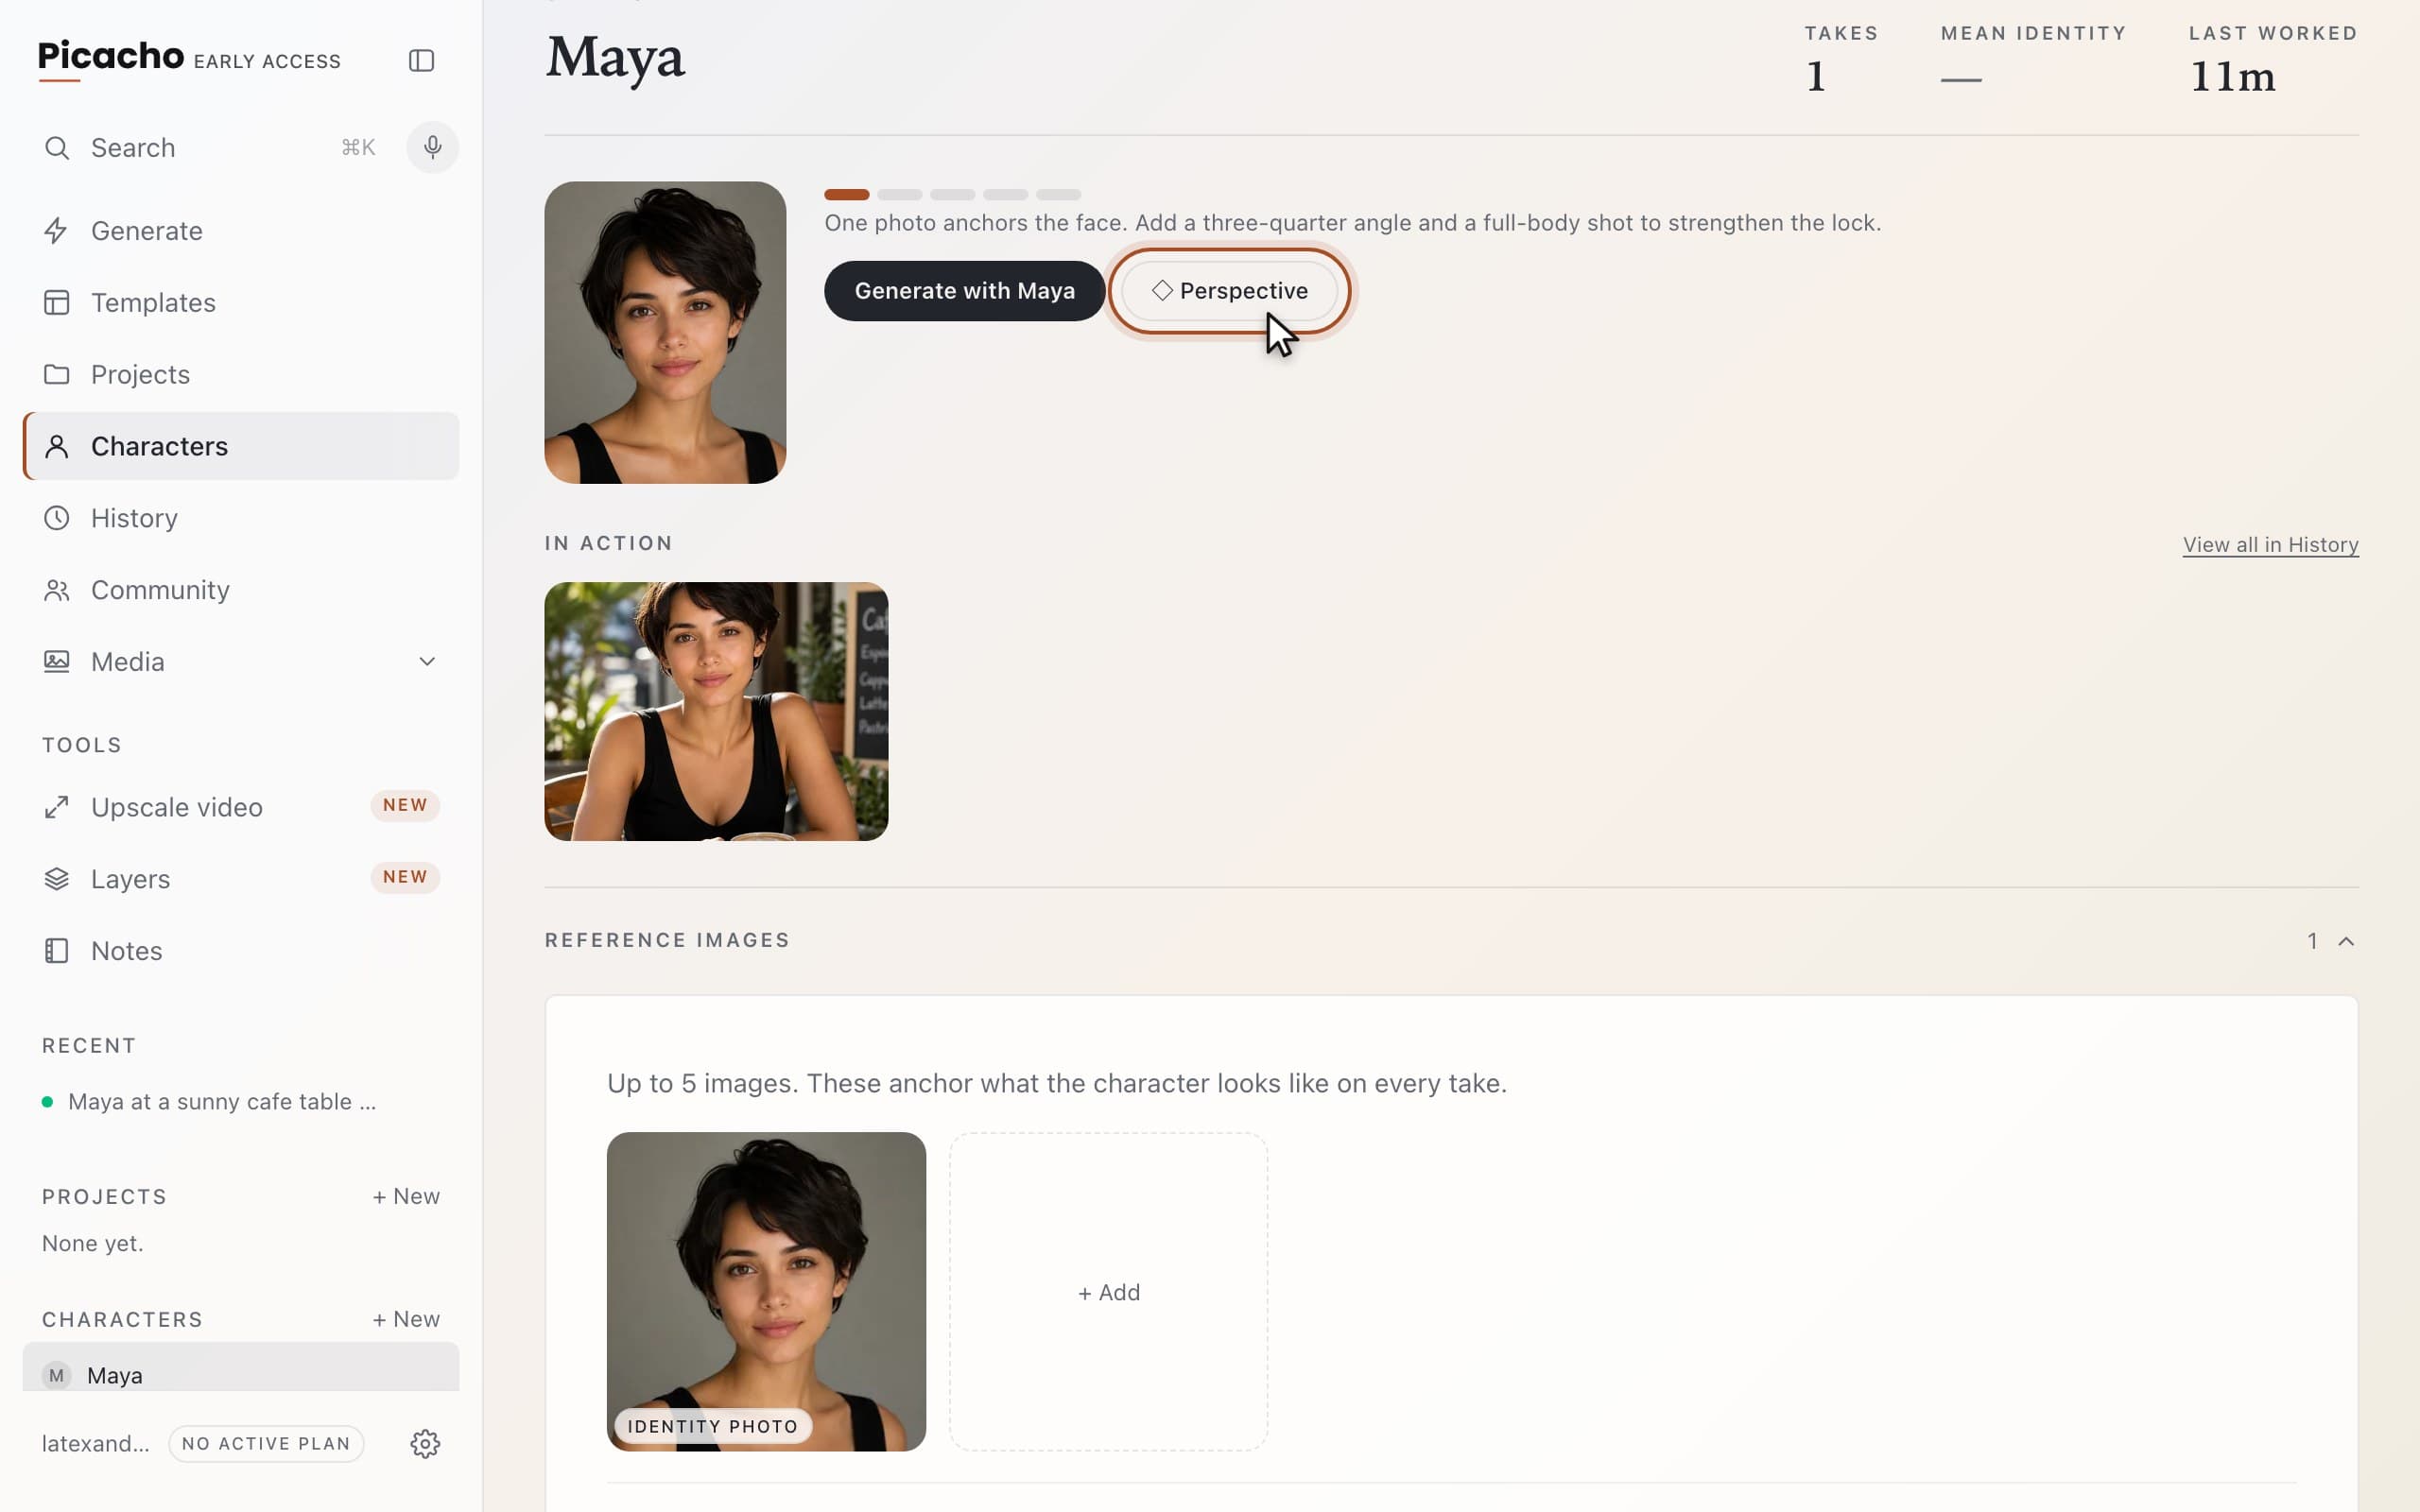
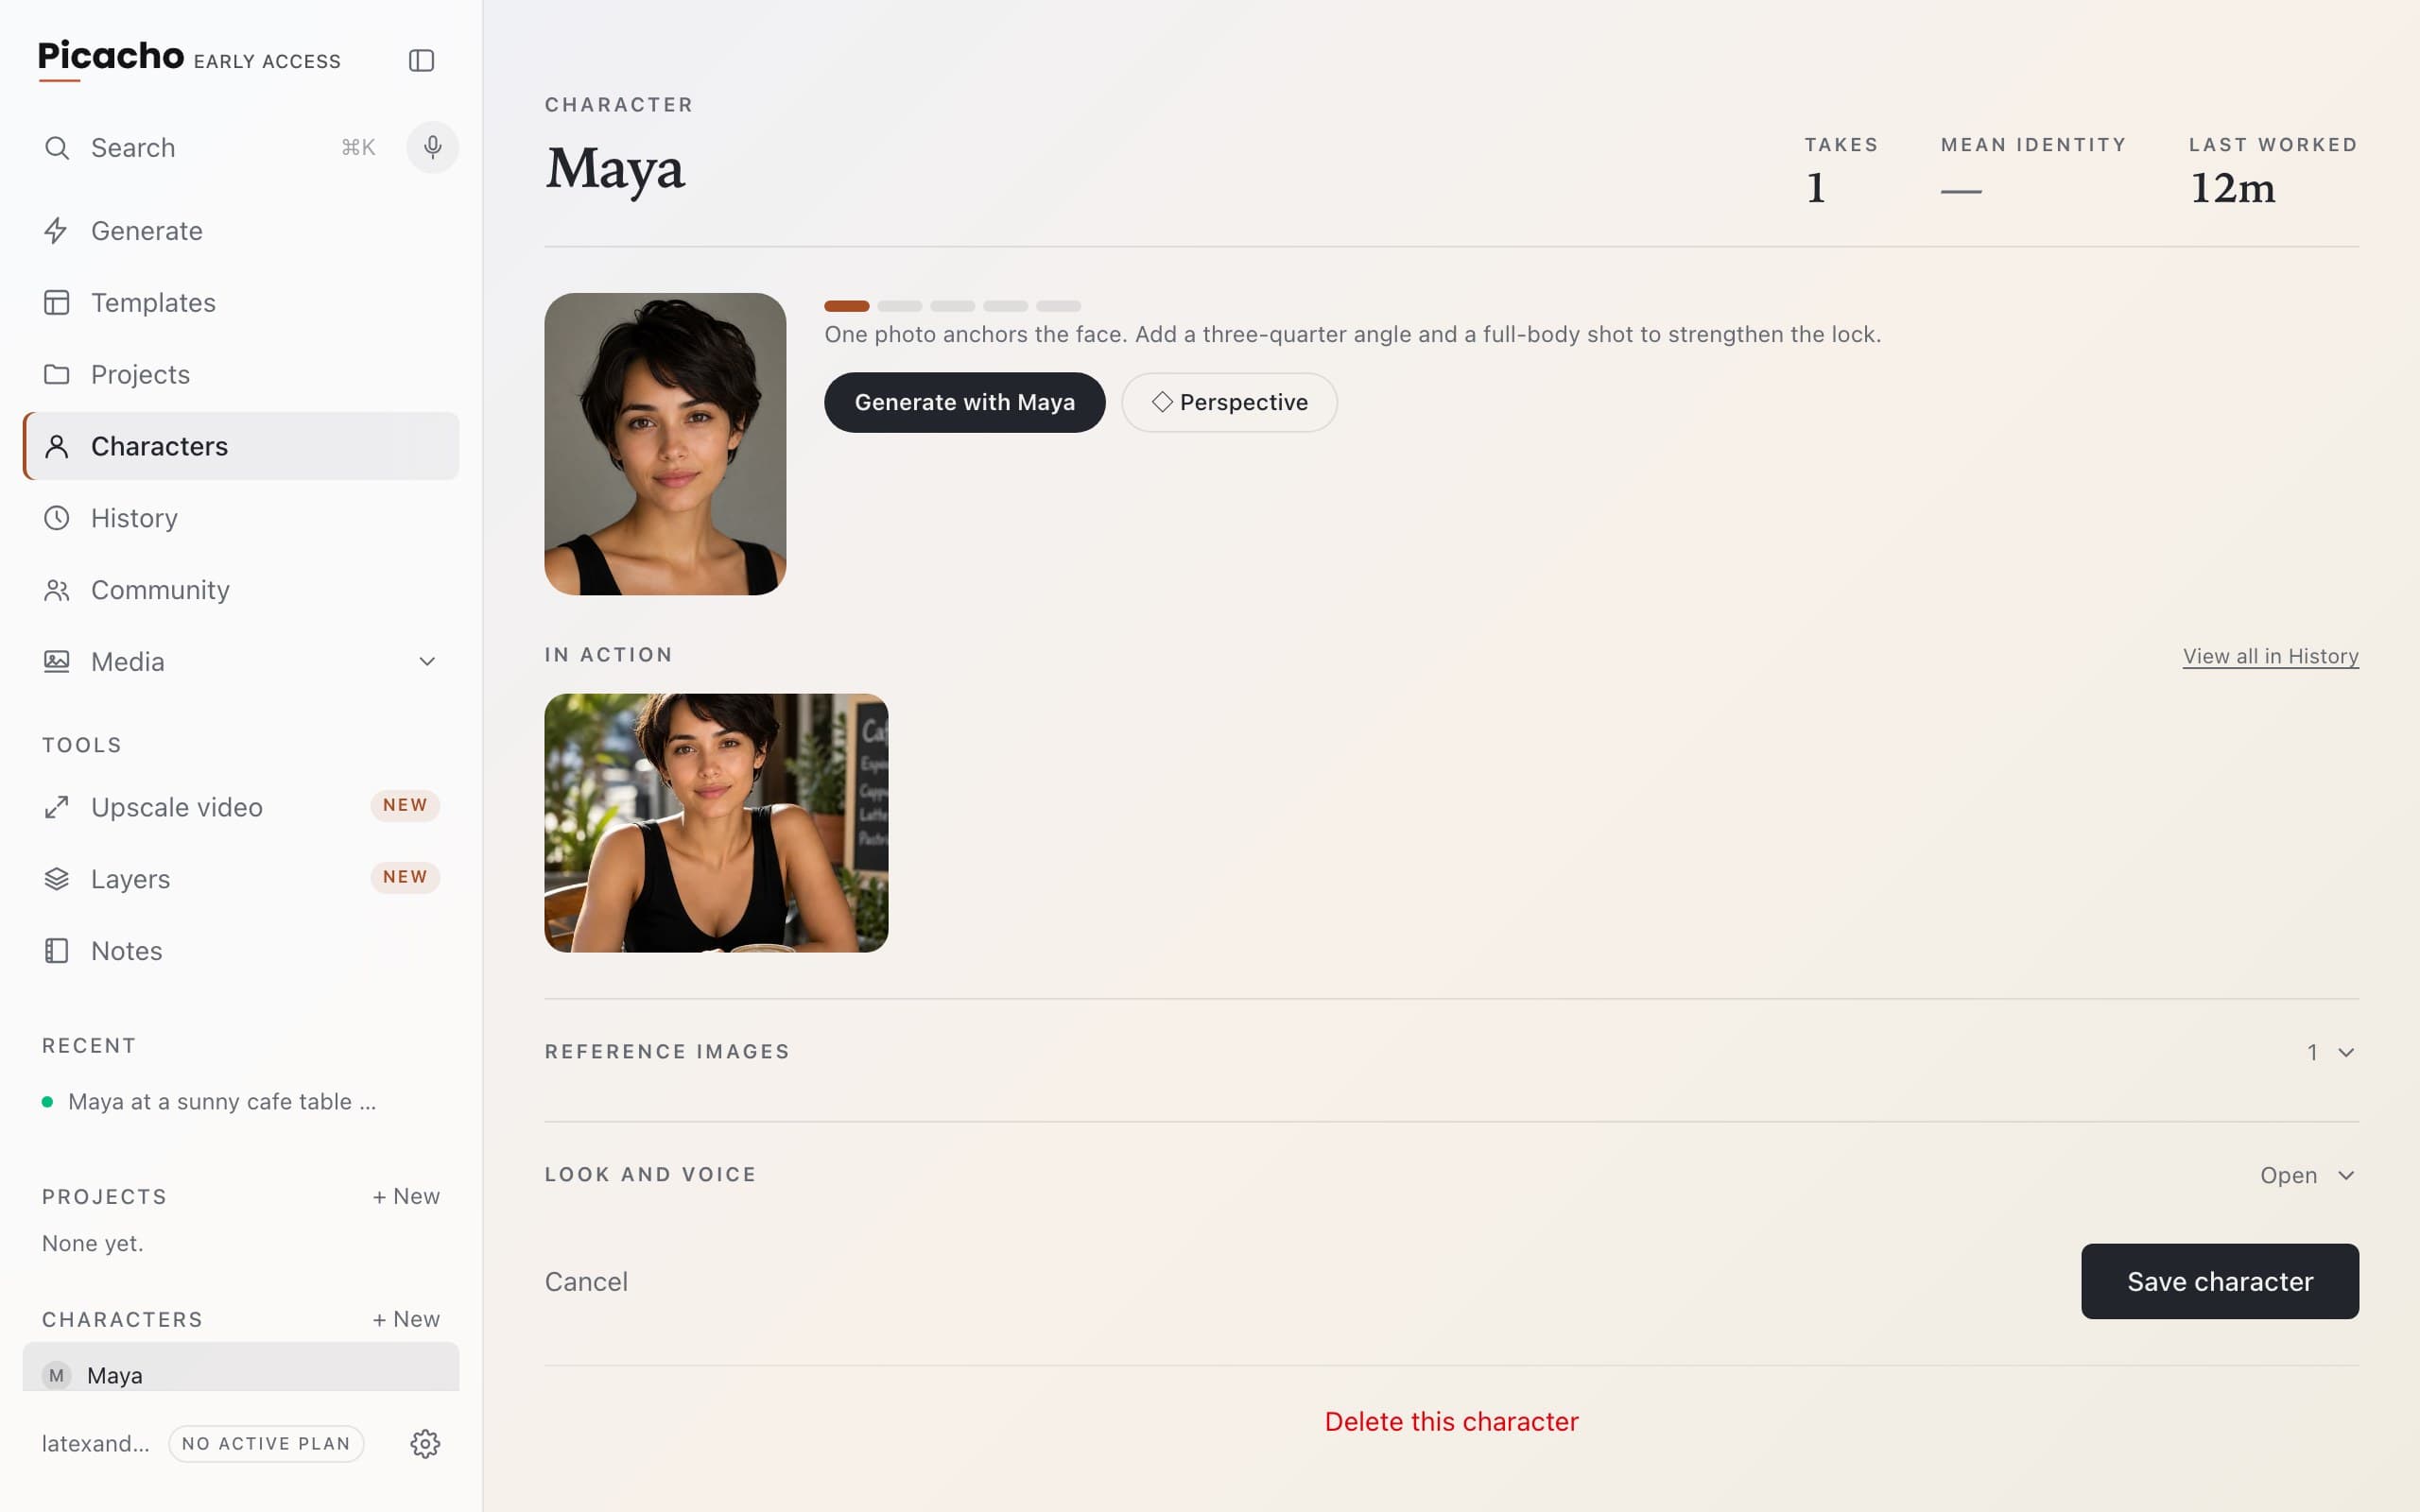
The photo lands with an IDENTITY PHOTO badge. That's the one every take is scored against. The small bar meter beside the portrait is the face lock: one photo lights one bar, and it gets stronger as you add more.
Or let Perspective do it
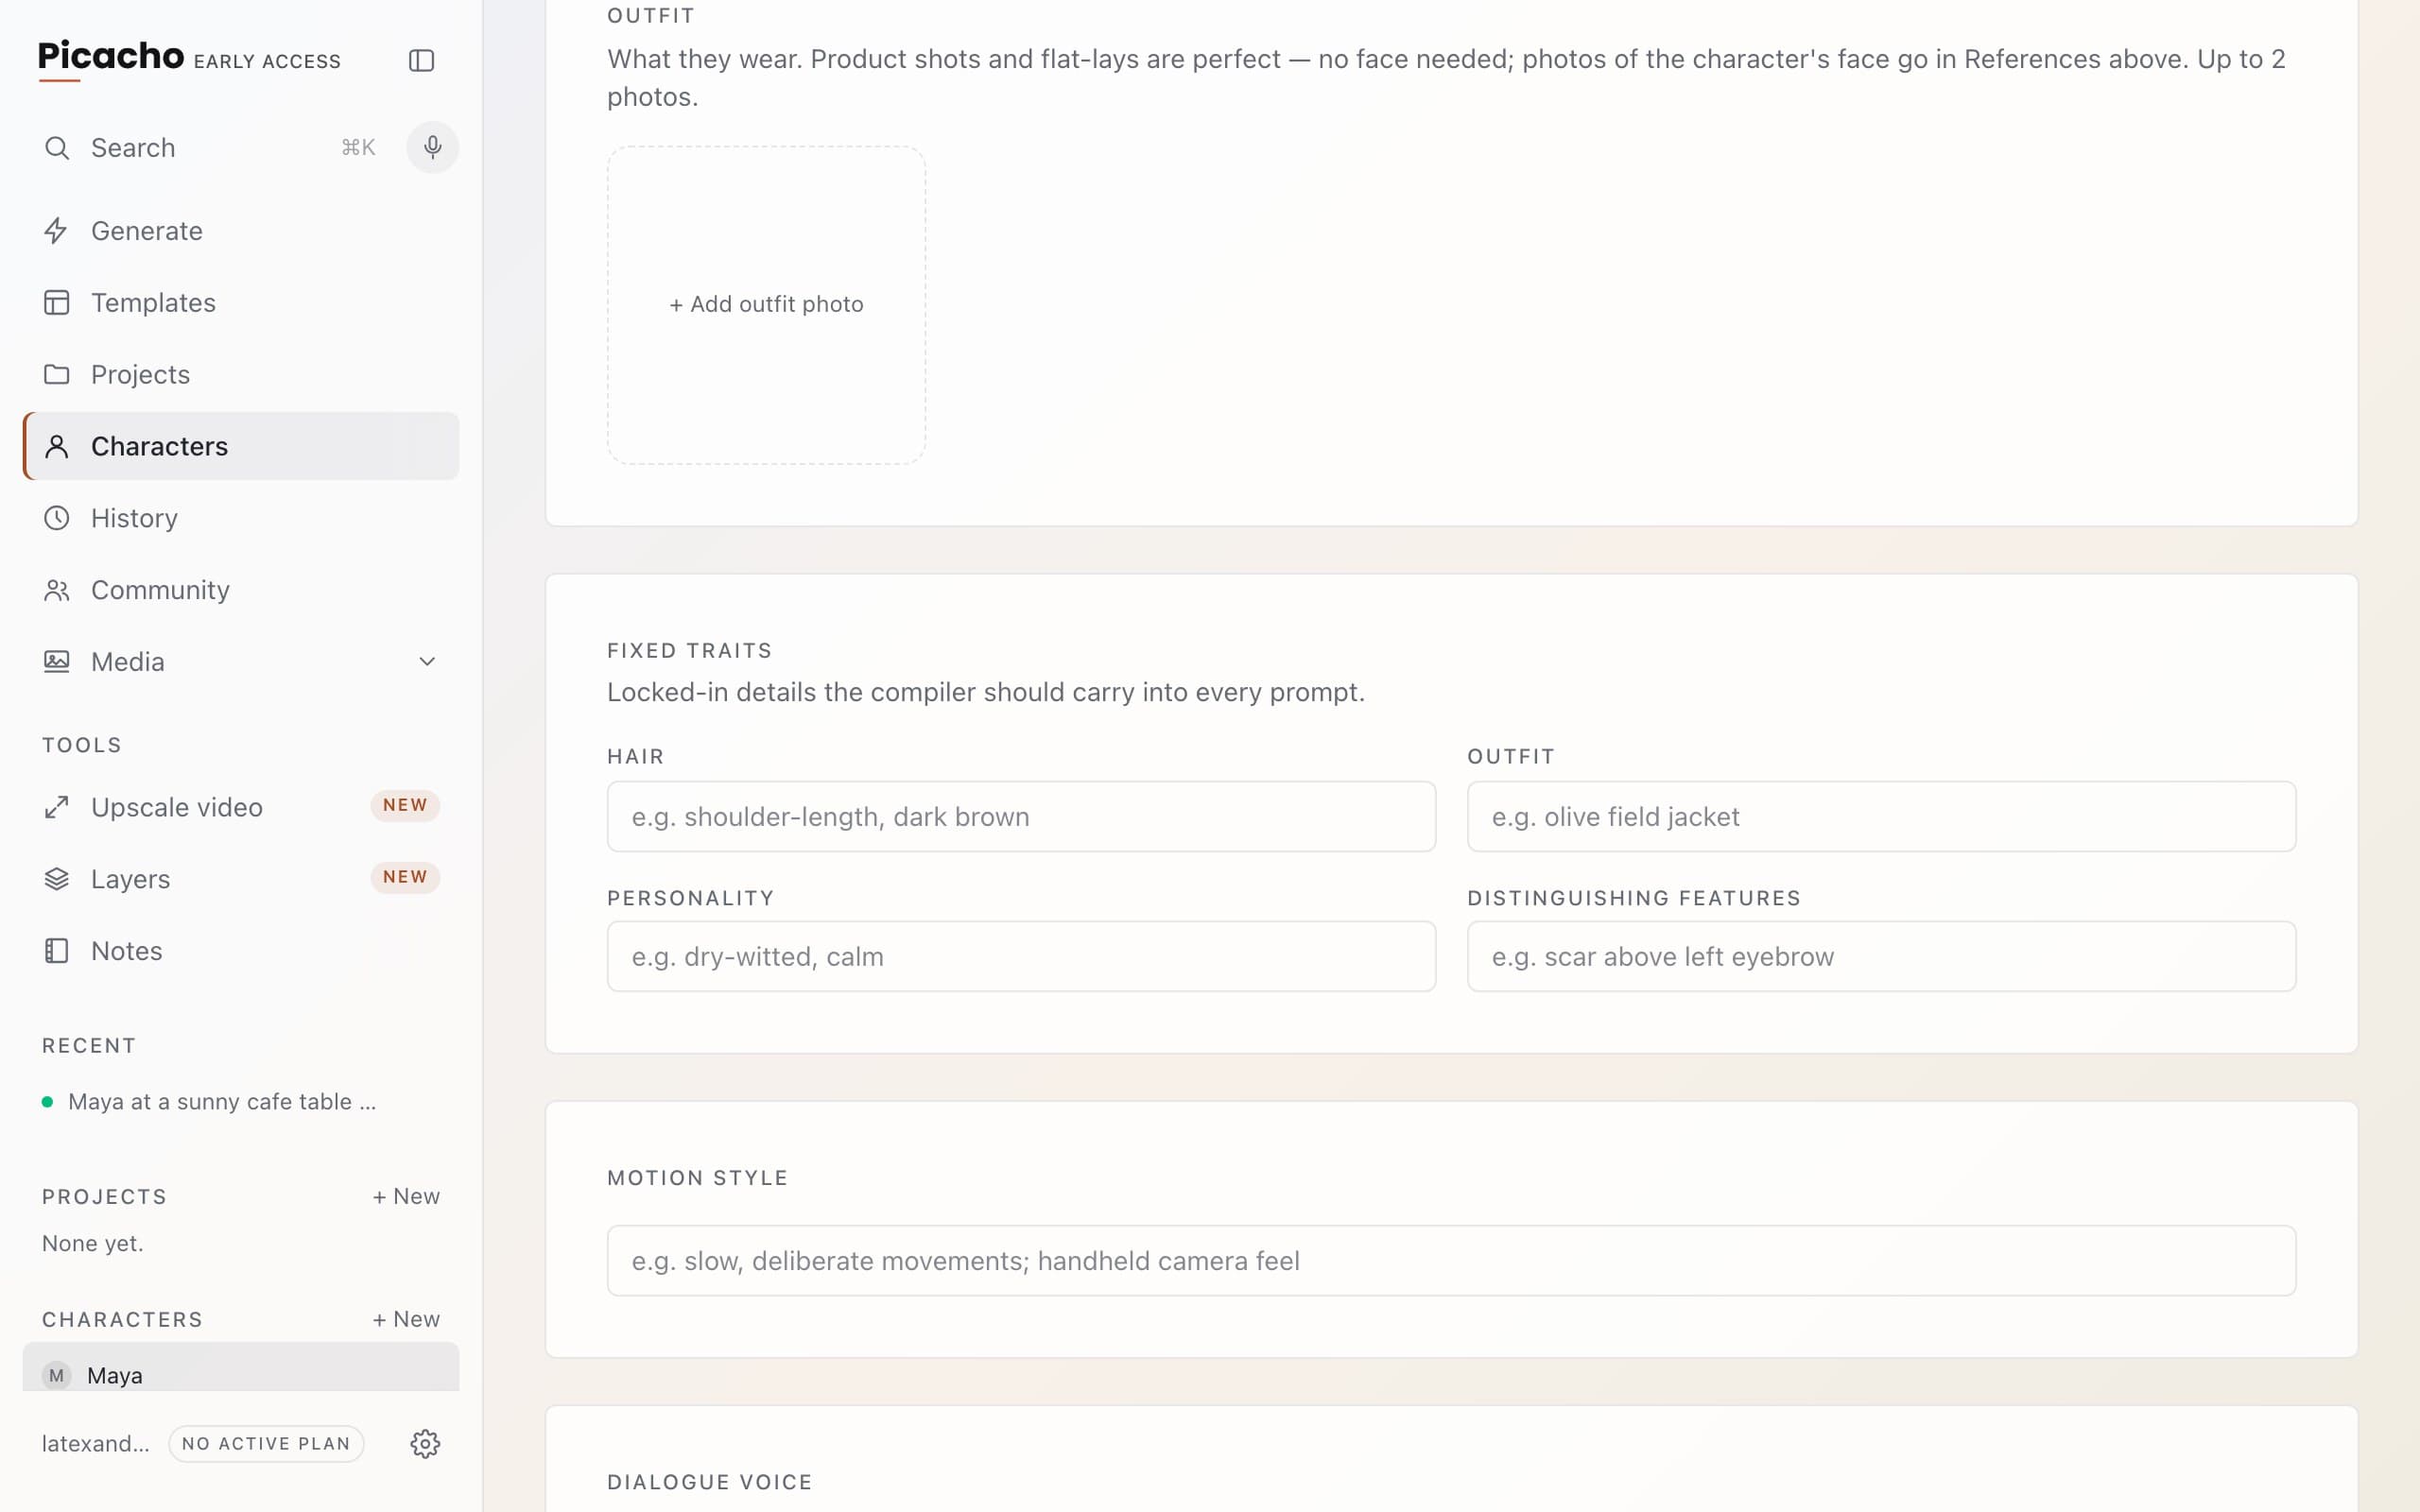
Perspective renders the same person front, three-quarter, profile and full body in one tap — exactly the angles the meter is asking for. Each rendered photo uses one AI-photo allowance.
Clothes go in Outfit, not in the photos
Look and voice is folded shut under the photos — click it open. The first thing inside is Outfit: up to two clothing photos, and flat-lays or product shots are perfect because no face is needed.
Fixed traits
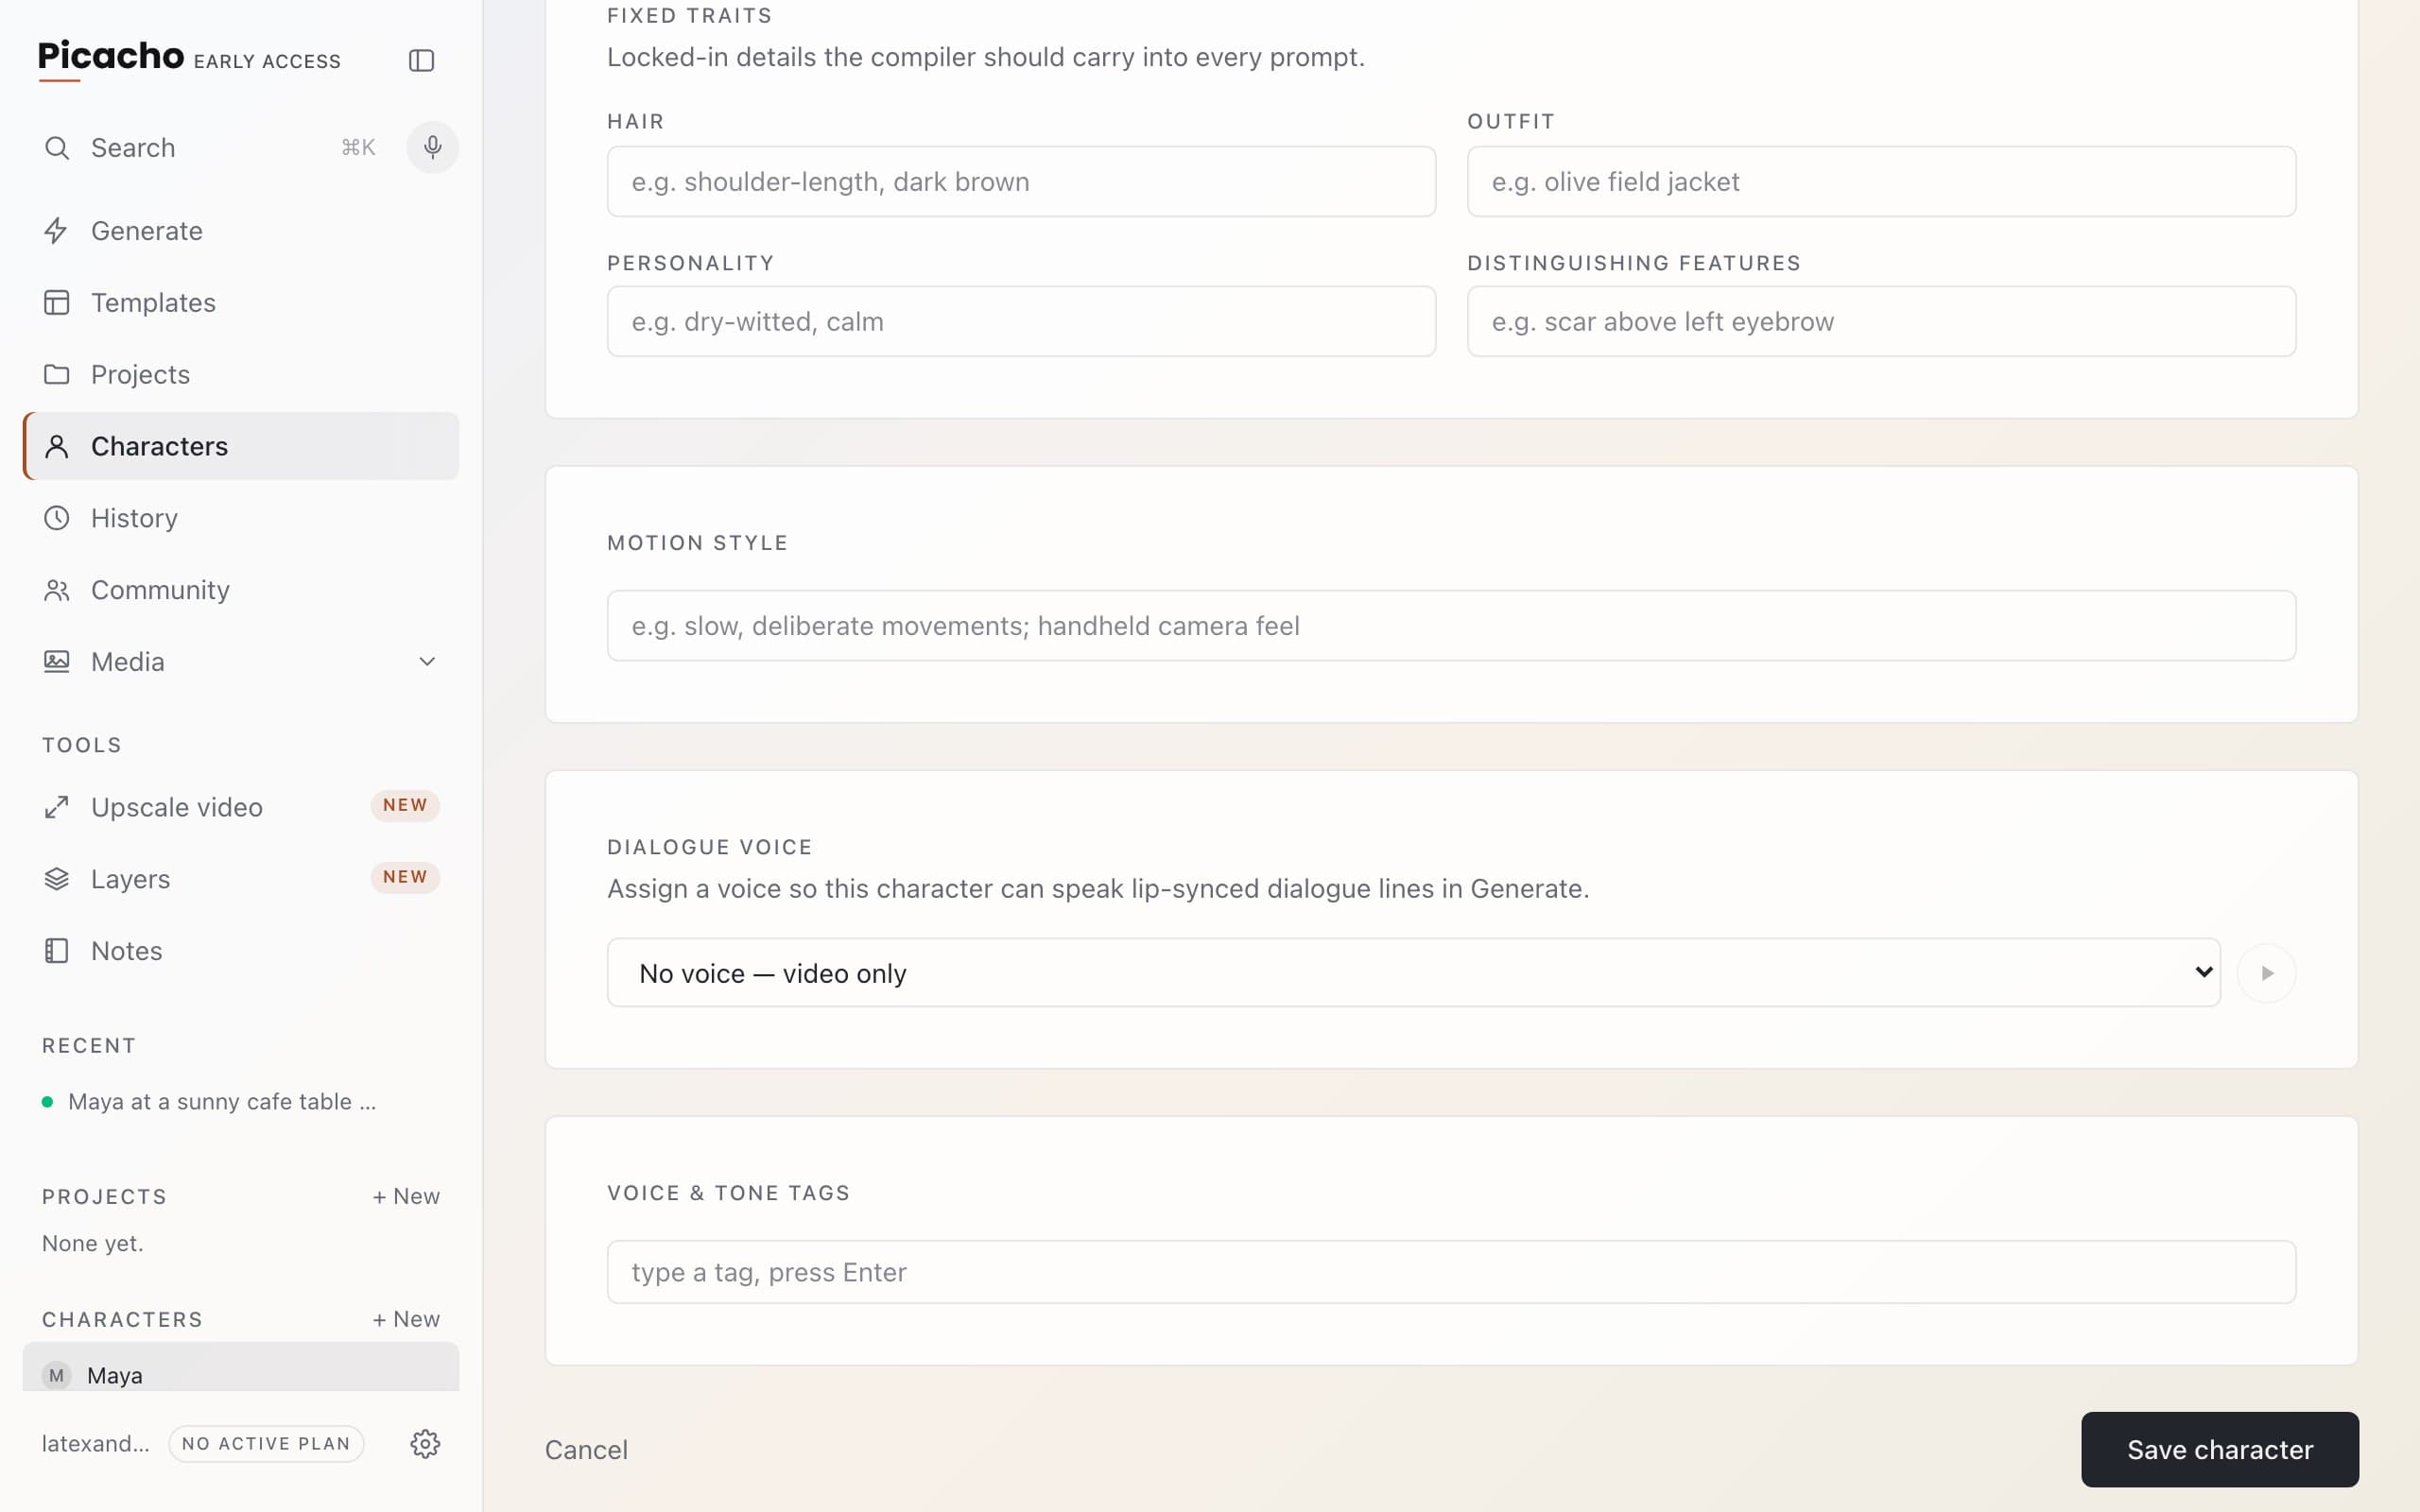
Hair, Outfit, Personality, Distinguishing features and Motion style are short phrases that ride into every prompt you write, so you never have to retype them.
Save
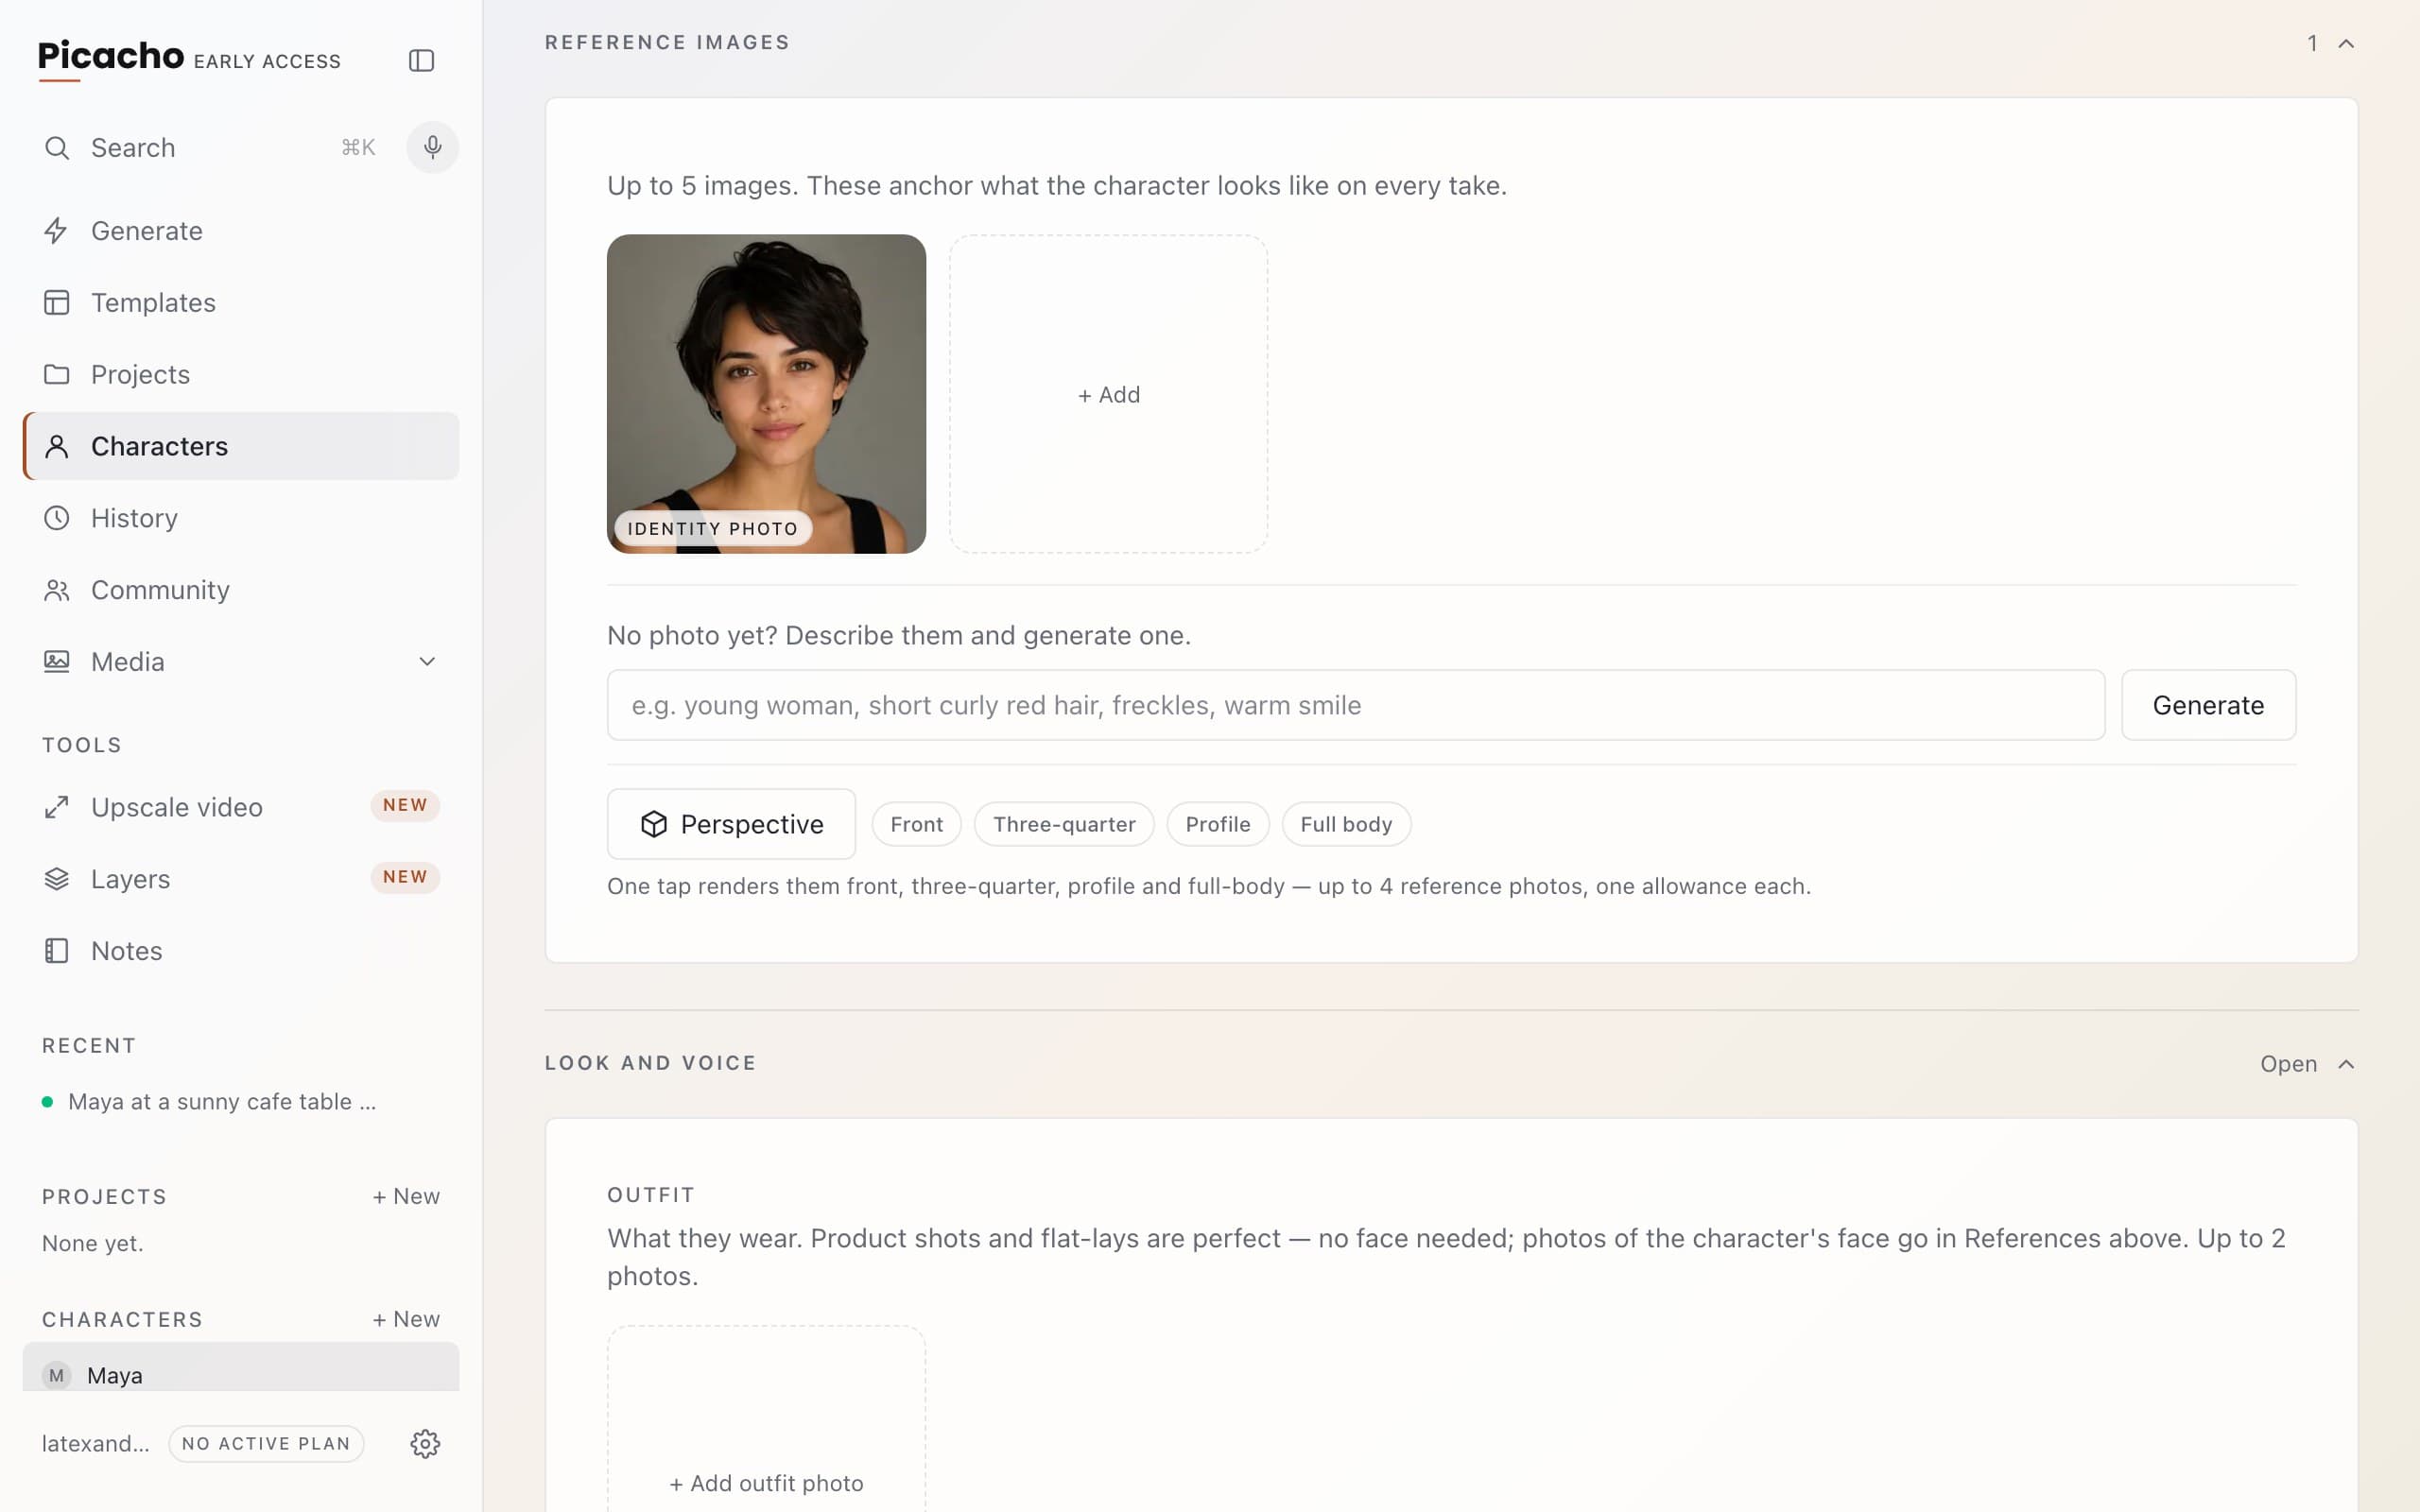
Click Save character. You land in the composer with your new character already picked, ready to render.
Their own page
Click a character on the wall any time to open their page: how many takes they're in, how well the face has held, when you last worked on them, and every take they appear in under In action. Generate with Maya jumps straight to a composer with her selected.
Chapter 3
3 minYour first image
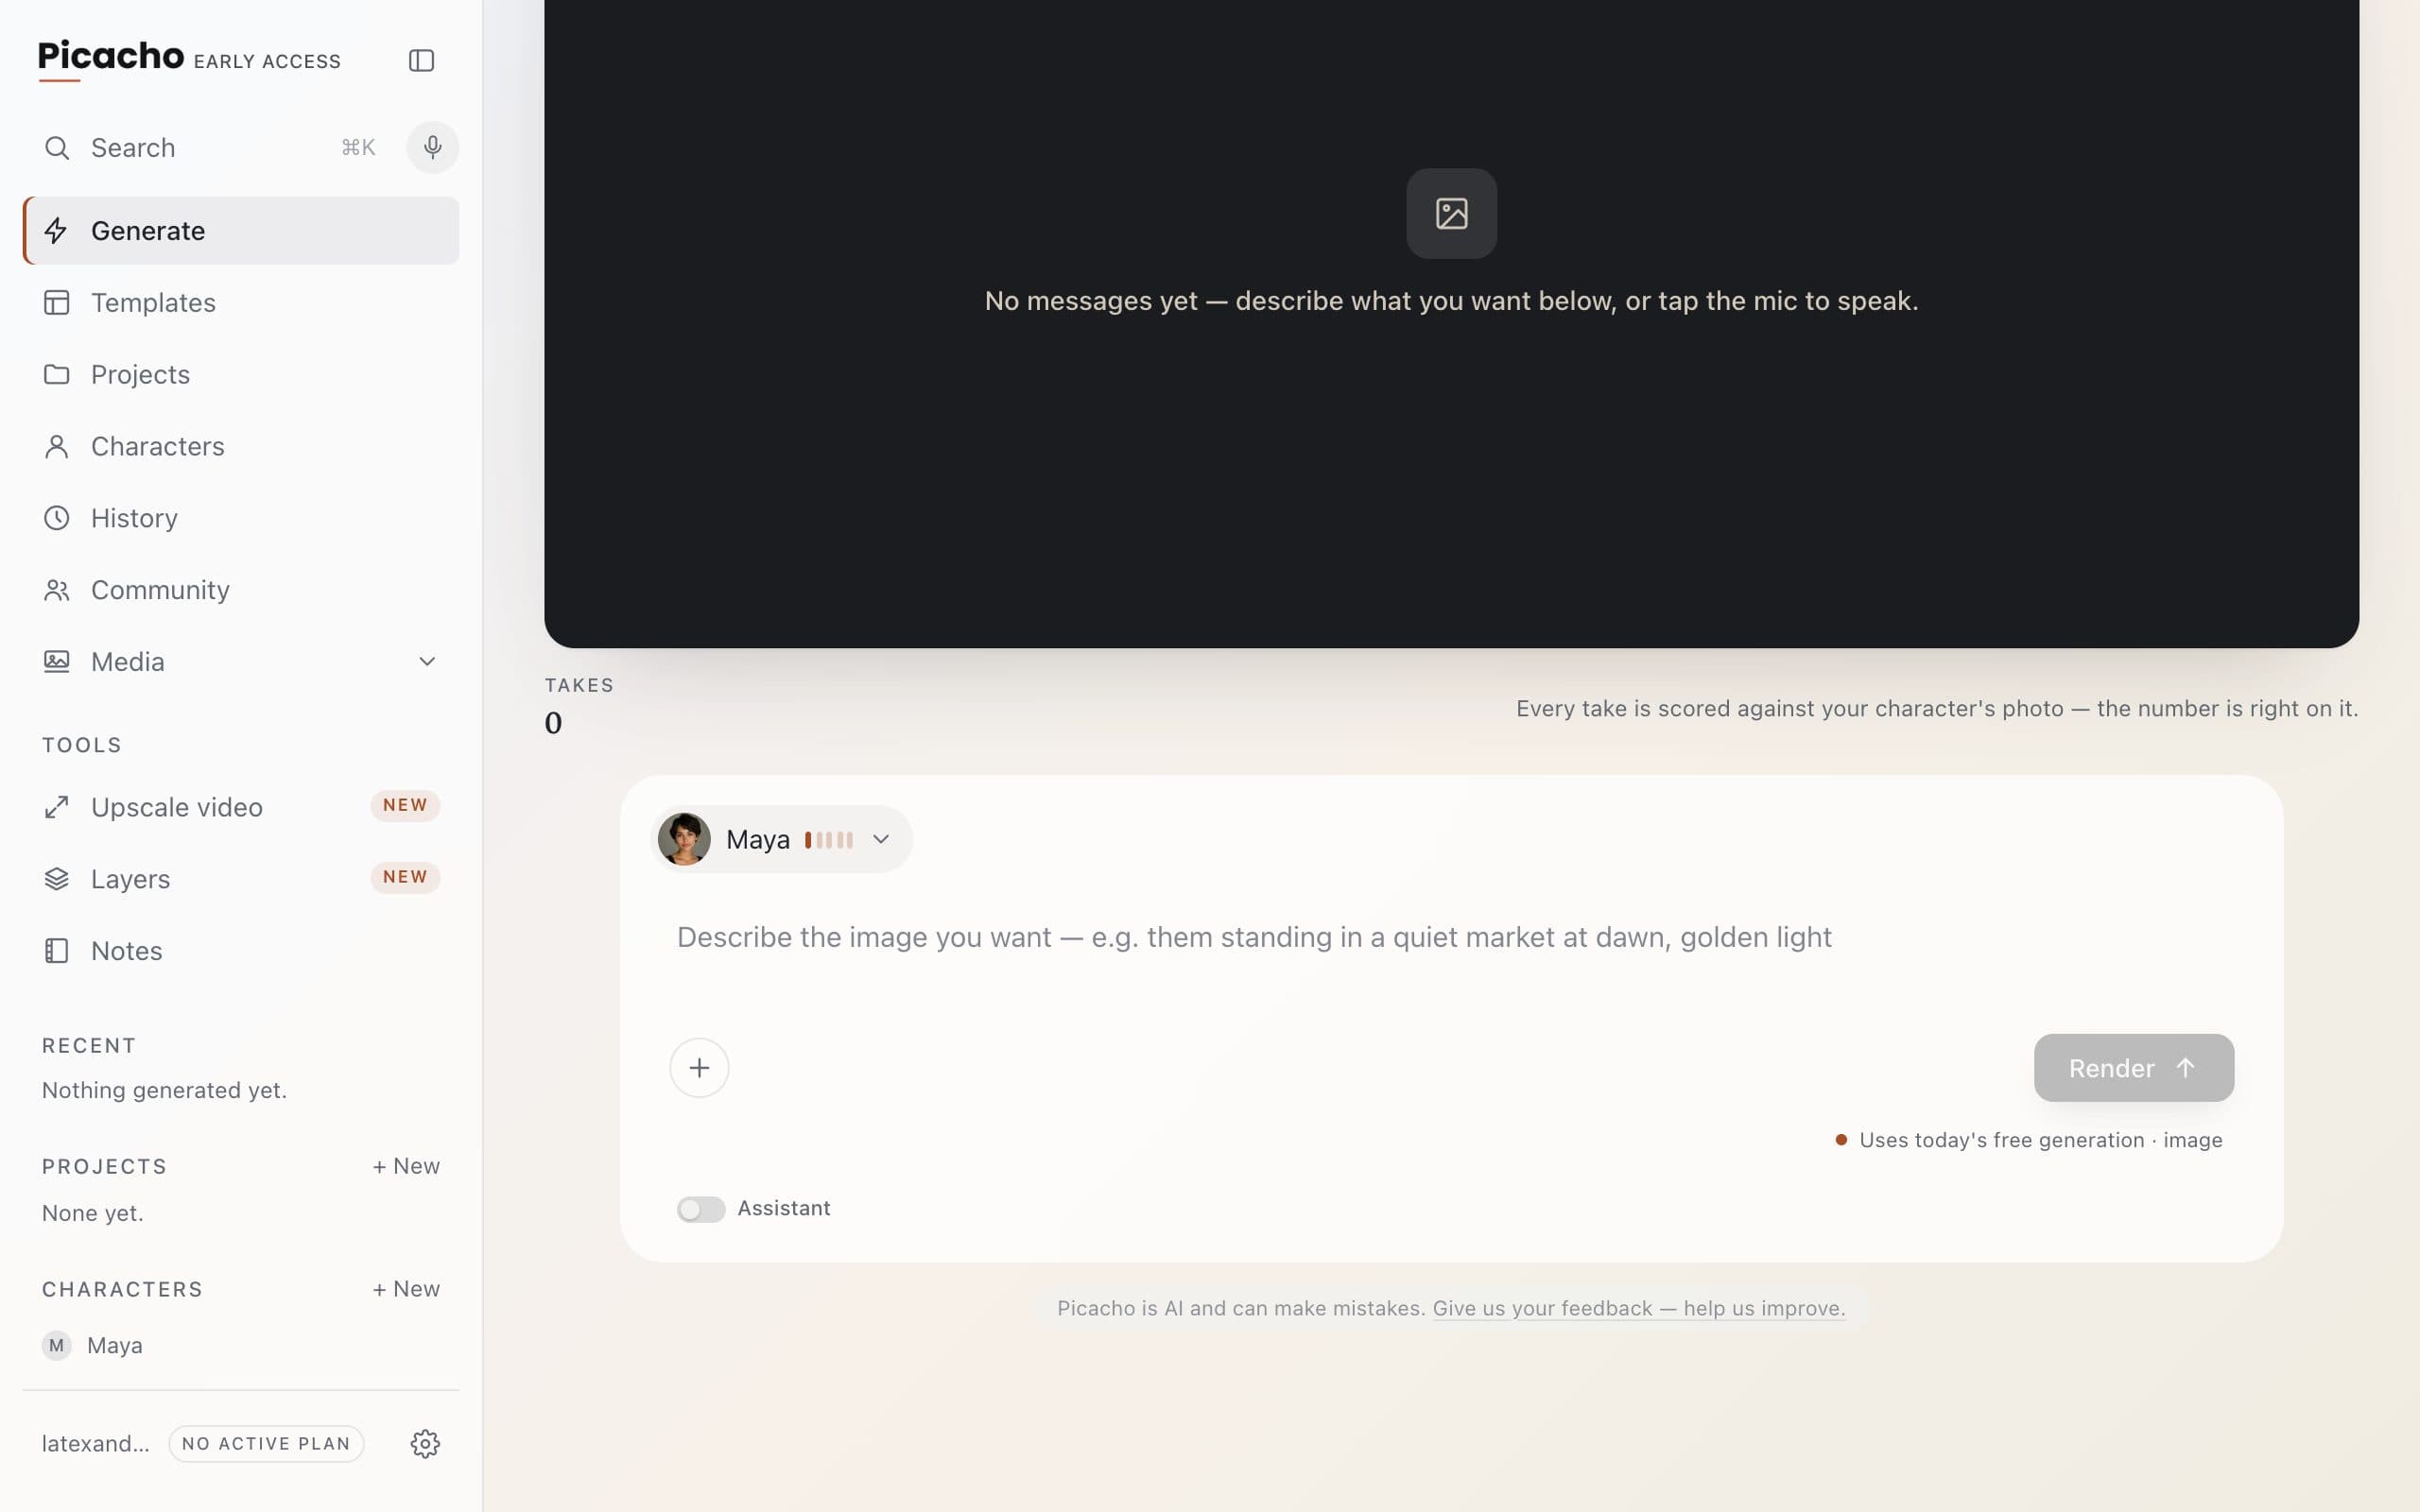
The composer is one screen: a dark stage at the top where takes land, a strip of this session's takes under it, and a card at the bottom where you type. Start on Image — it's the fastest way to meet your character.
The screen
The dark box is the stage, where your finished take appears. Takes underneath collects everything from this session. The card at the bottom is the composer — everything you choose before you send lives on that one row.
Check who's in the scene
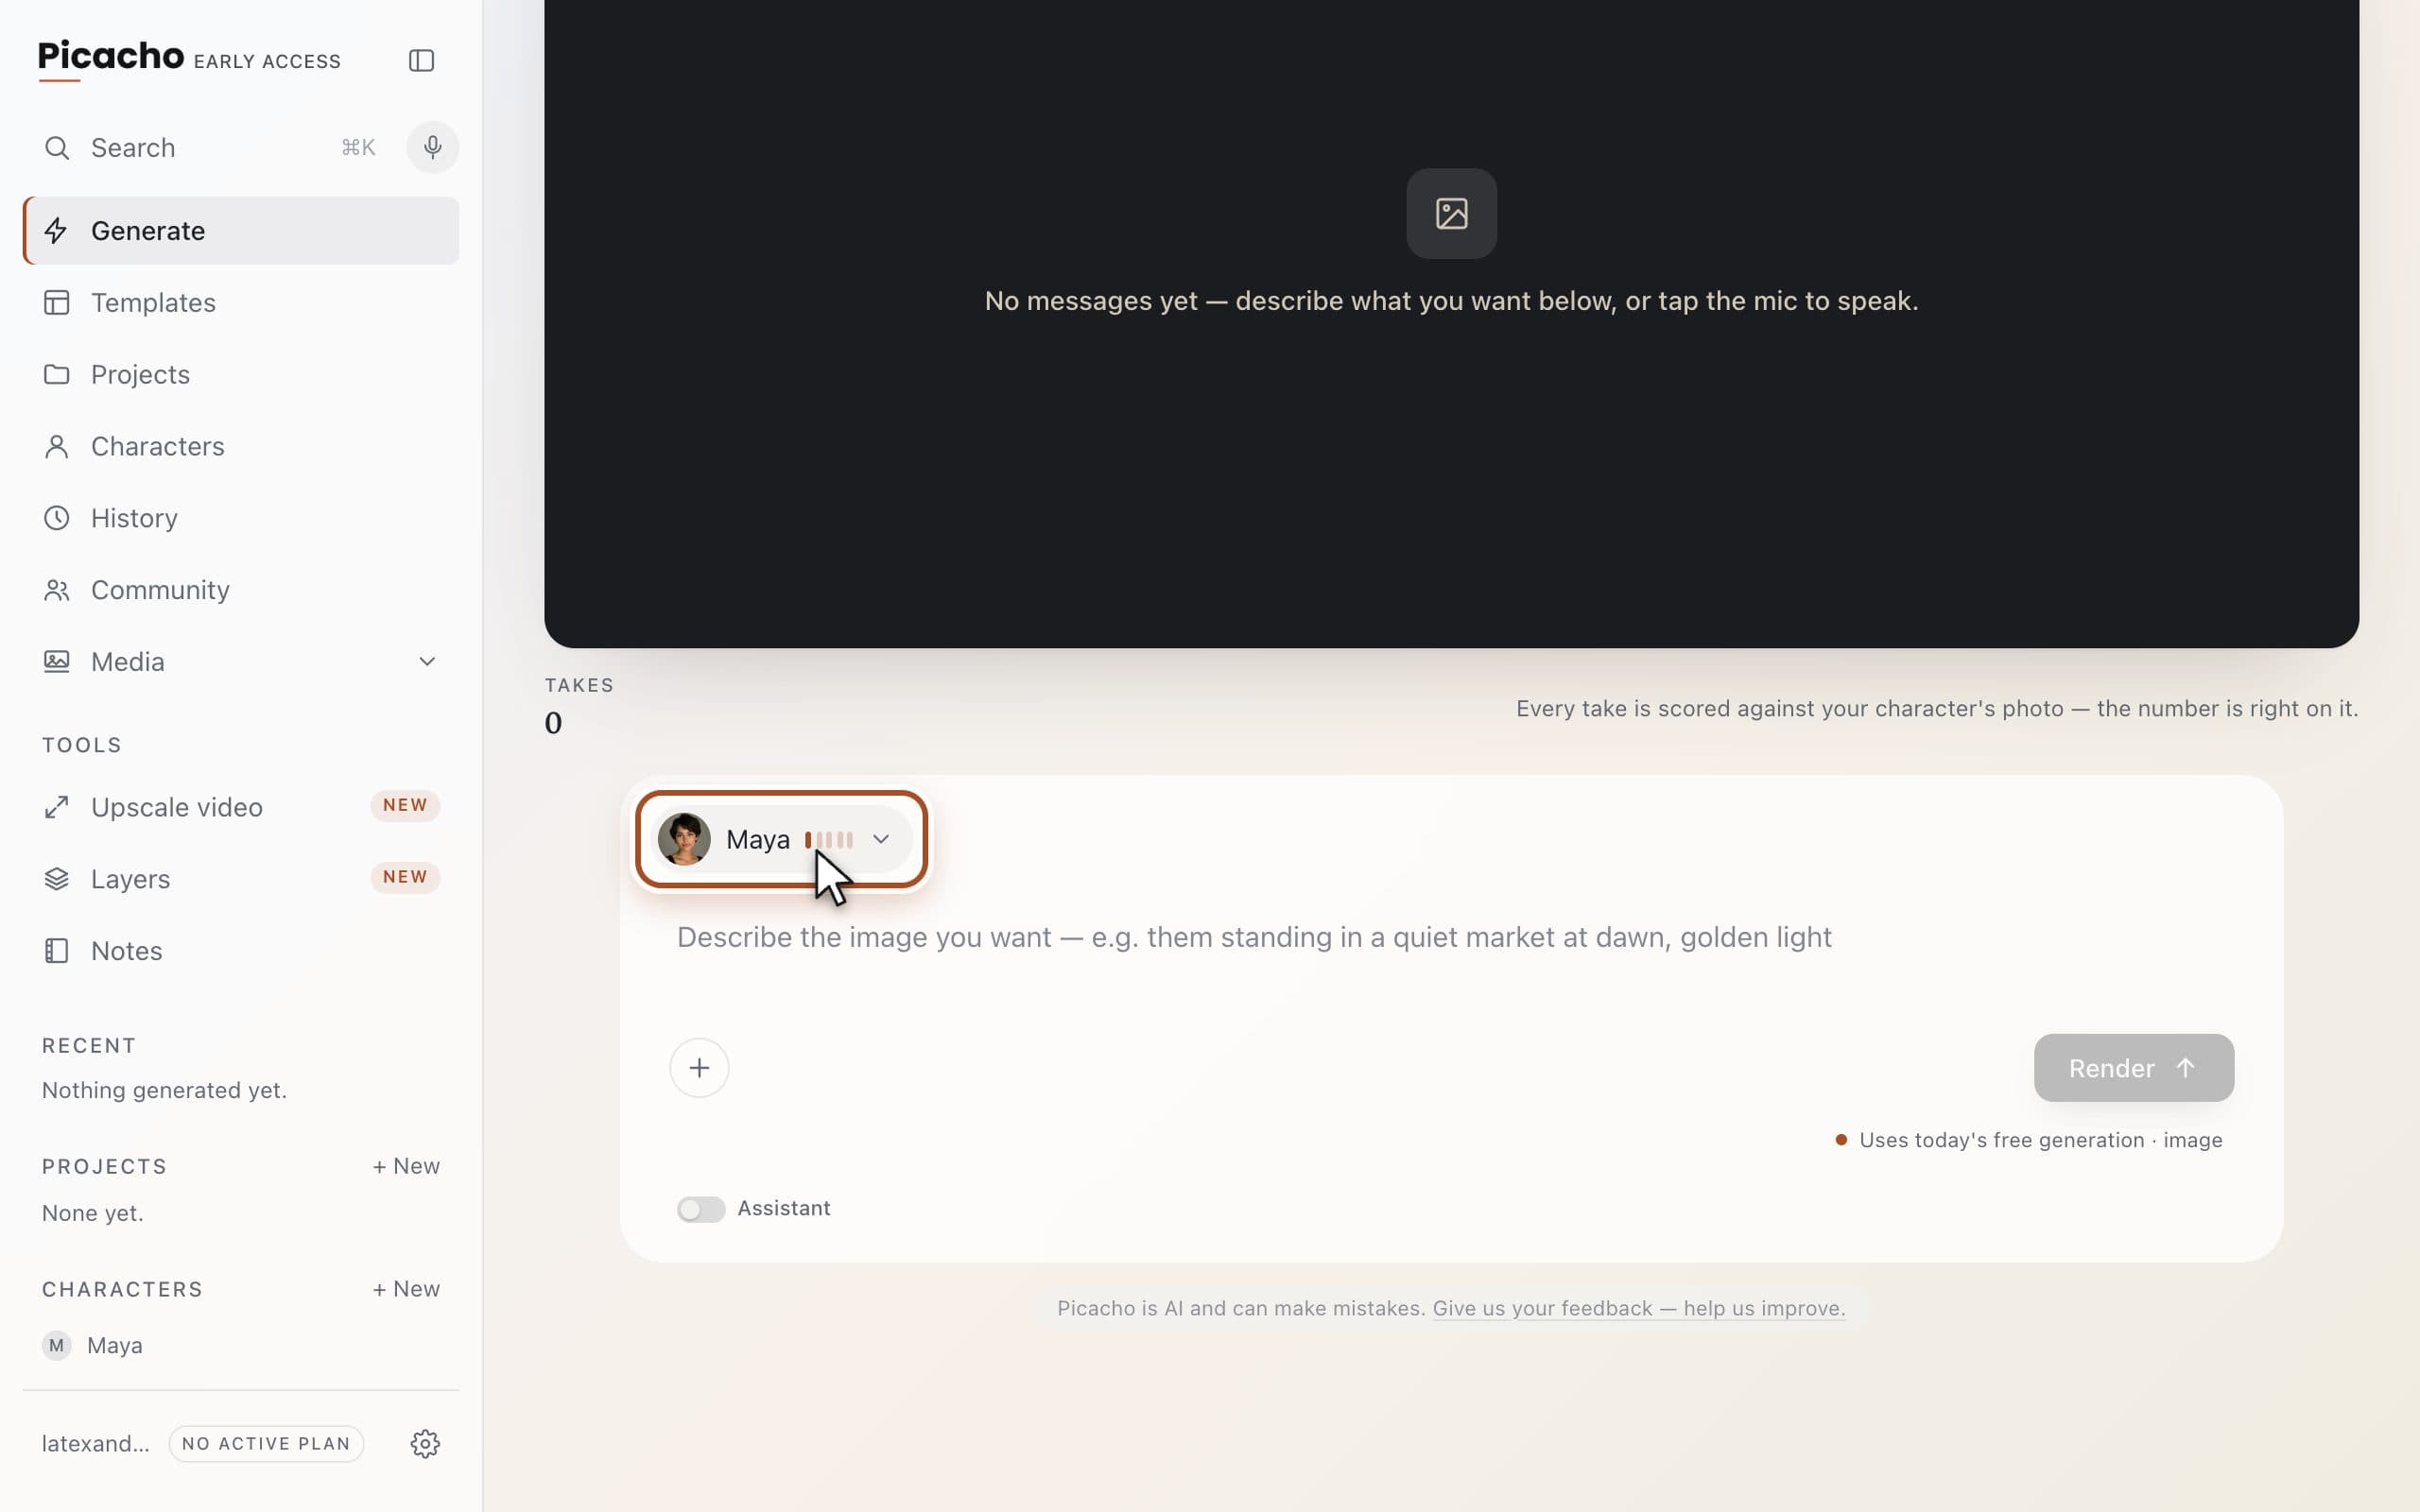
The first chip on the composer is your character, with their photo and their face-lock meter. In image mode that is the whole row — the engine, clip length and frame shape chips only appear once you switch to video.
Describe the scene, not the person
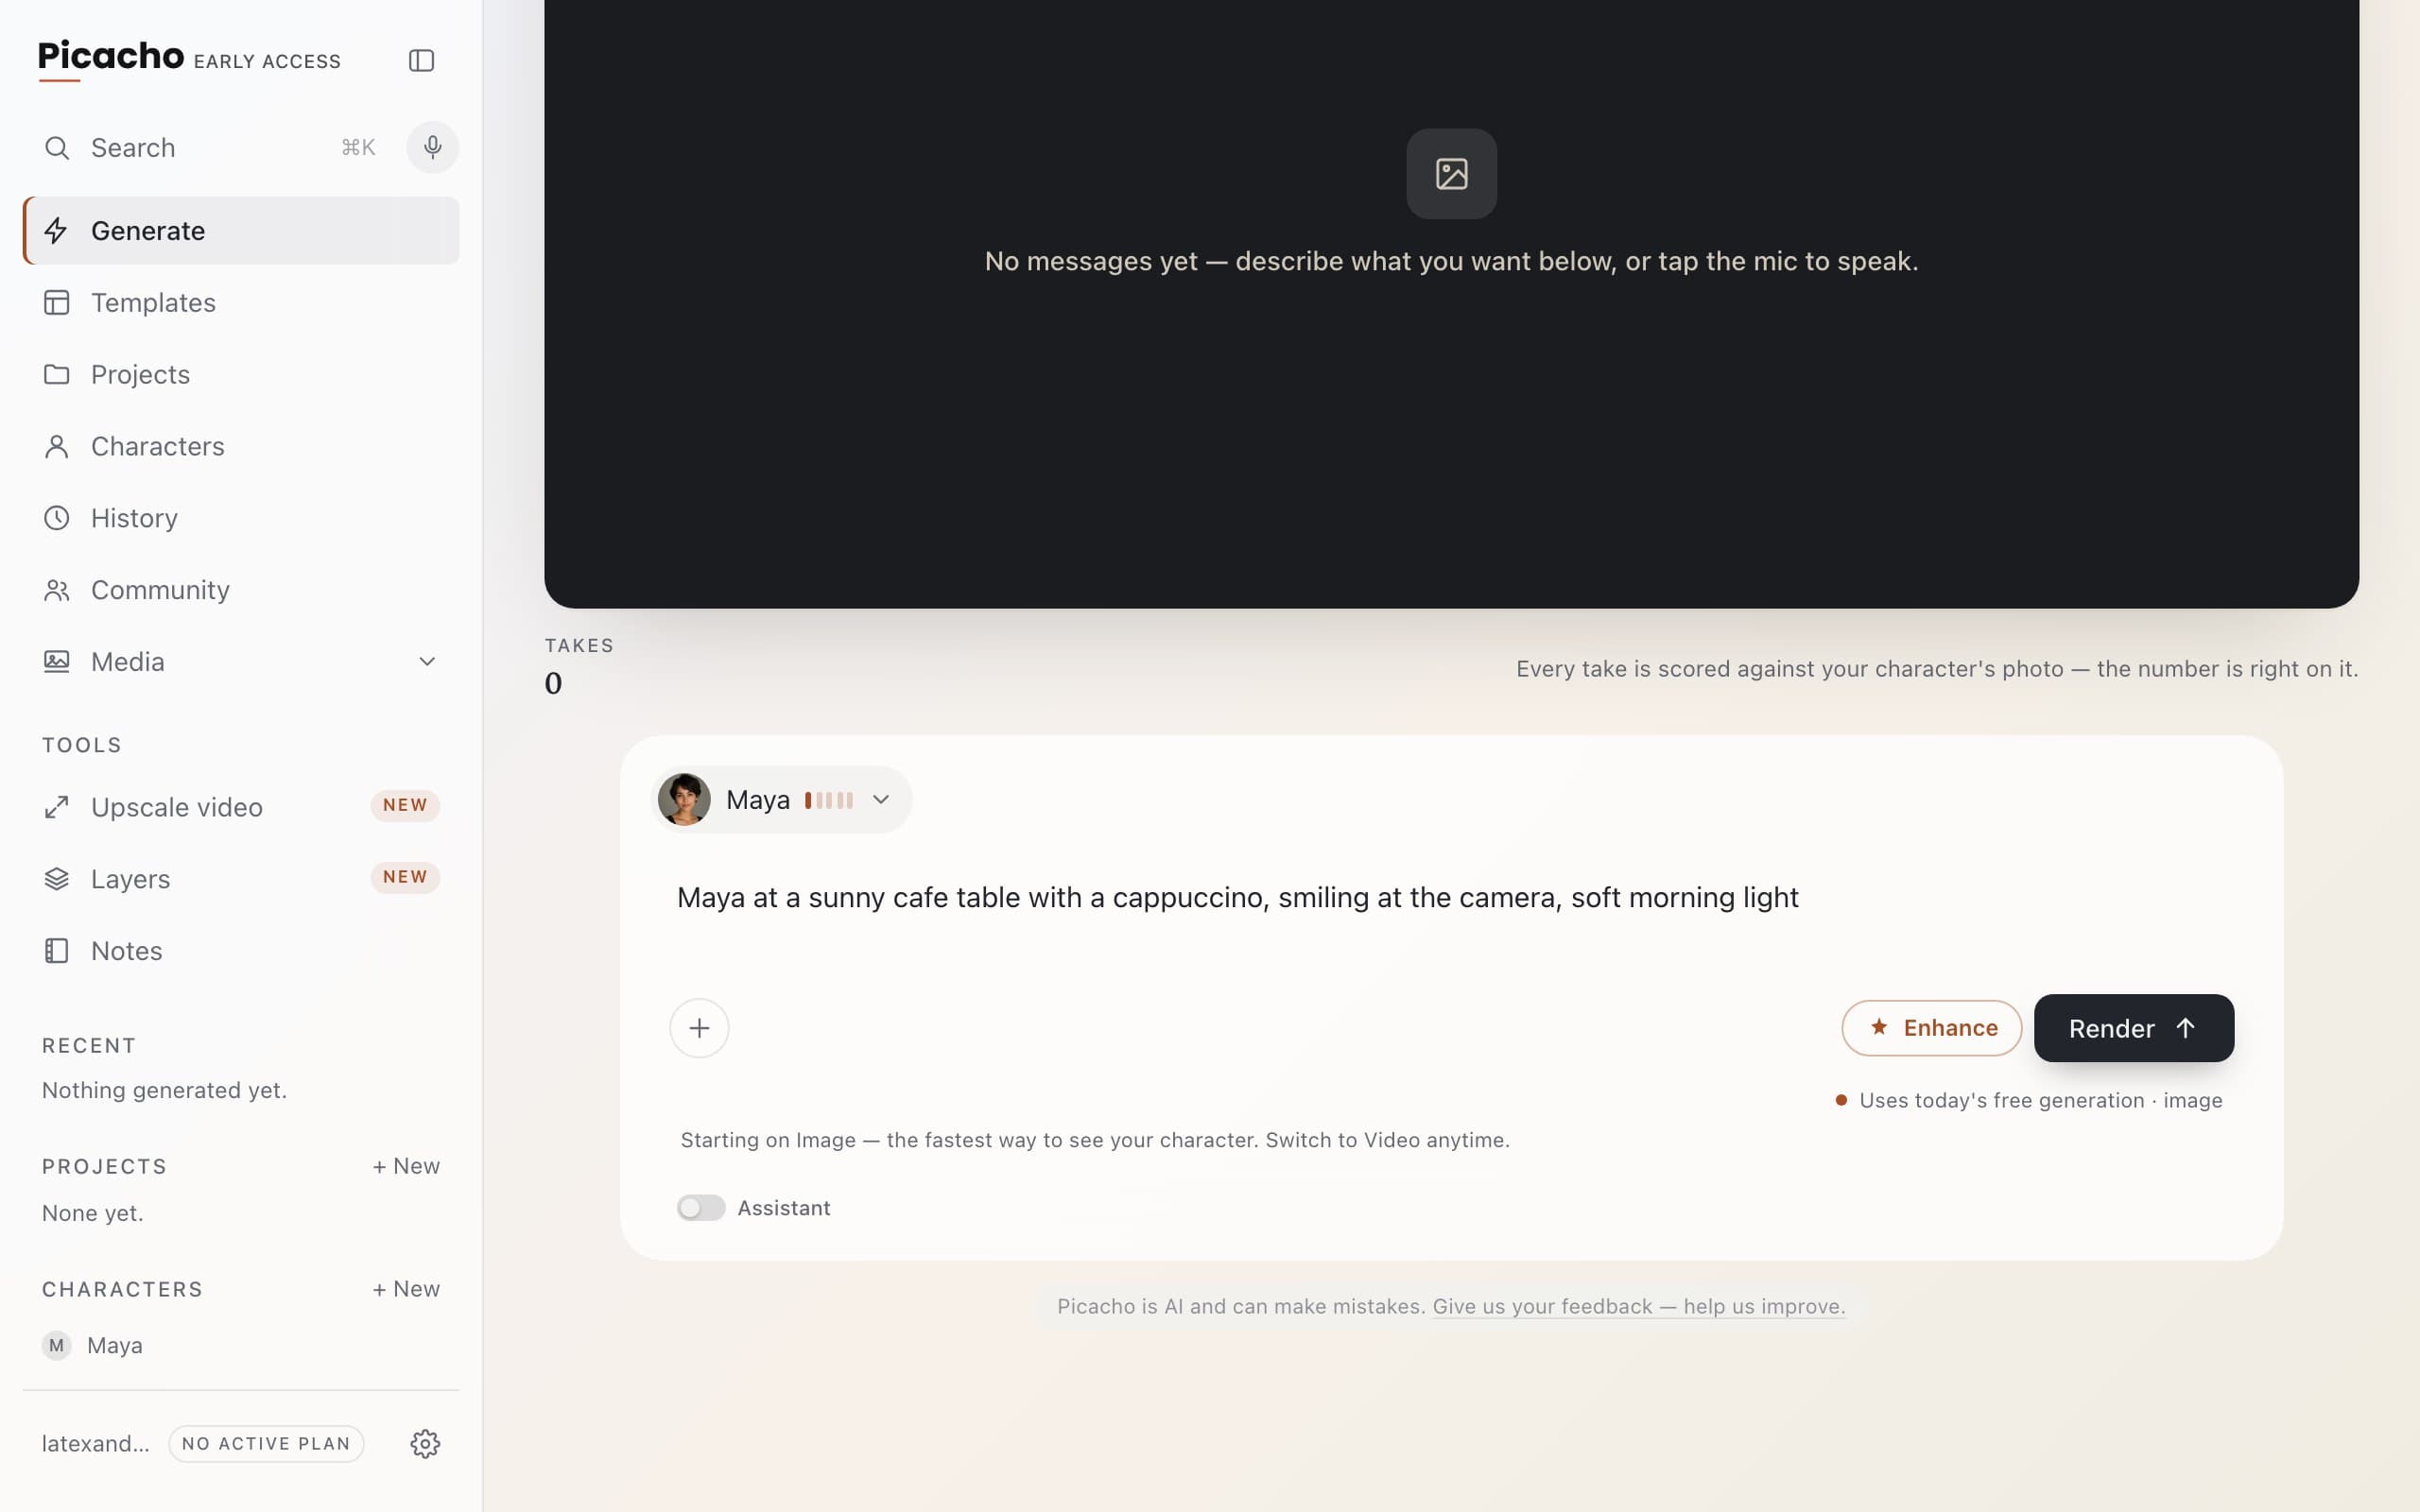
Write it the way you'd tell a friend: Maya at a sunny cafe table with a cappuccino, smiling at the camera, soft morning light. You don't need to describe her face or her hair — that's what the character is for.
Send it
Enhance will rewrite your line into a fuller prompt and show it to you before anything is spent — useful, optional. When you're ready, press Render. The line underneath tells you exactly what it will cost: on a new account, Uses today's free generation.
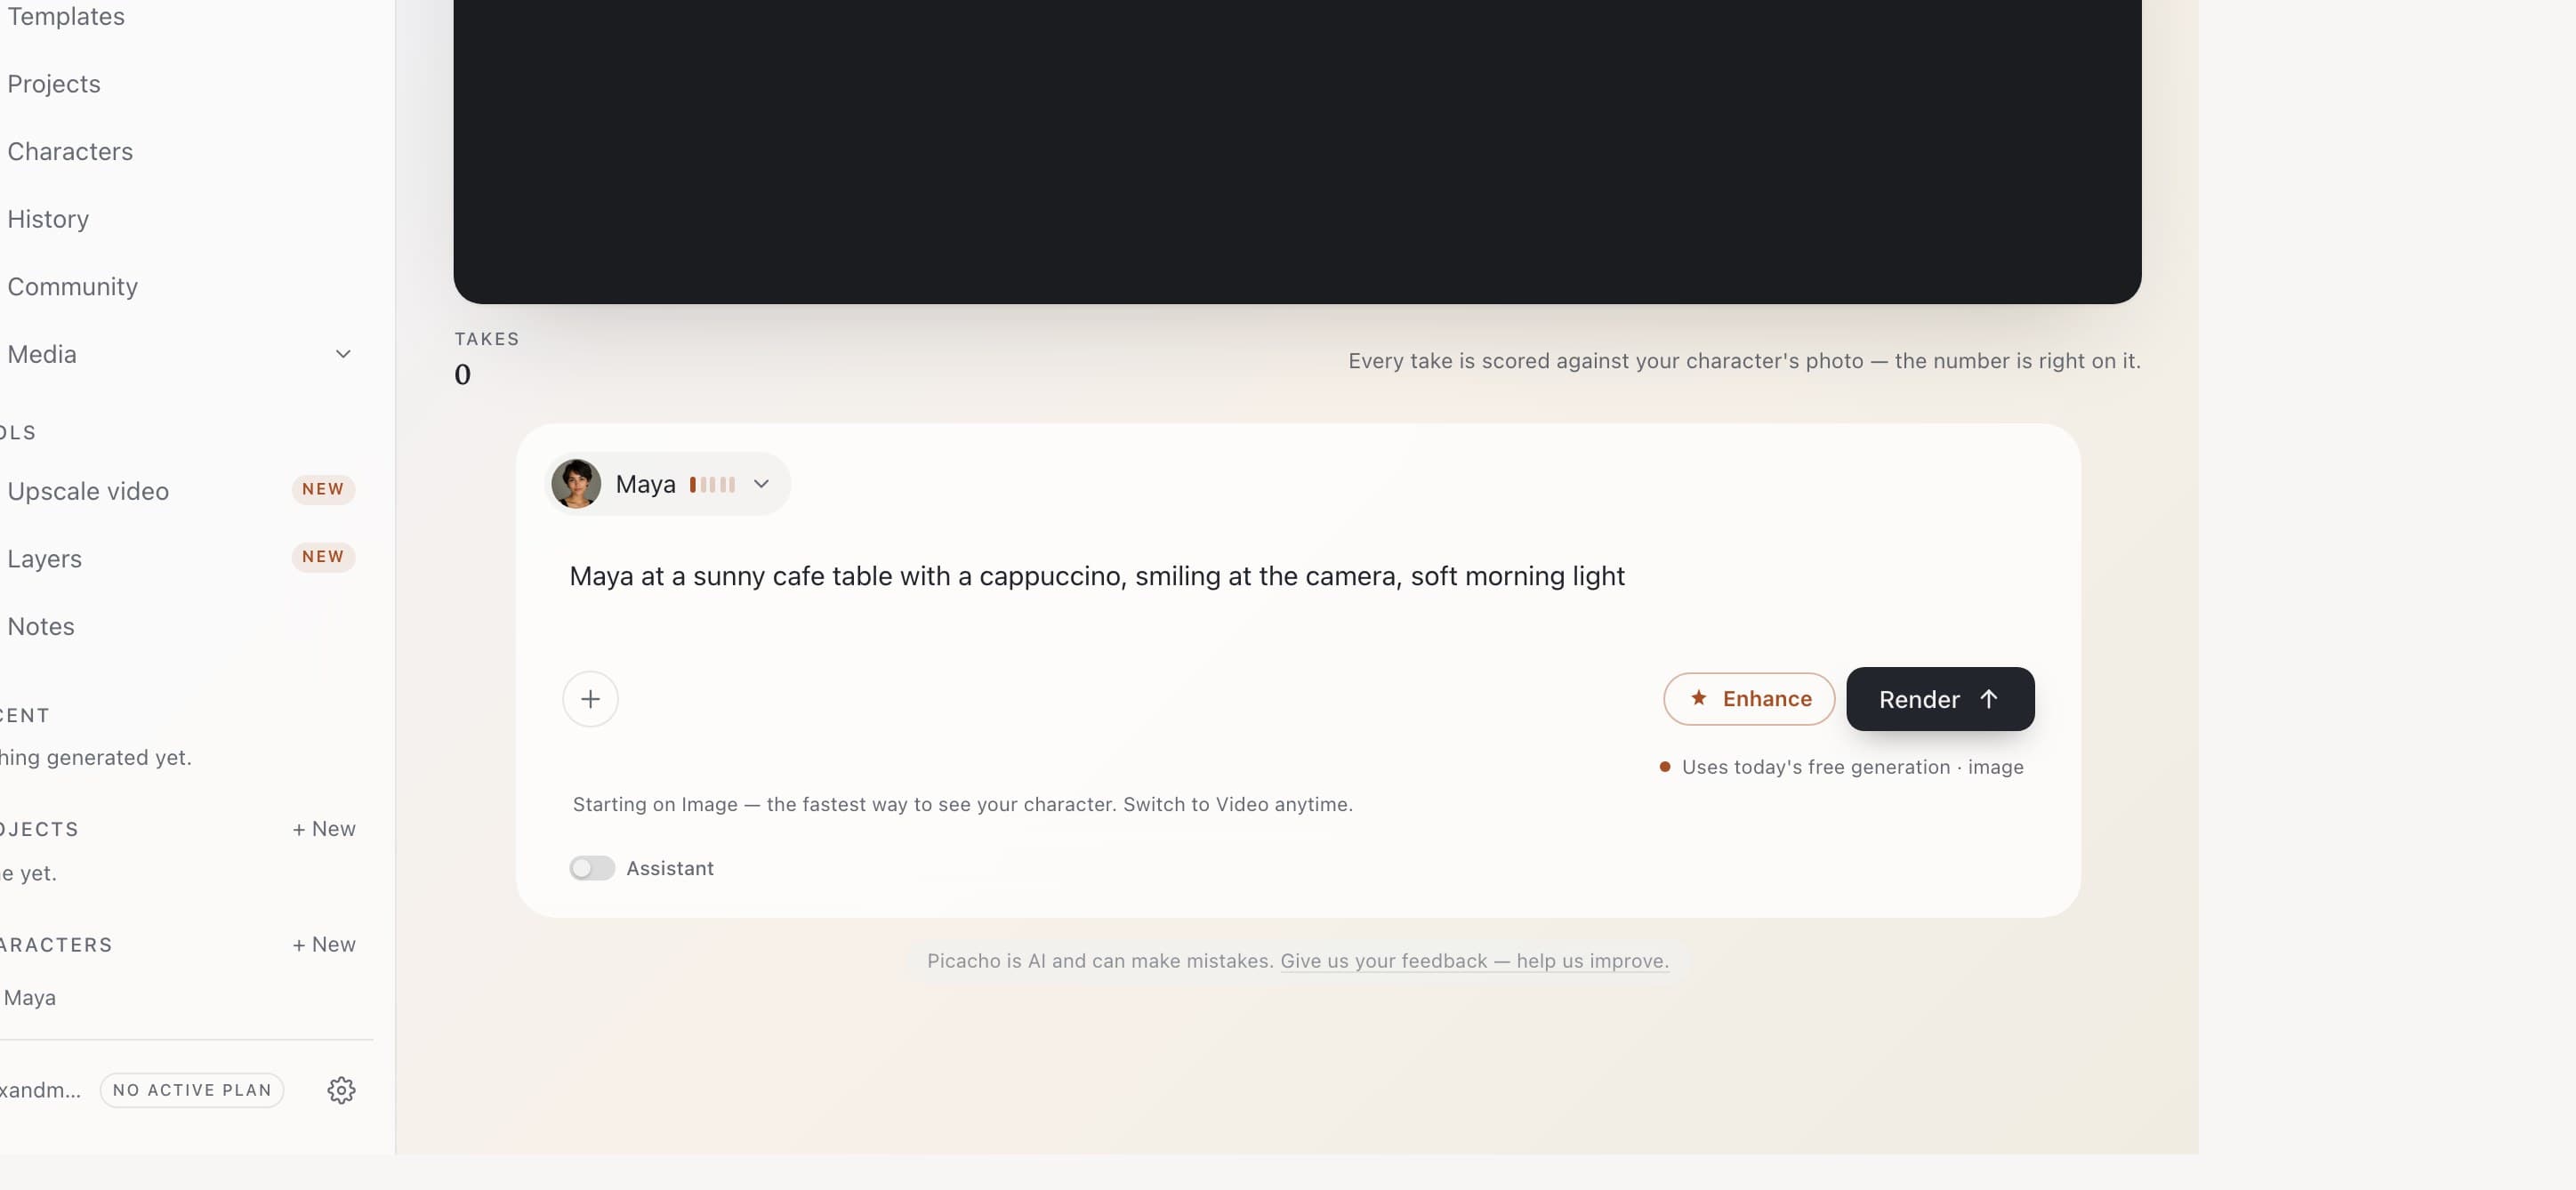
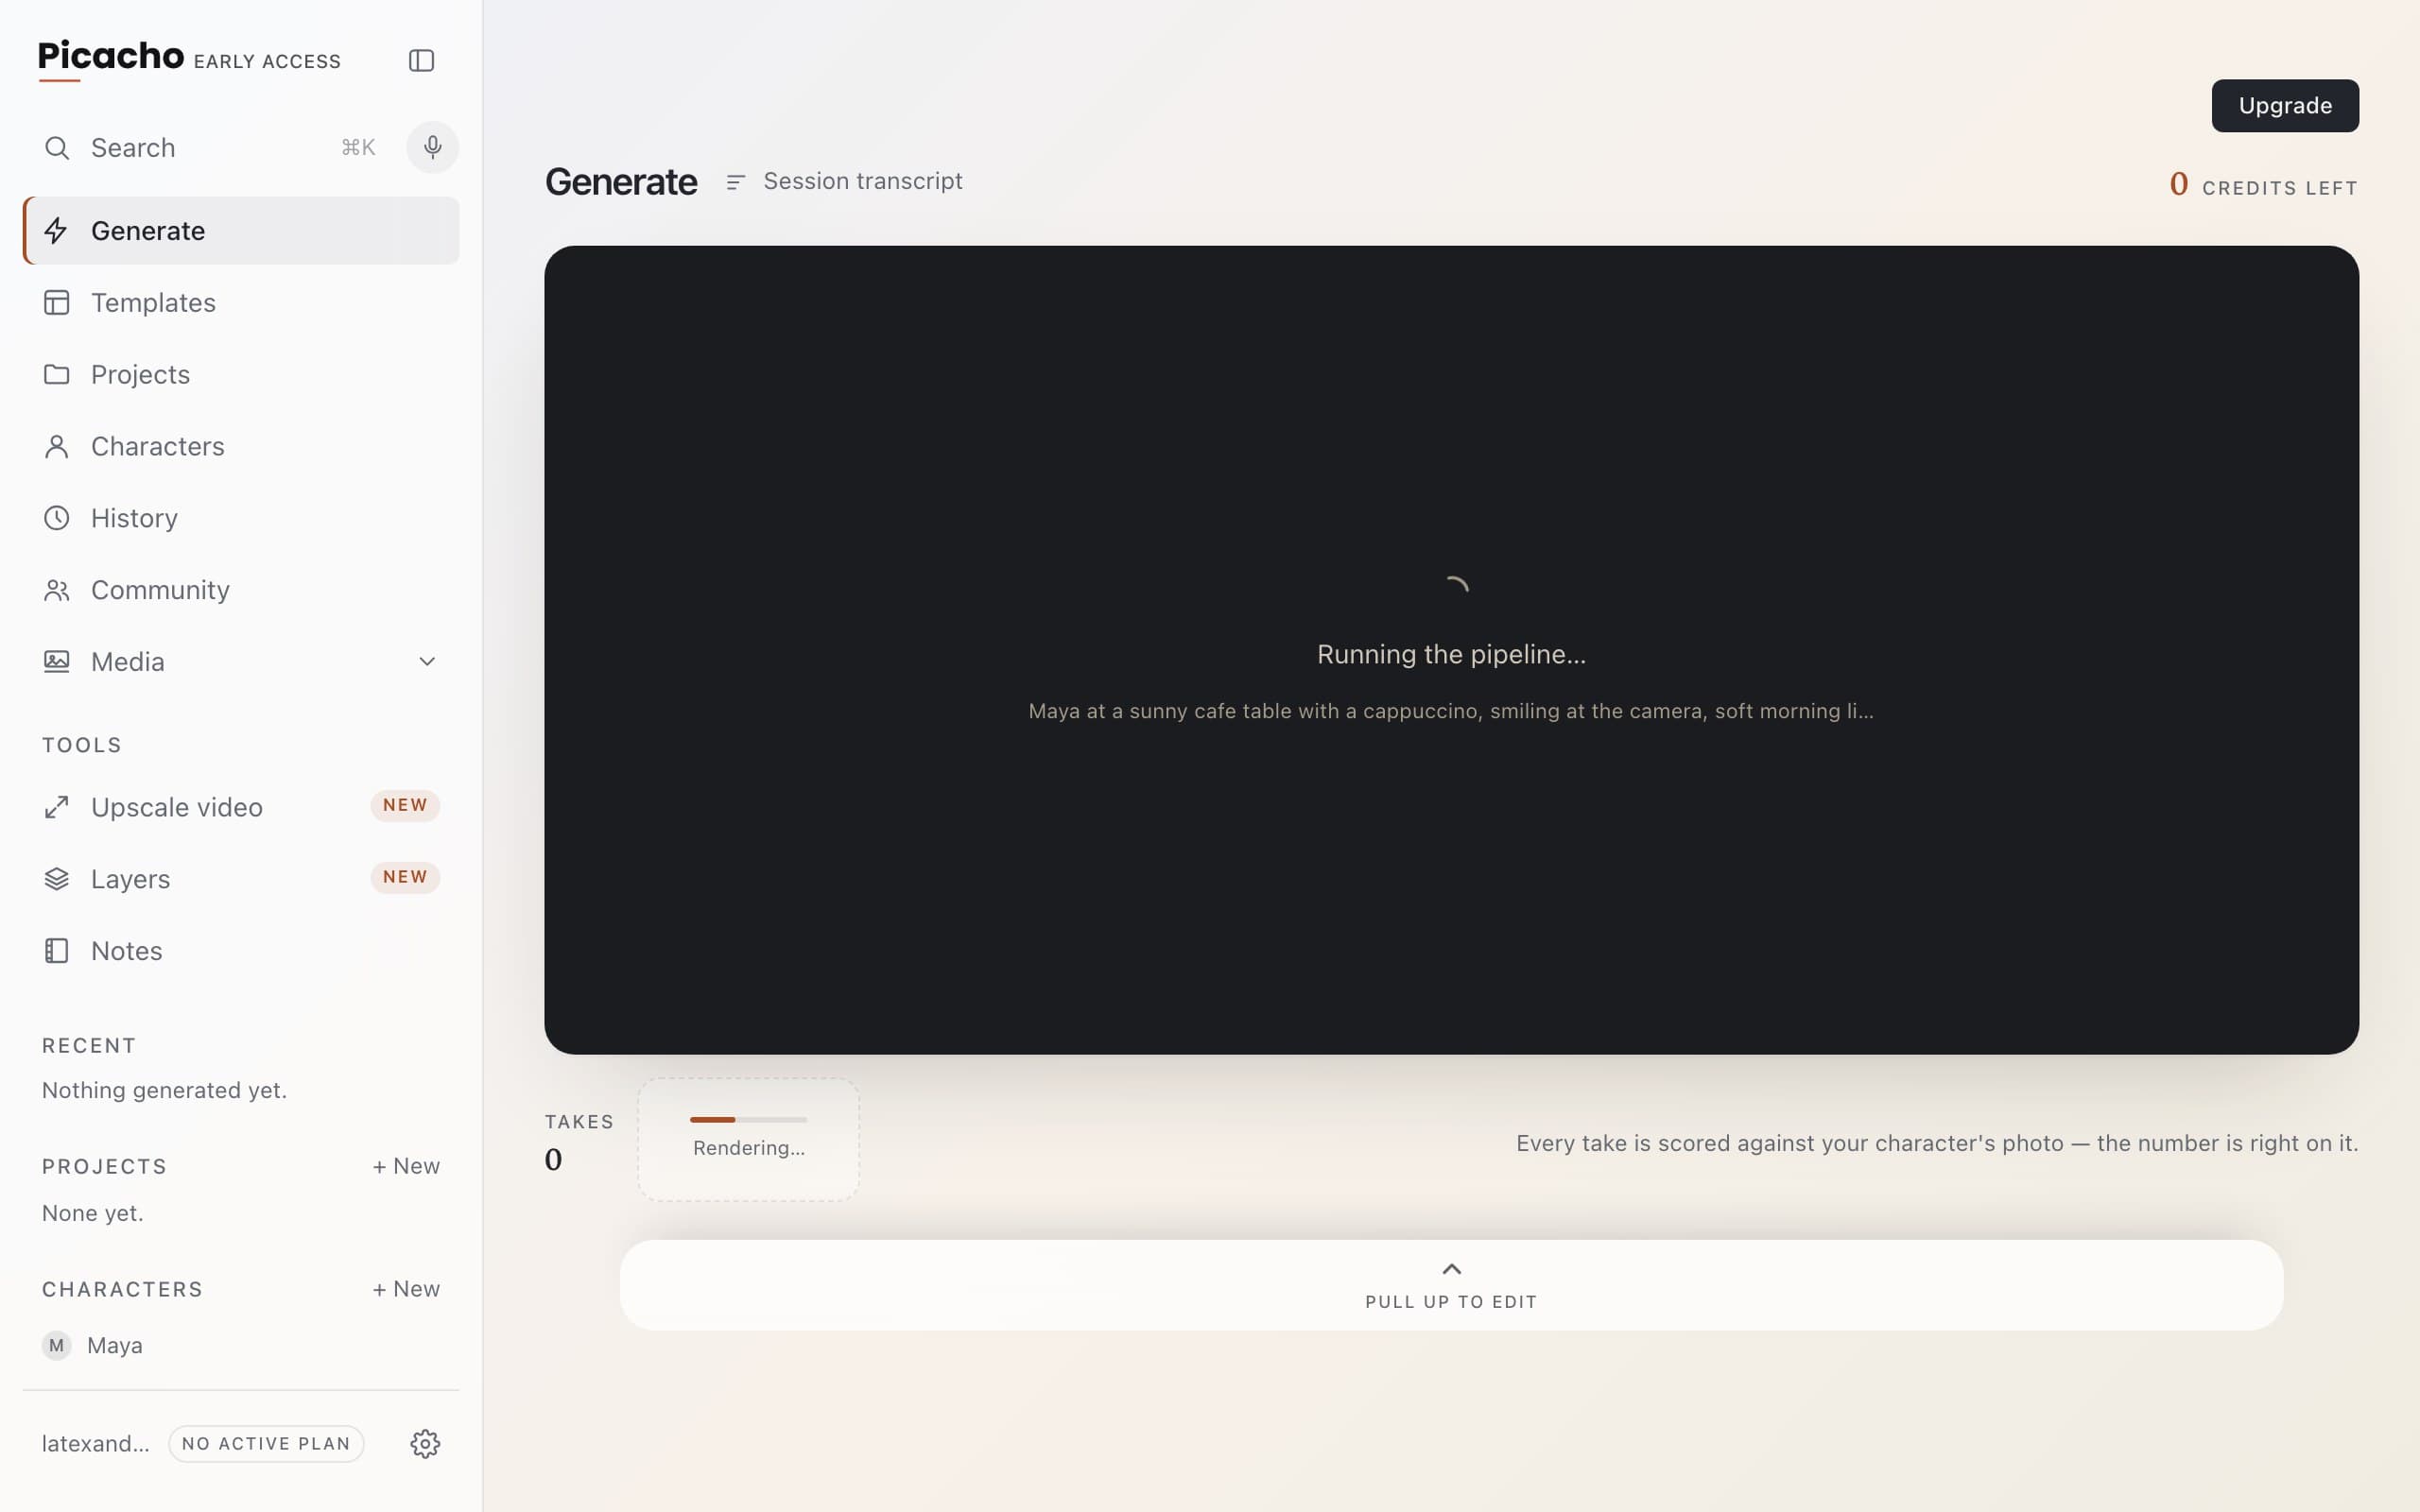
Watch it work
The composer folds down to a bar and the stage narrates the pipeline: your prompt is rewritten with the character's details folded in, checked that nothing about them was lost, then rendered. You can leave the page — it carries on without you.
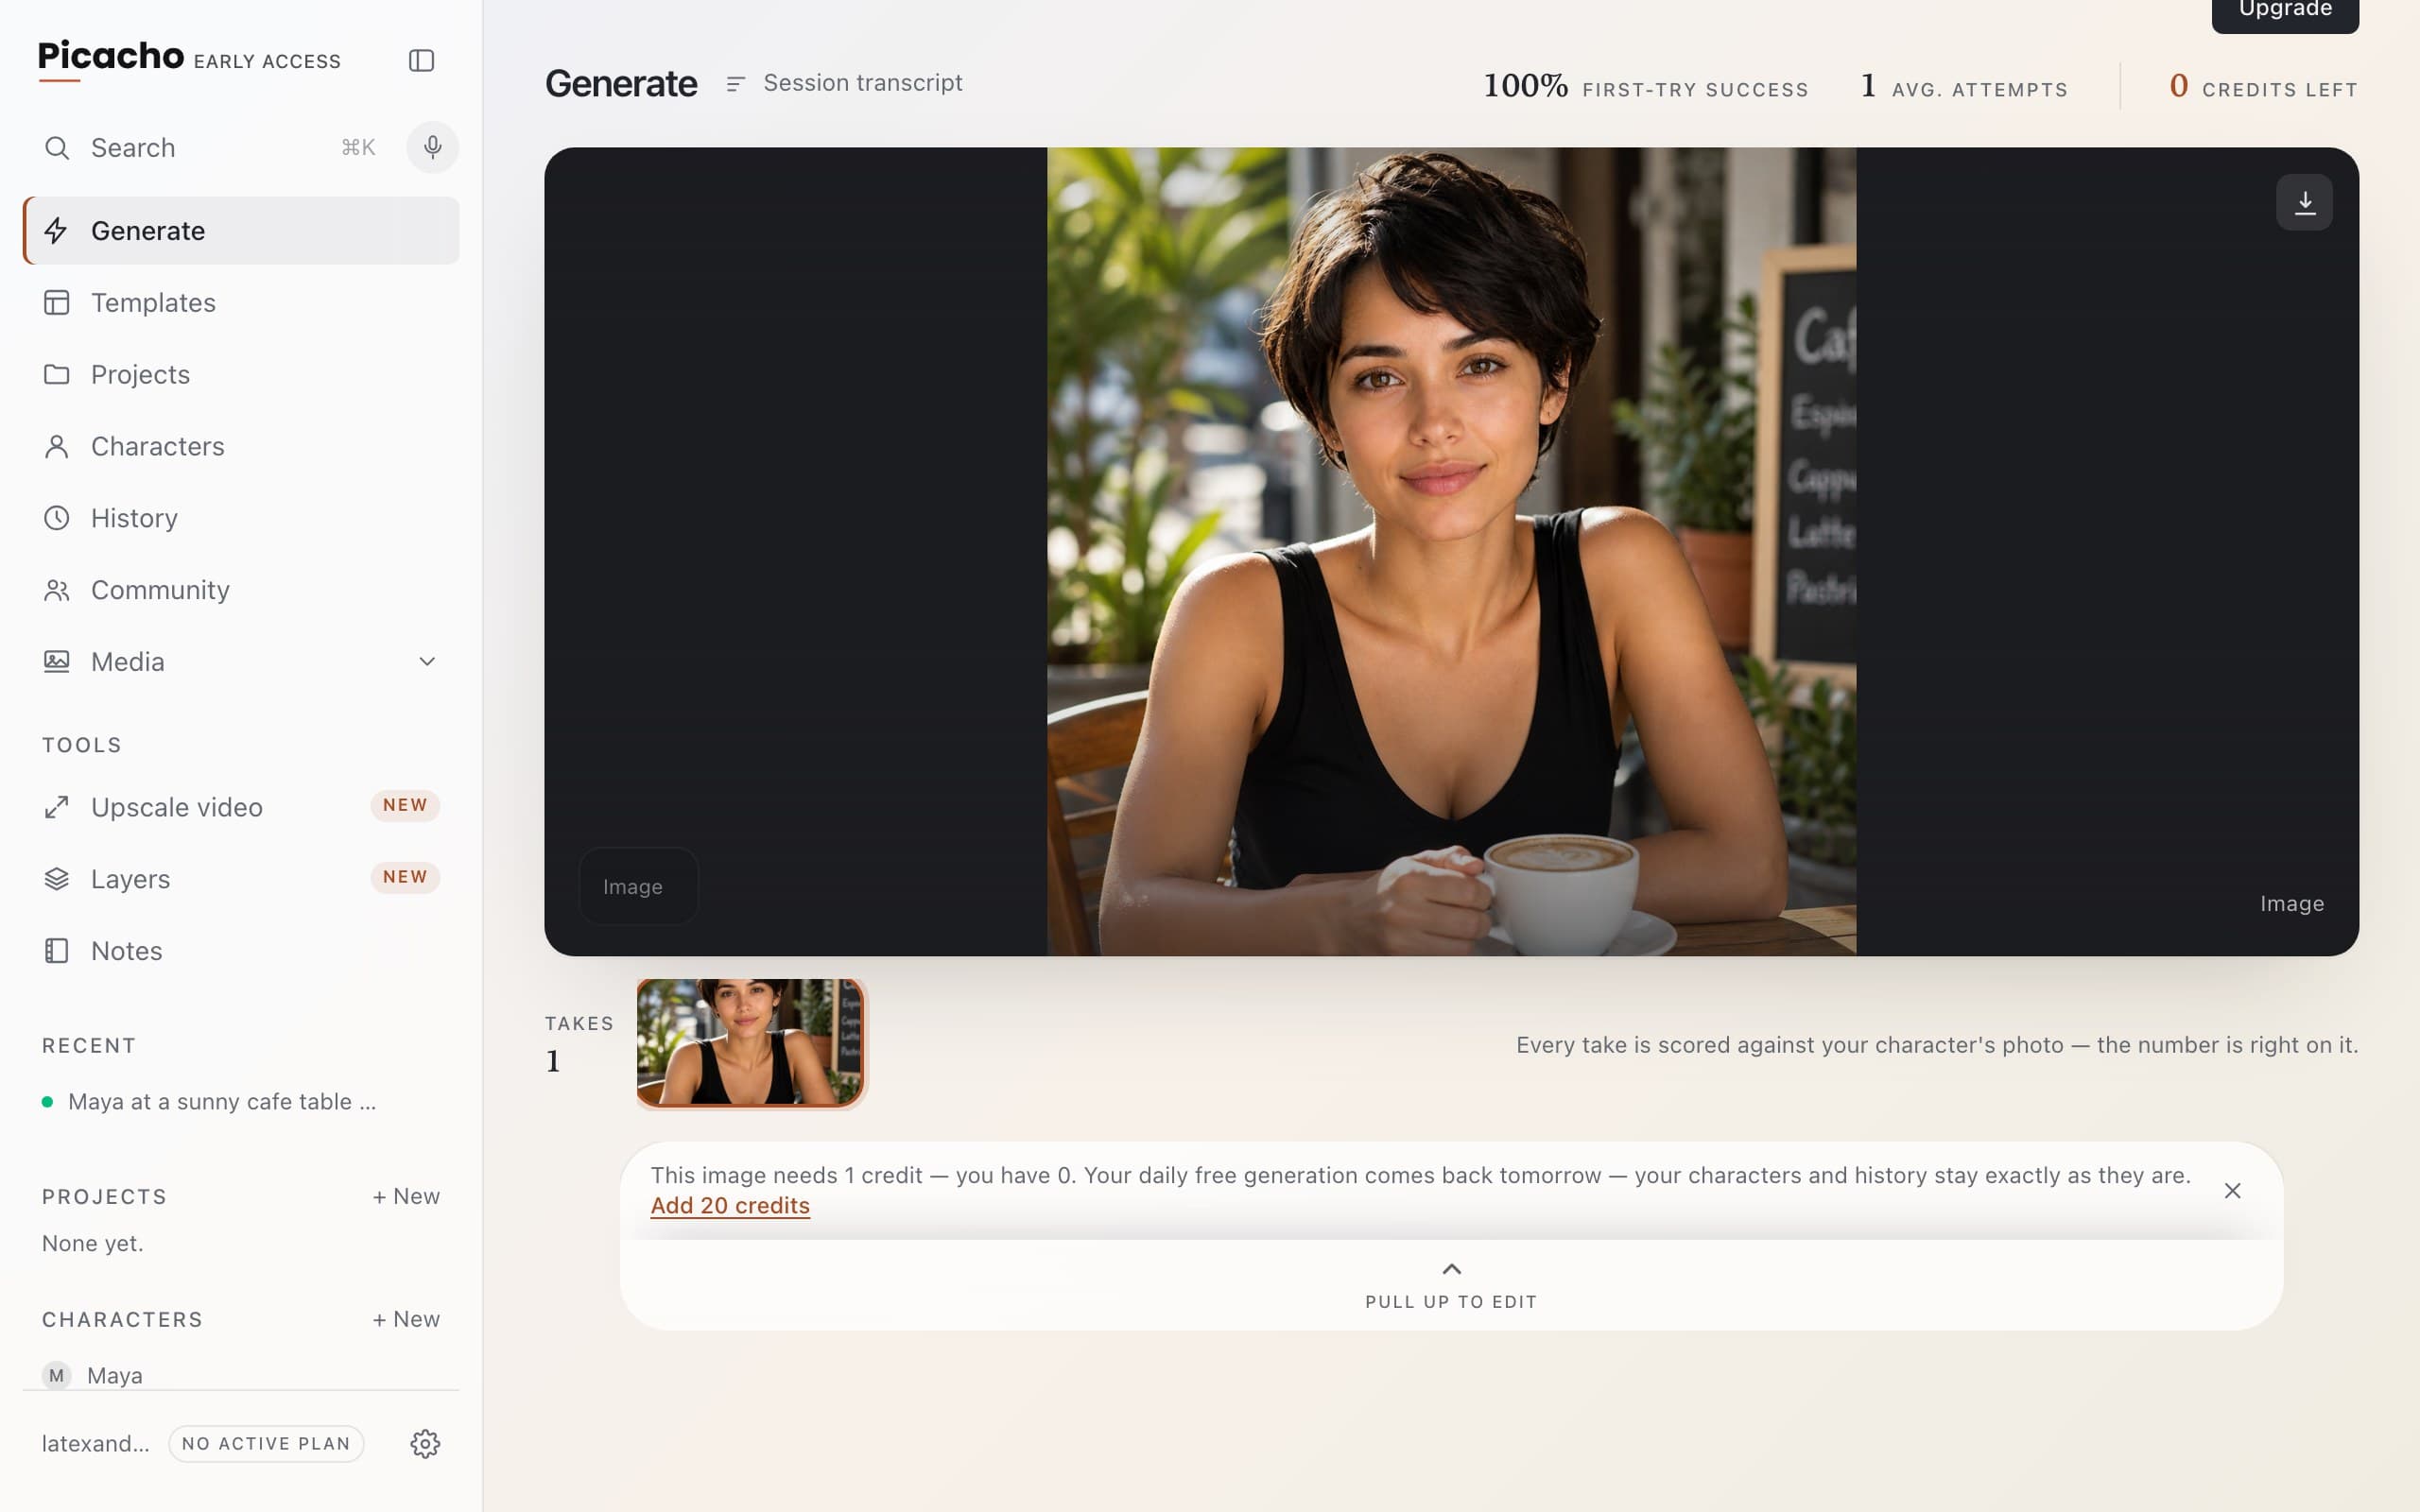
Your take
About half a minute later the image lands on the stage — same face as the reference photo, new scene. Hover it to download it, or open it full screen. It's also in Takes below the stage and in History for good.
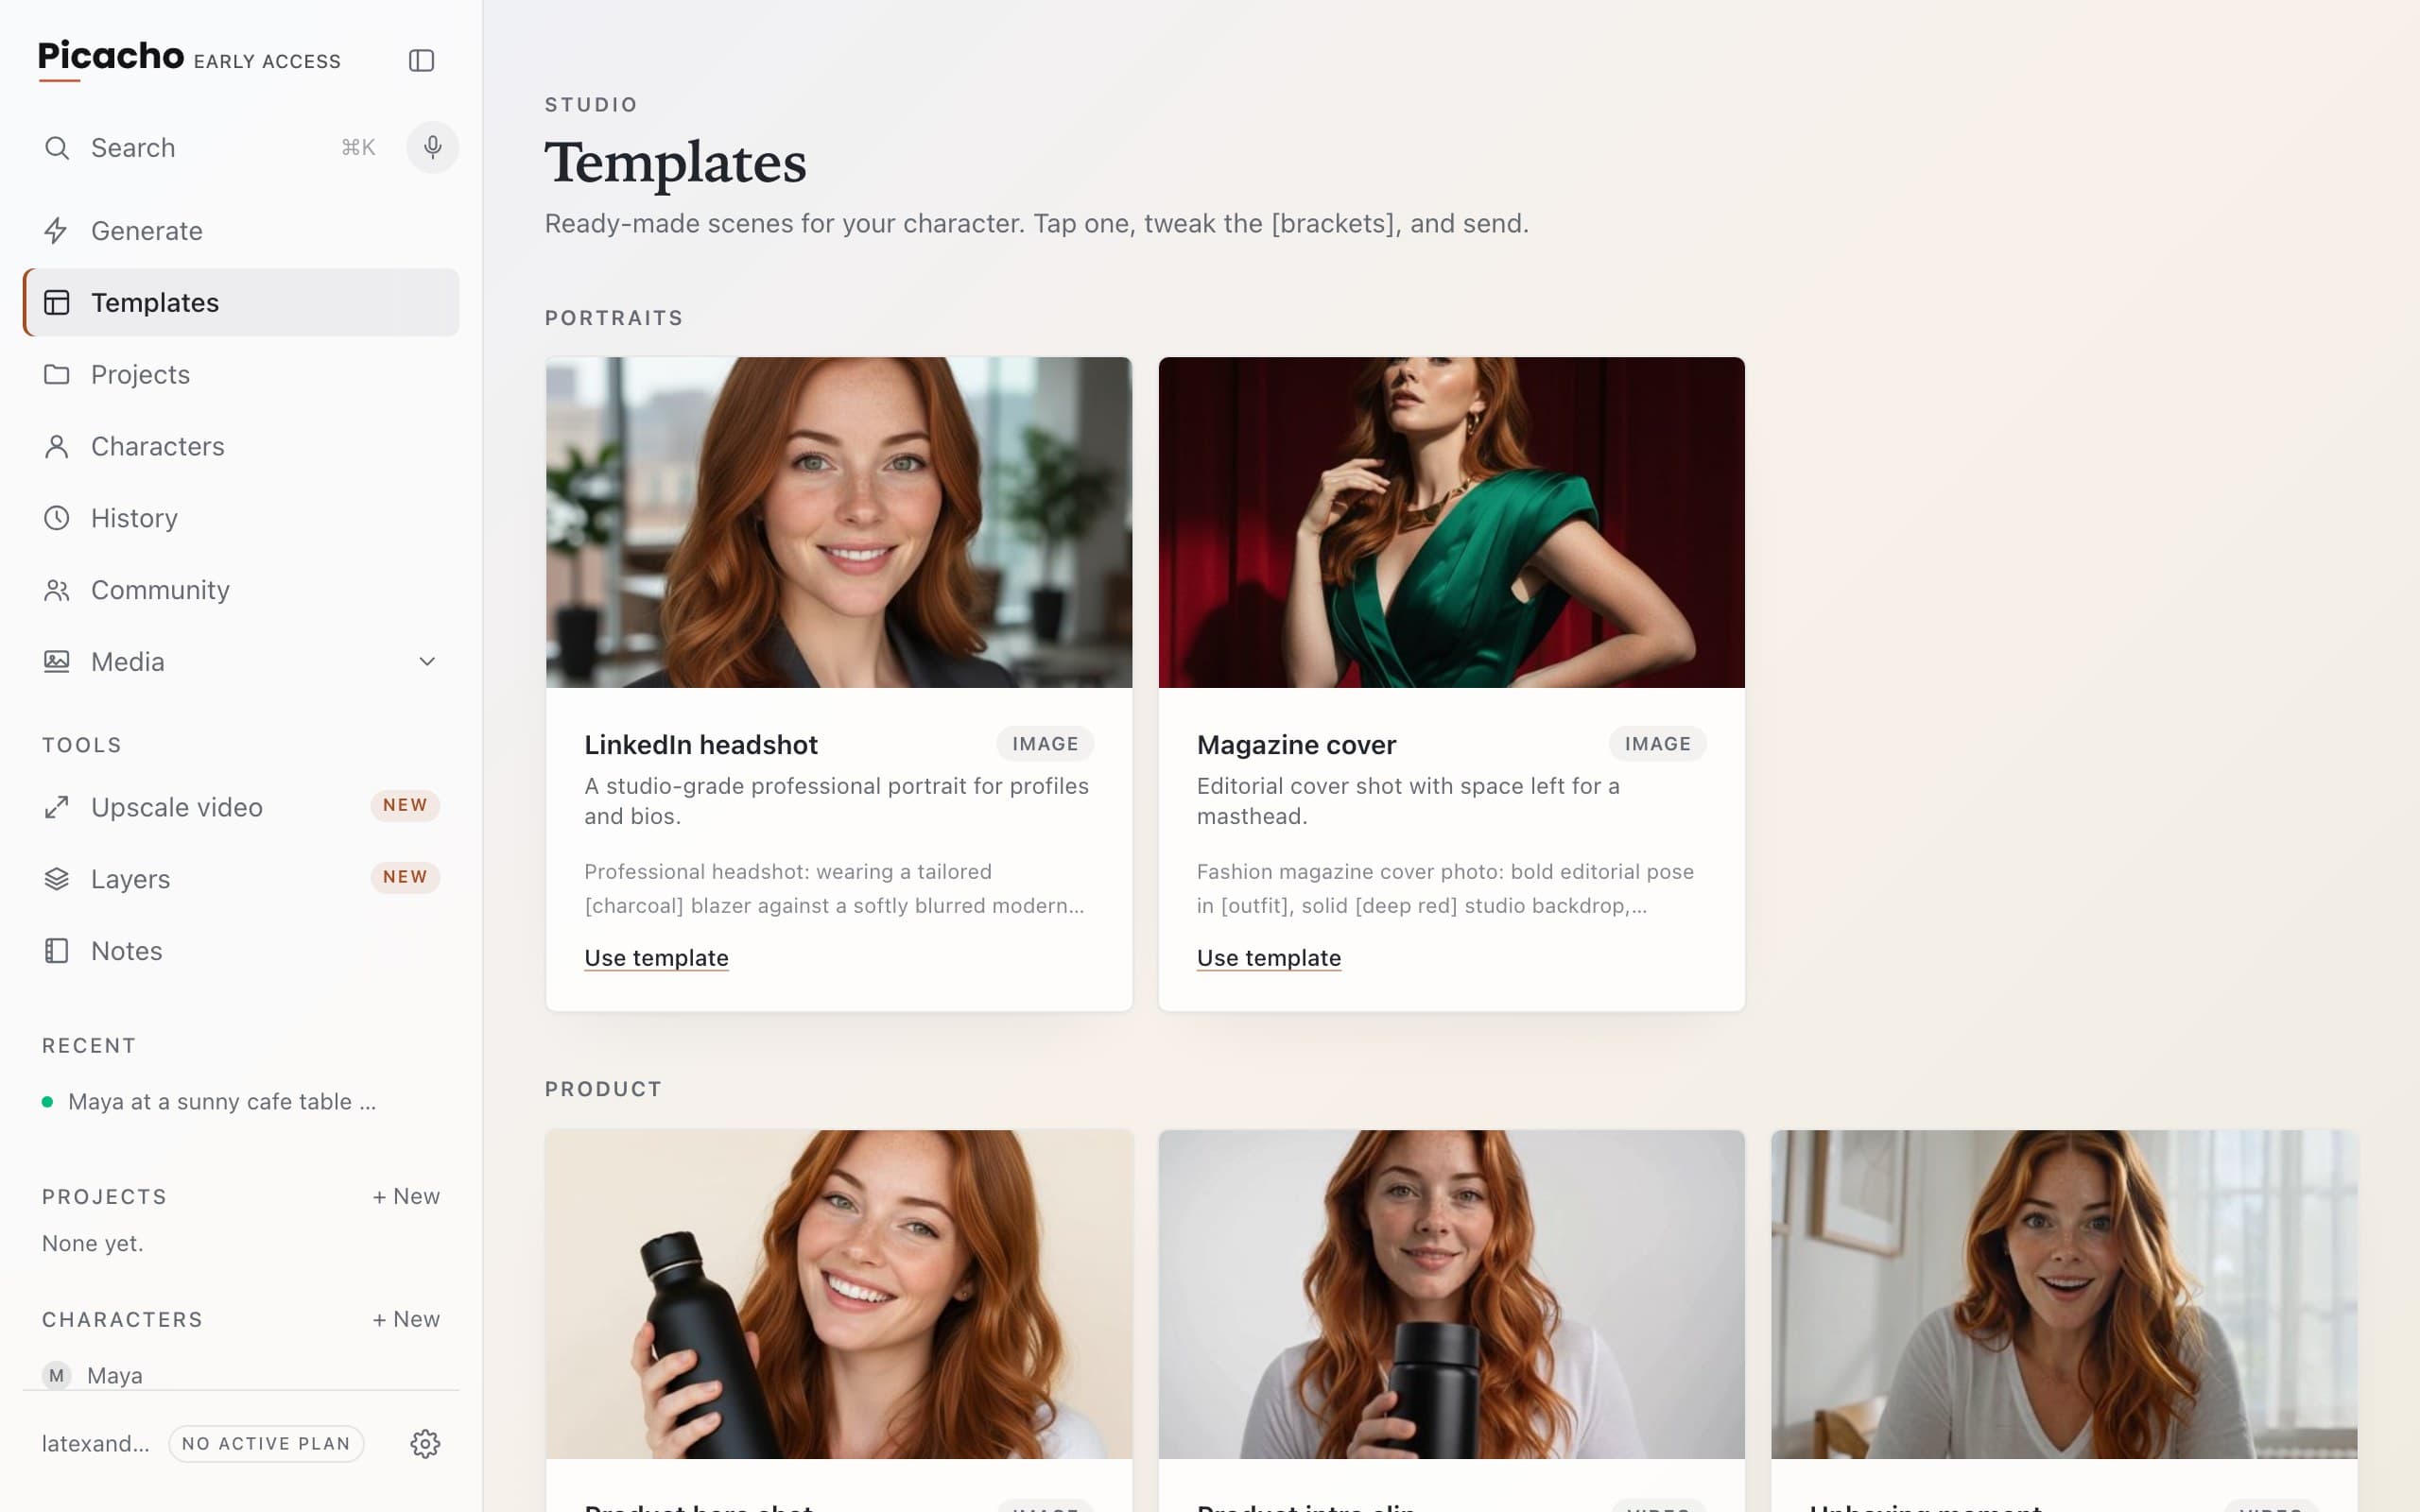
Want a head start?
Templates in the sidebar are finished prompts with sample pictures — headshots, magazine covers, product shots, seasonal cards. Pick one, swap in your character, change the words that are meant to be changed, send.
Chapter 4
5 minMake a video
Same composer, same character, one different chip. Video costs more than an image and takes longer, so it's worth knowing which engine you're asking and what it's good at.
Switch to Video
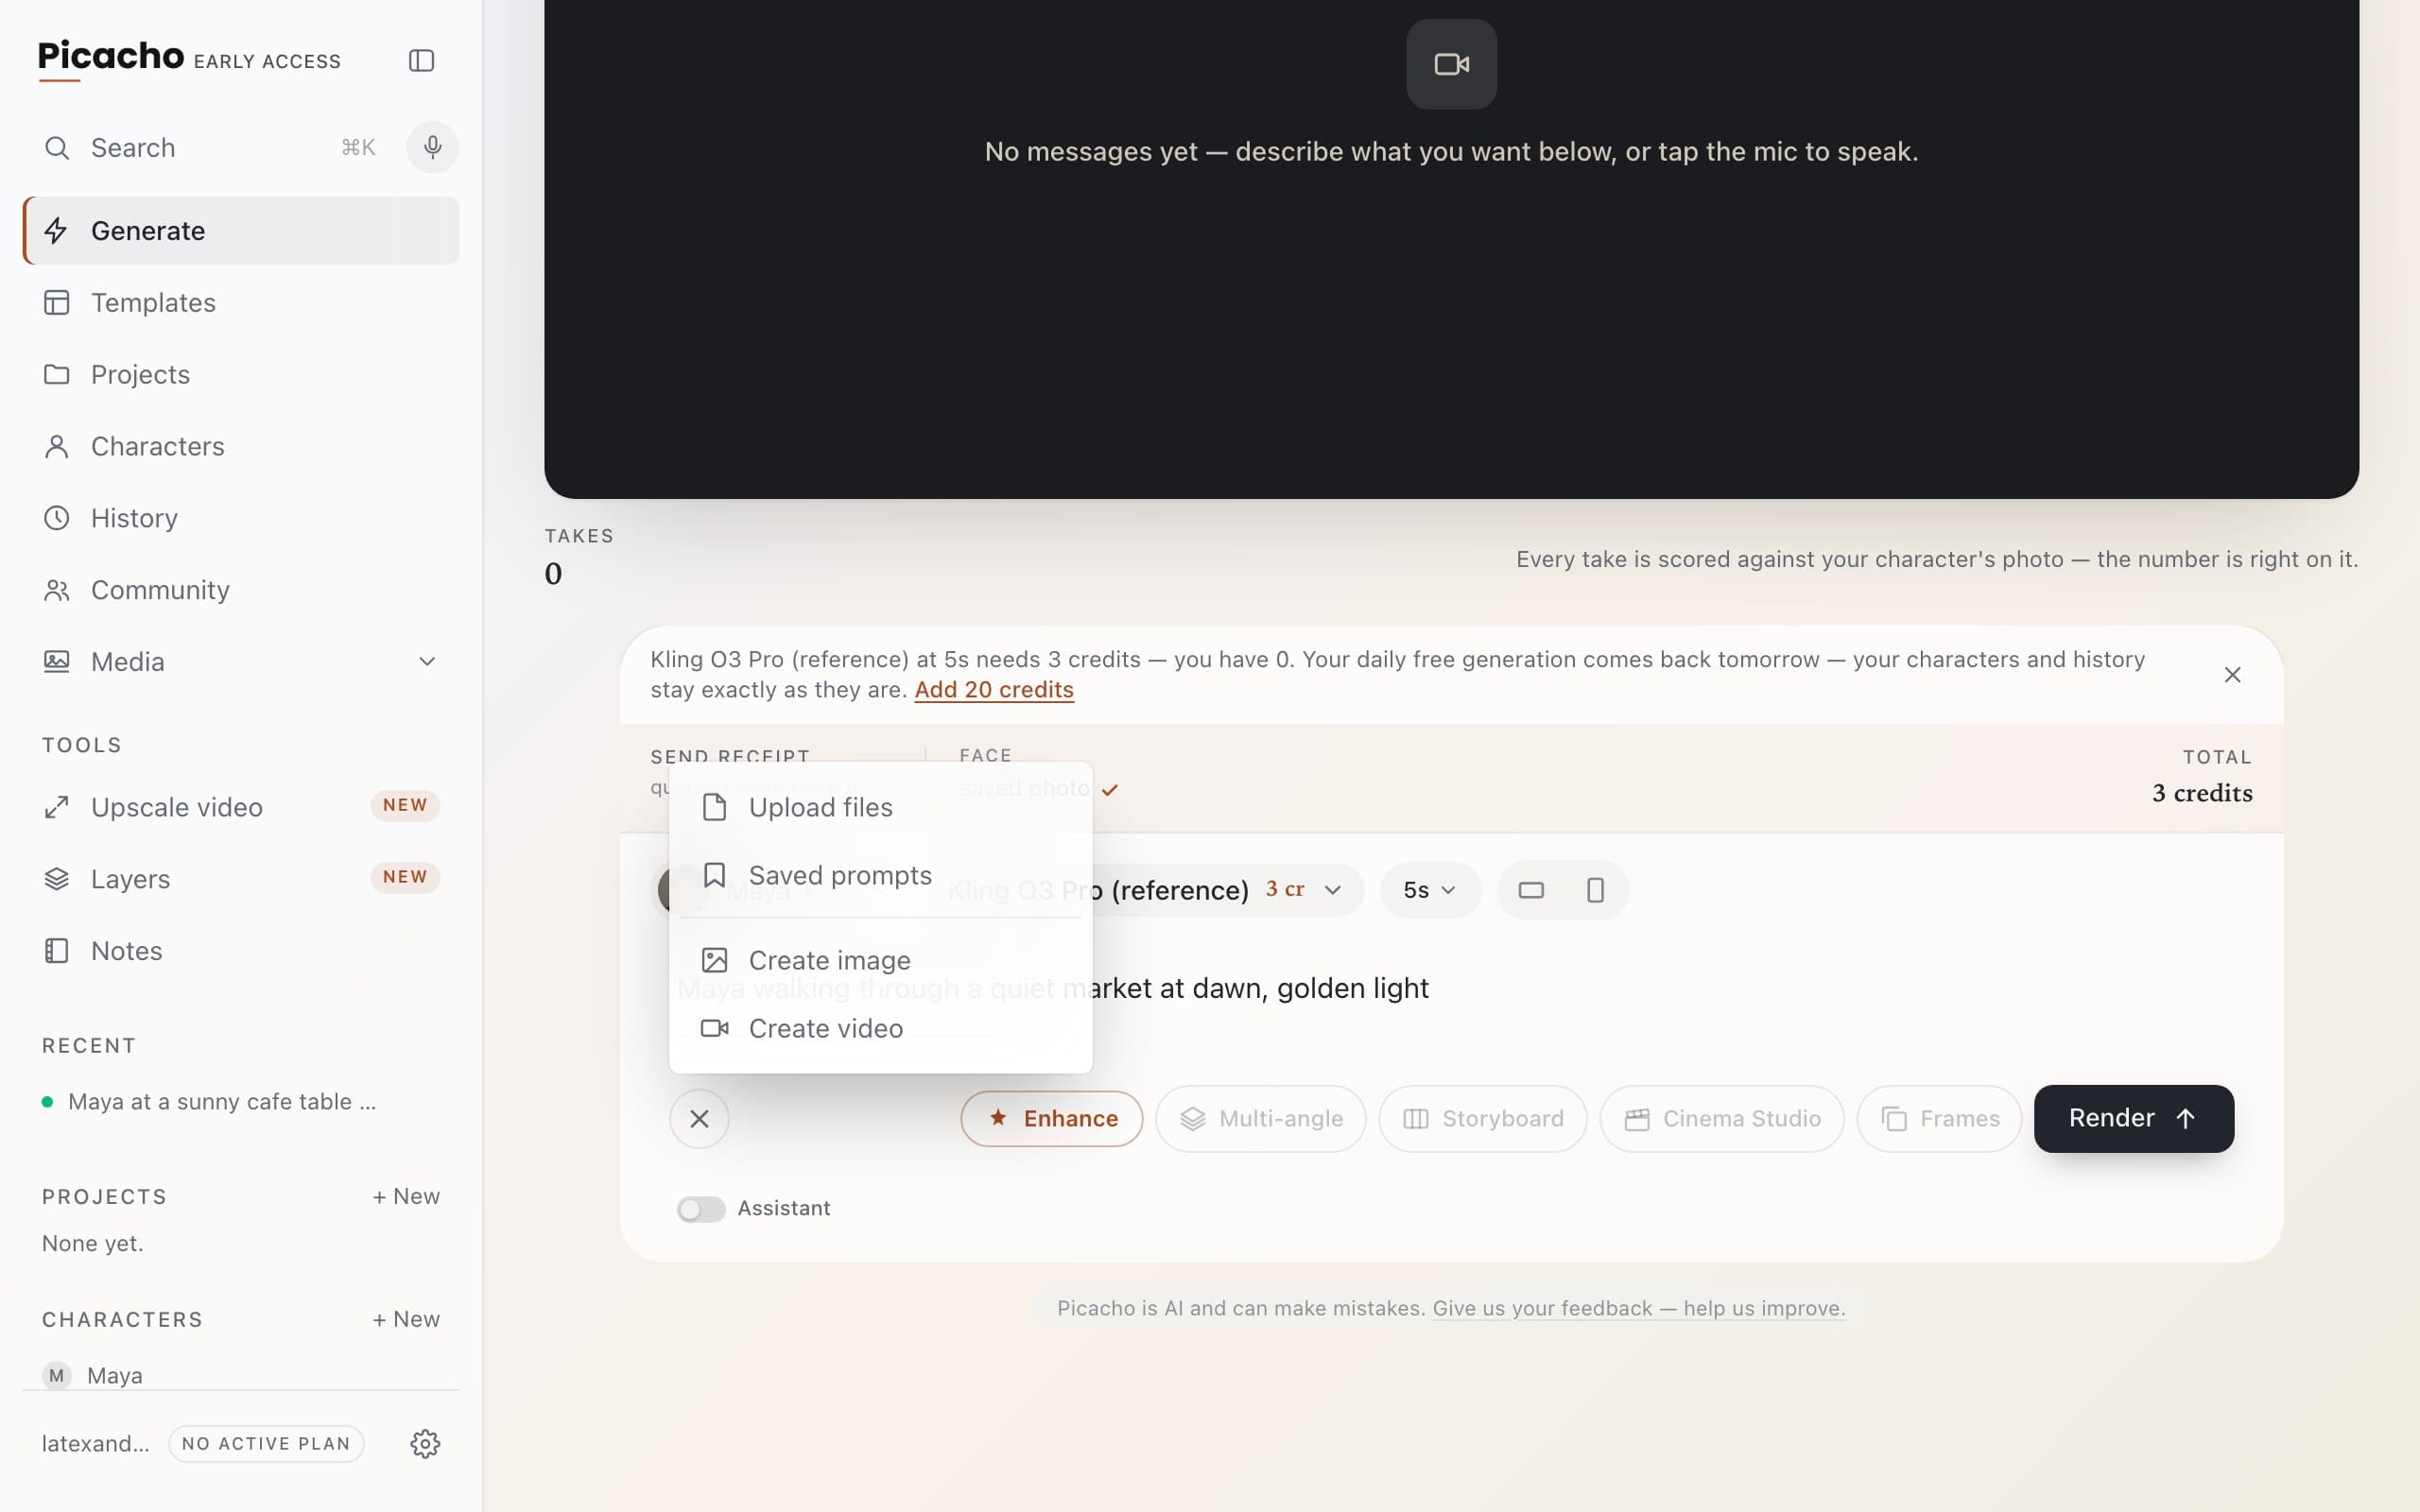
The + button beside the prompt opens a short menu: Upload files, Saved prompts, Create image, Create video. Pick Create video. The composer keeps its shape — character, engine, length, frame shape — and a small chip beside the button now reads Video.
Choose an engine
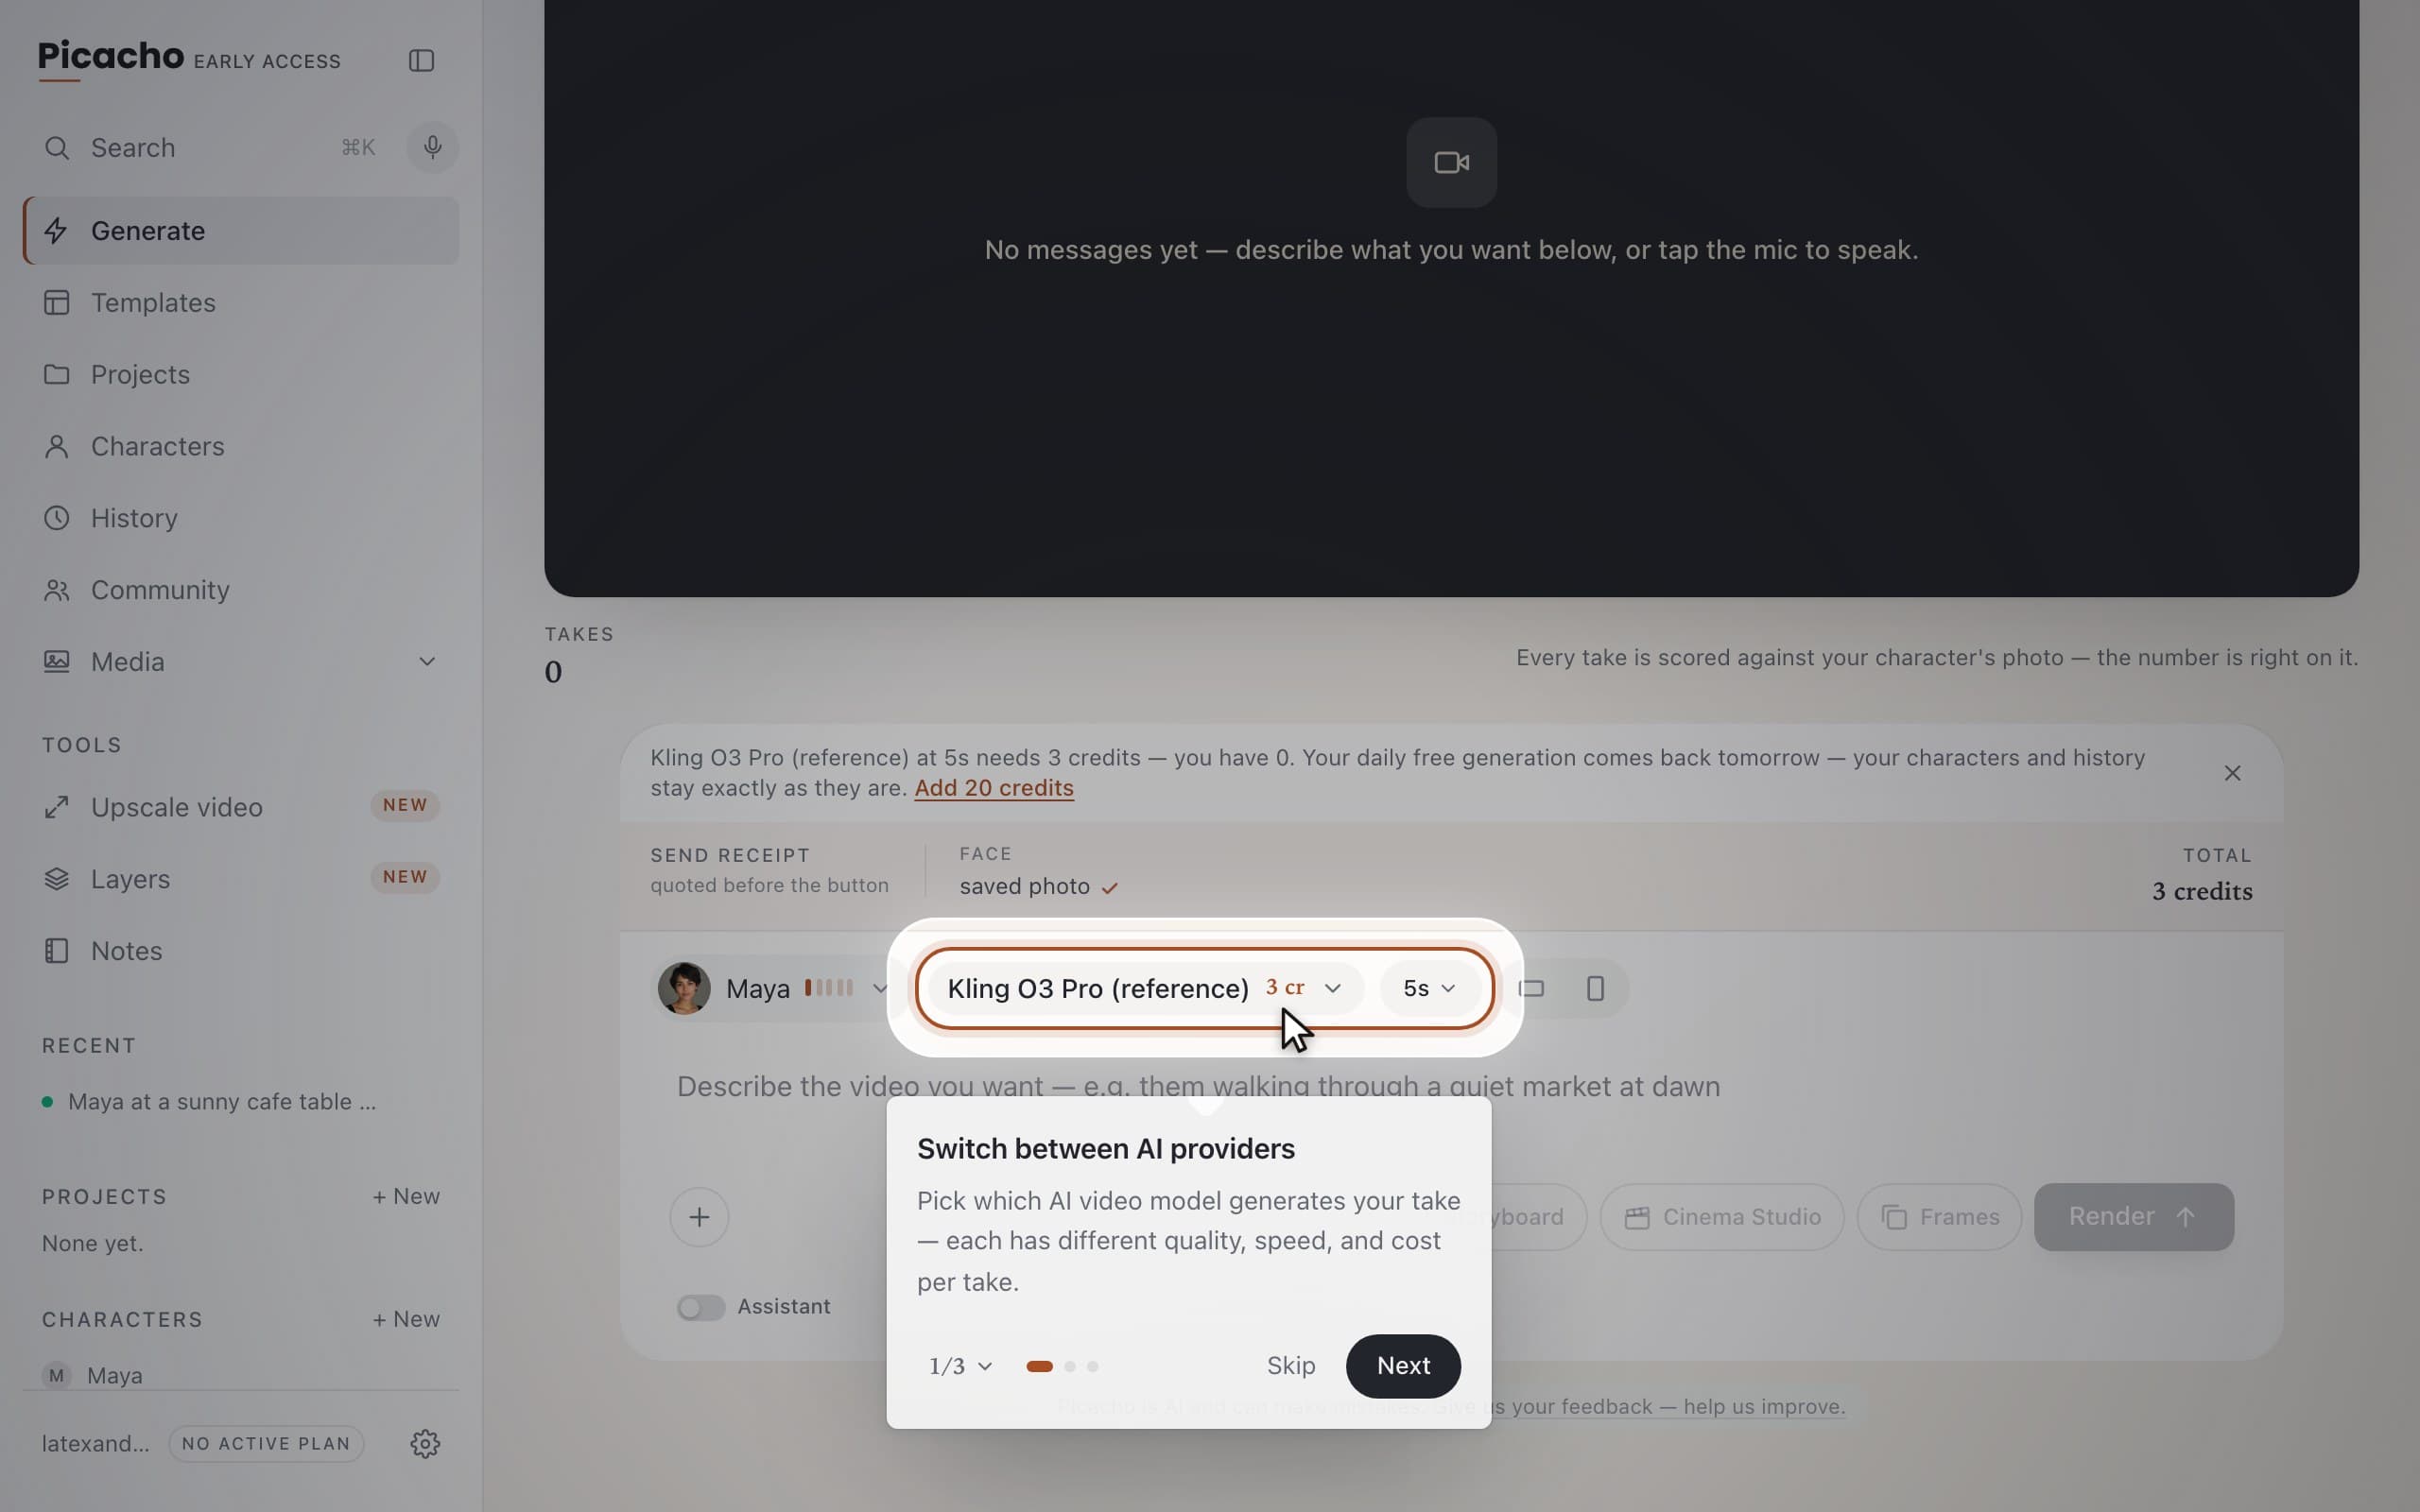
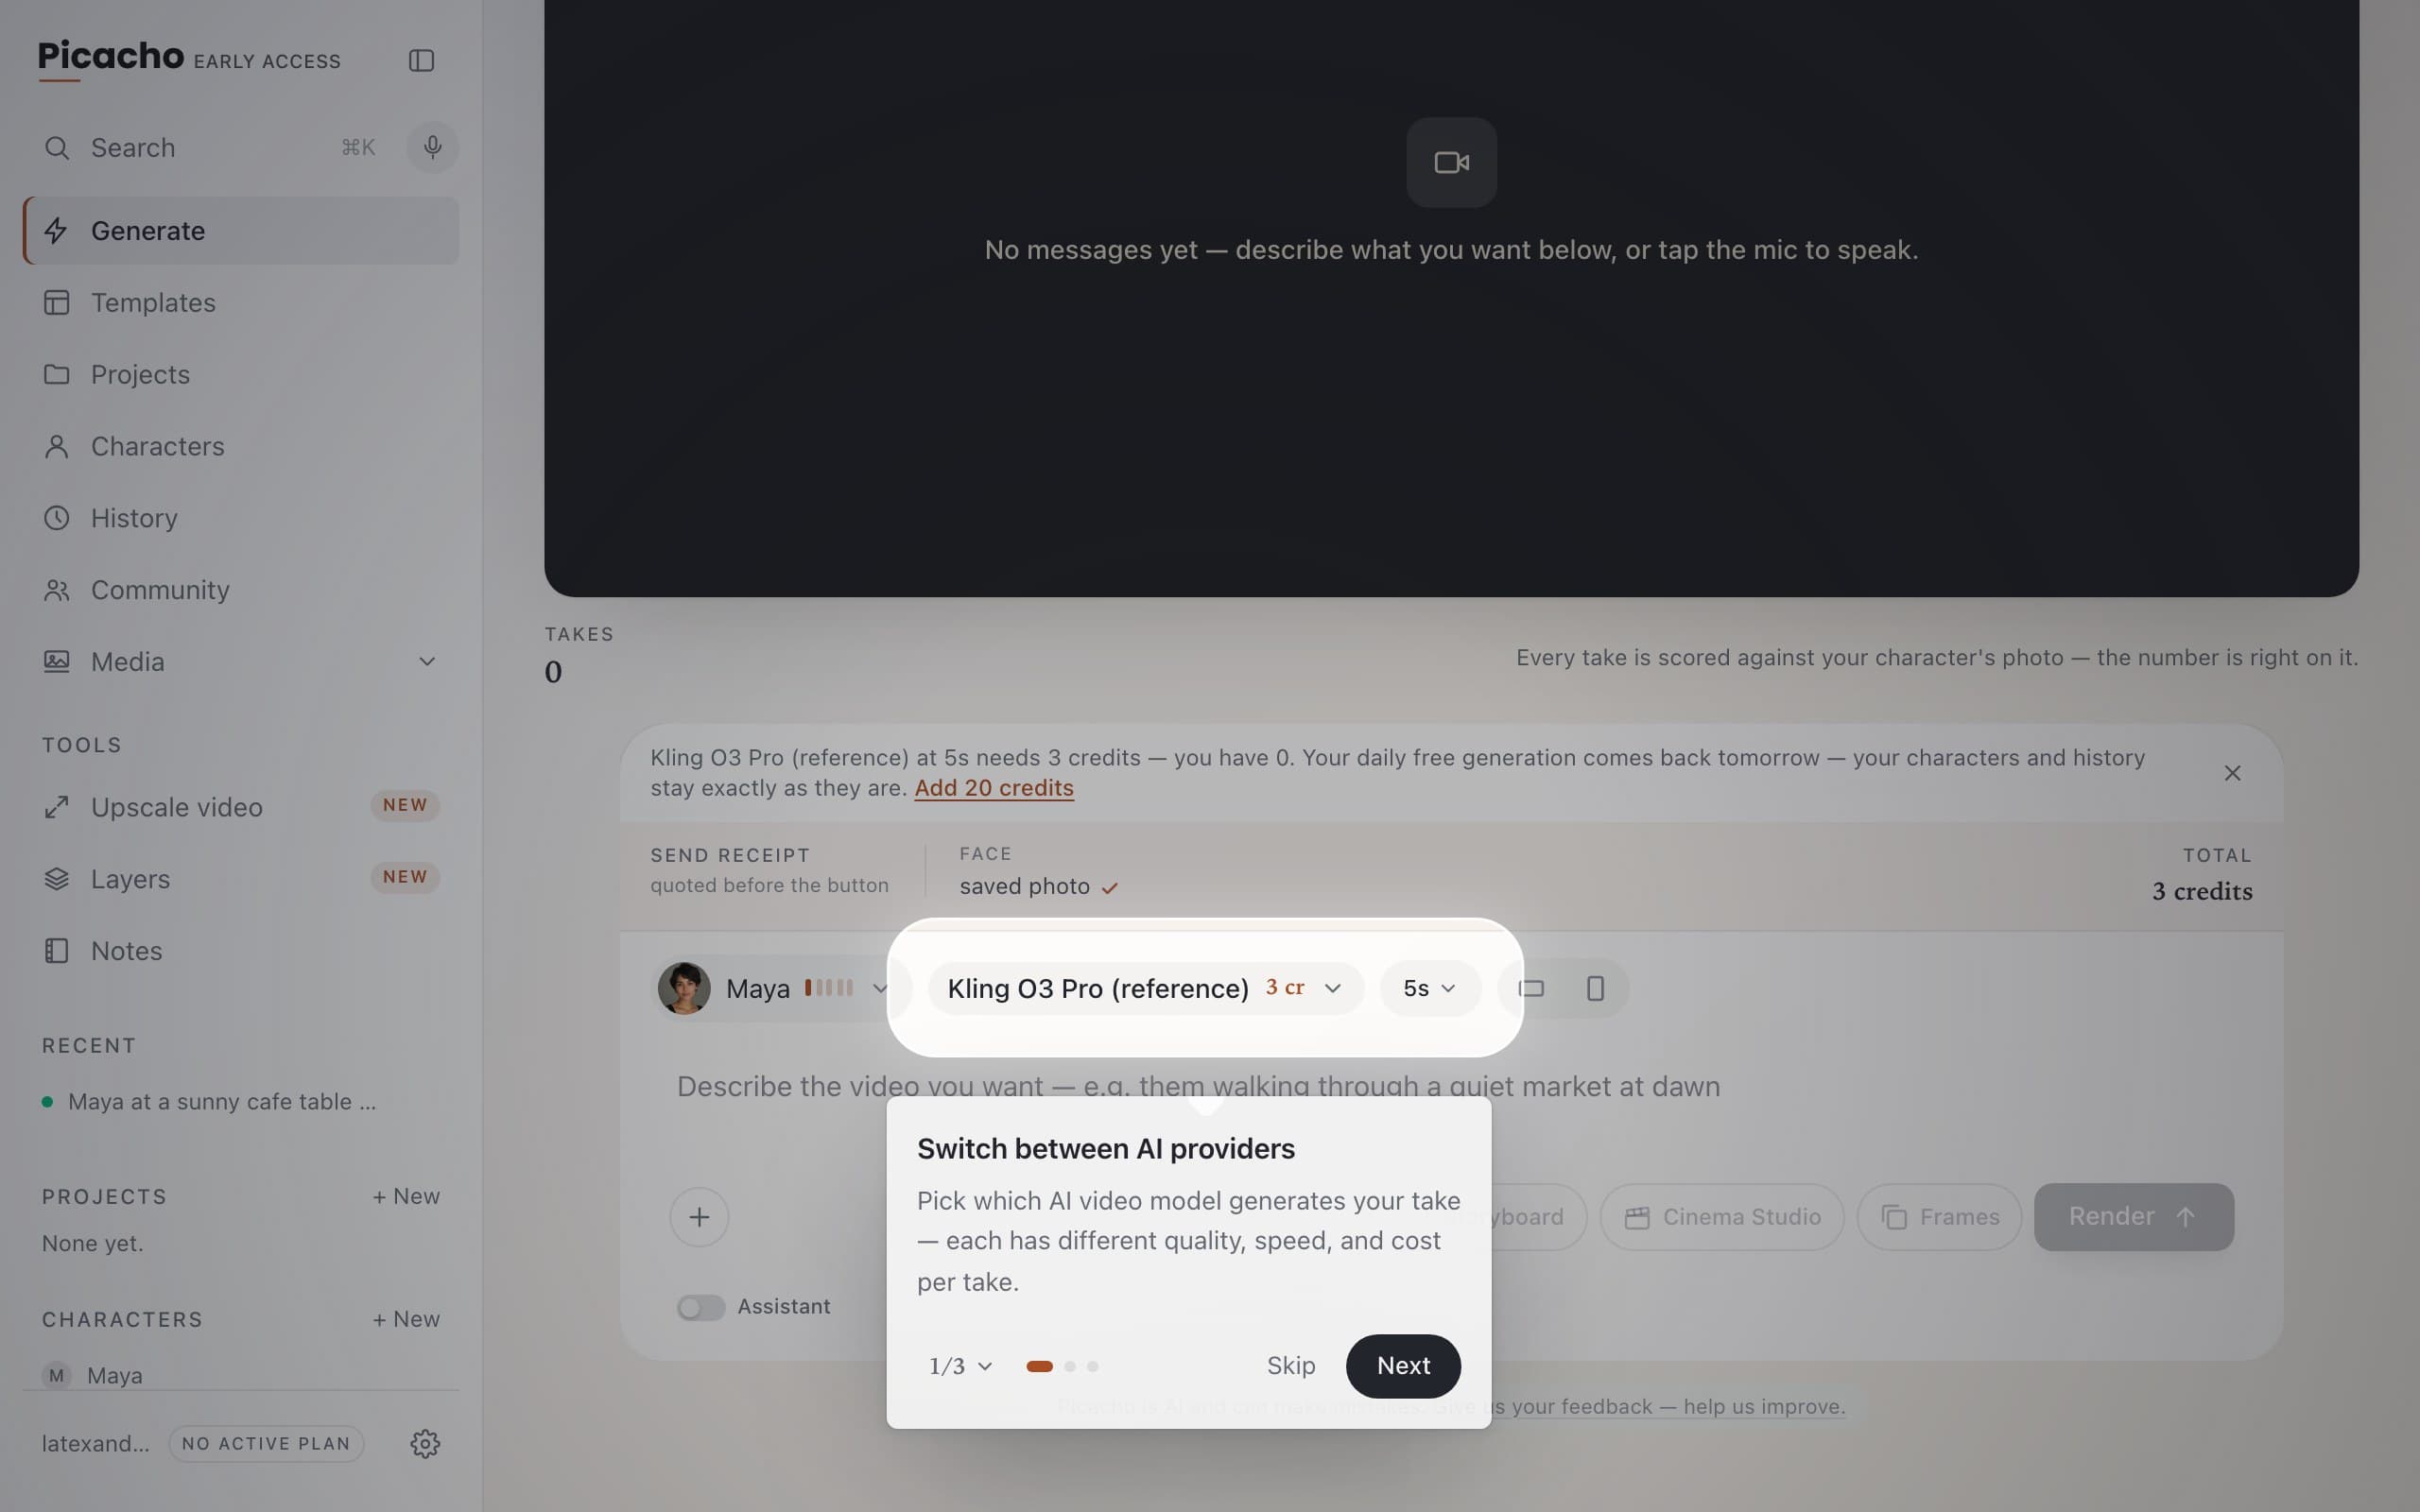
Four are featured: Seedance 2.0, Kling O3 Pro, Gemini Omni Flash 1.1 and Veo 3.1. Each shows its price in credits before you commit. More models opens the rest. On the free plan your one video a day runs on Wan Turbo — the four above unlock with credits, and the composer says so before you send.
Length and shape
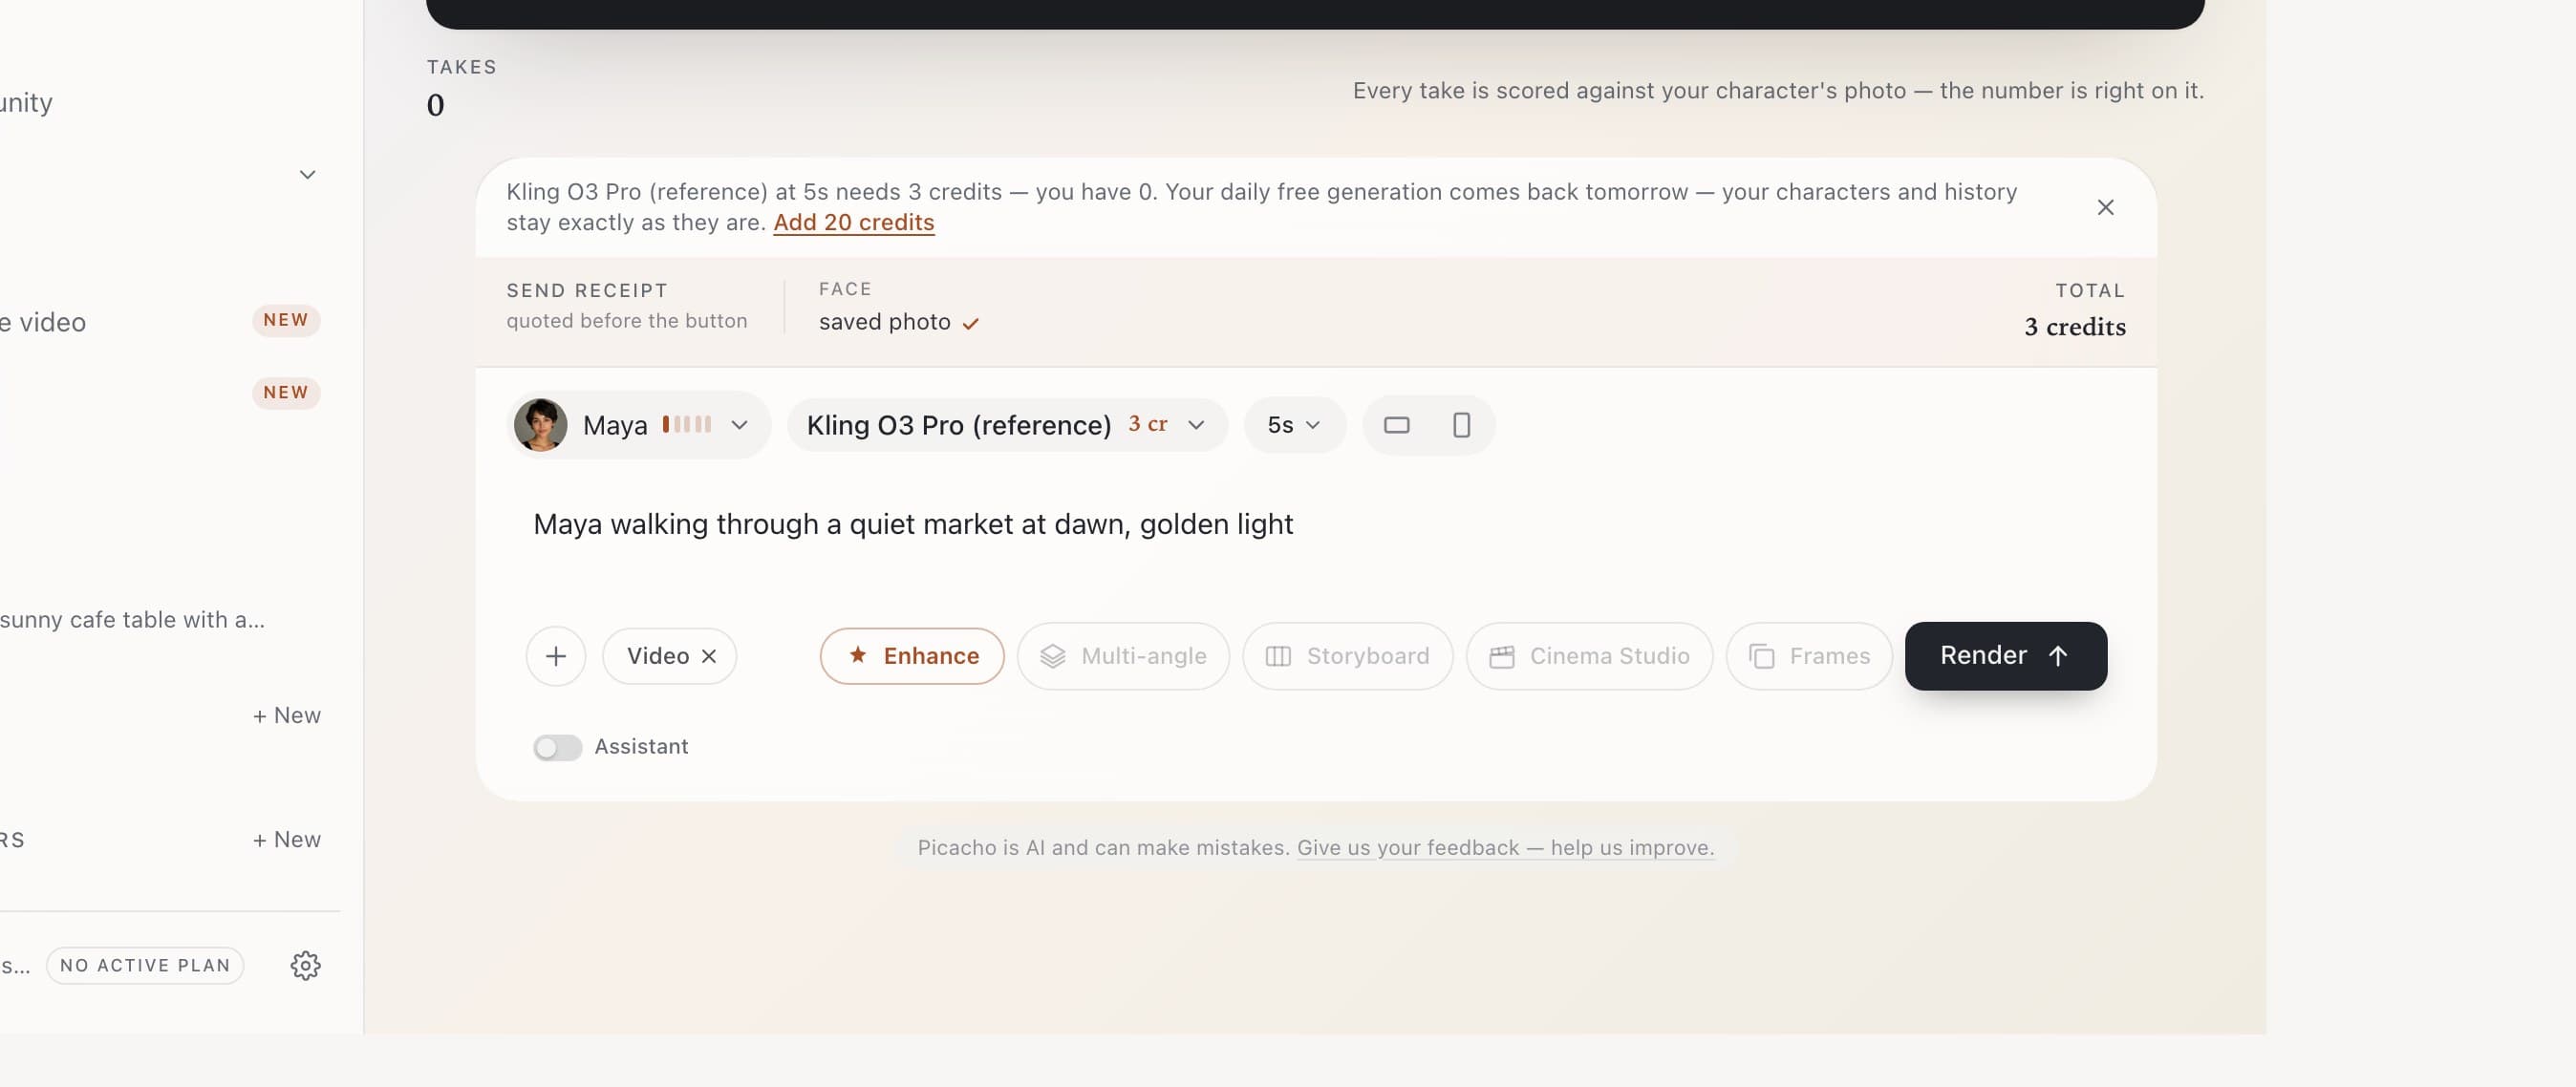
The seconds chip sets clip length — Seedance 2.0 does 5, 10 or 15 seconds, and other engines offer their own. The two icons beside it switch between landscape and portrait.
Three more controls, for when one clip isn't enough
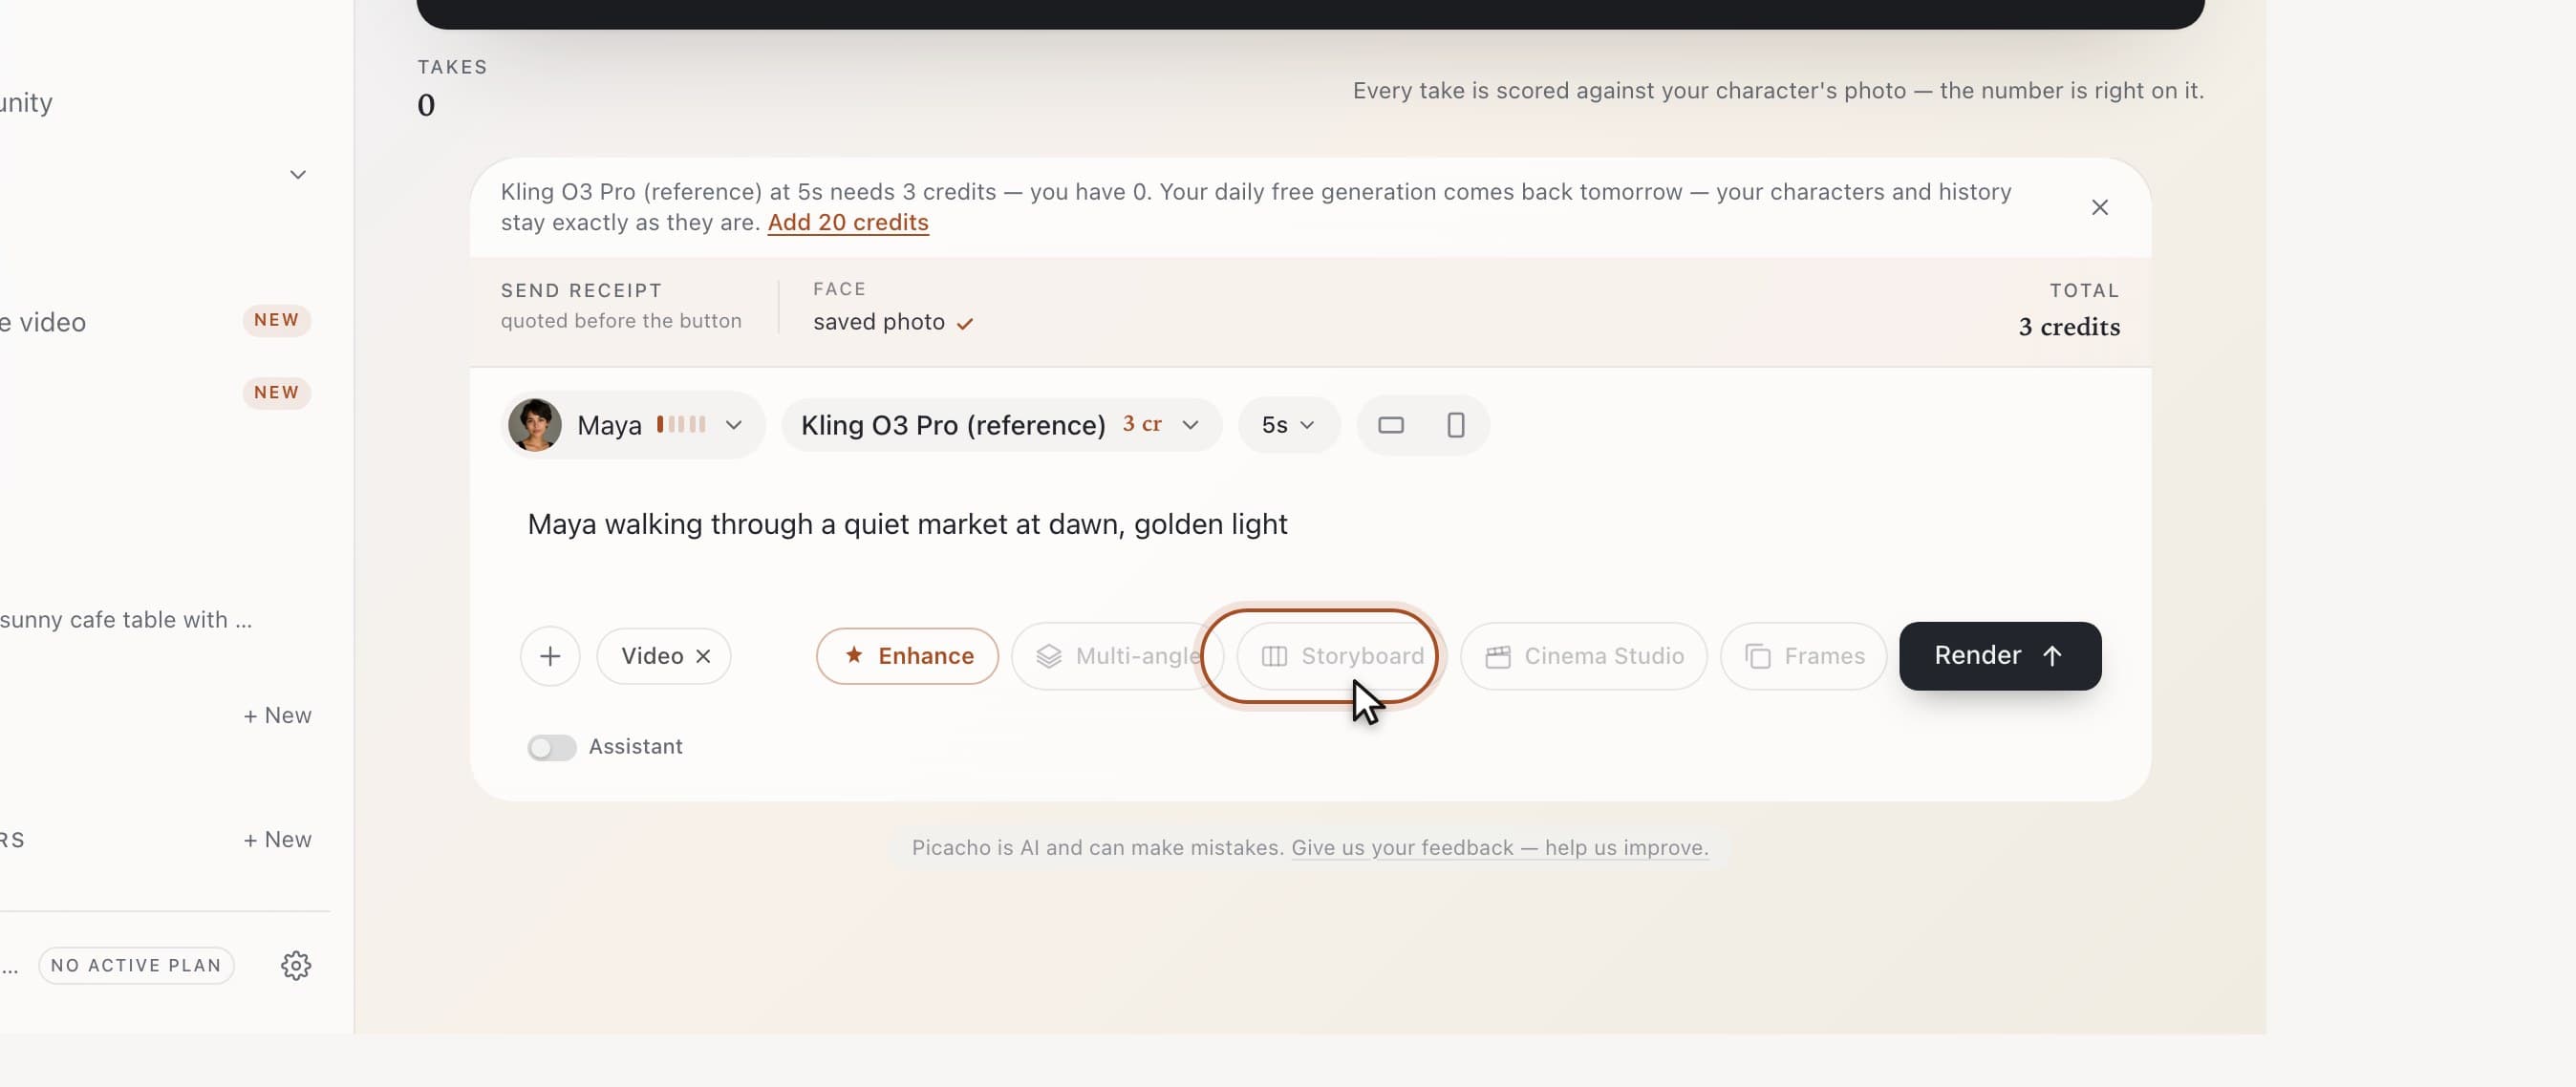
Storyboard plans the video as two to six shots, each with its own line and its own length. Cinema Studio turns a single idea into that shot list for you. Frames lets you pin the first frame — and optionally the last — to a photo you already have.
Video introduces itself
The first time you switch to video, a short tour walks the controls that are new here — three stops, a counter, and Skip whenever you want. It only ever appears once.
Chapter 5
2 minWhat you attach, and what it does
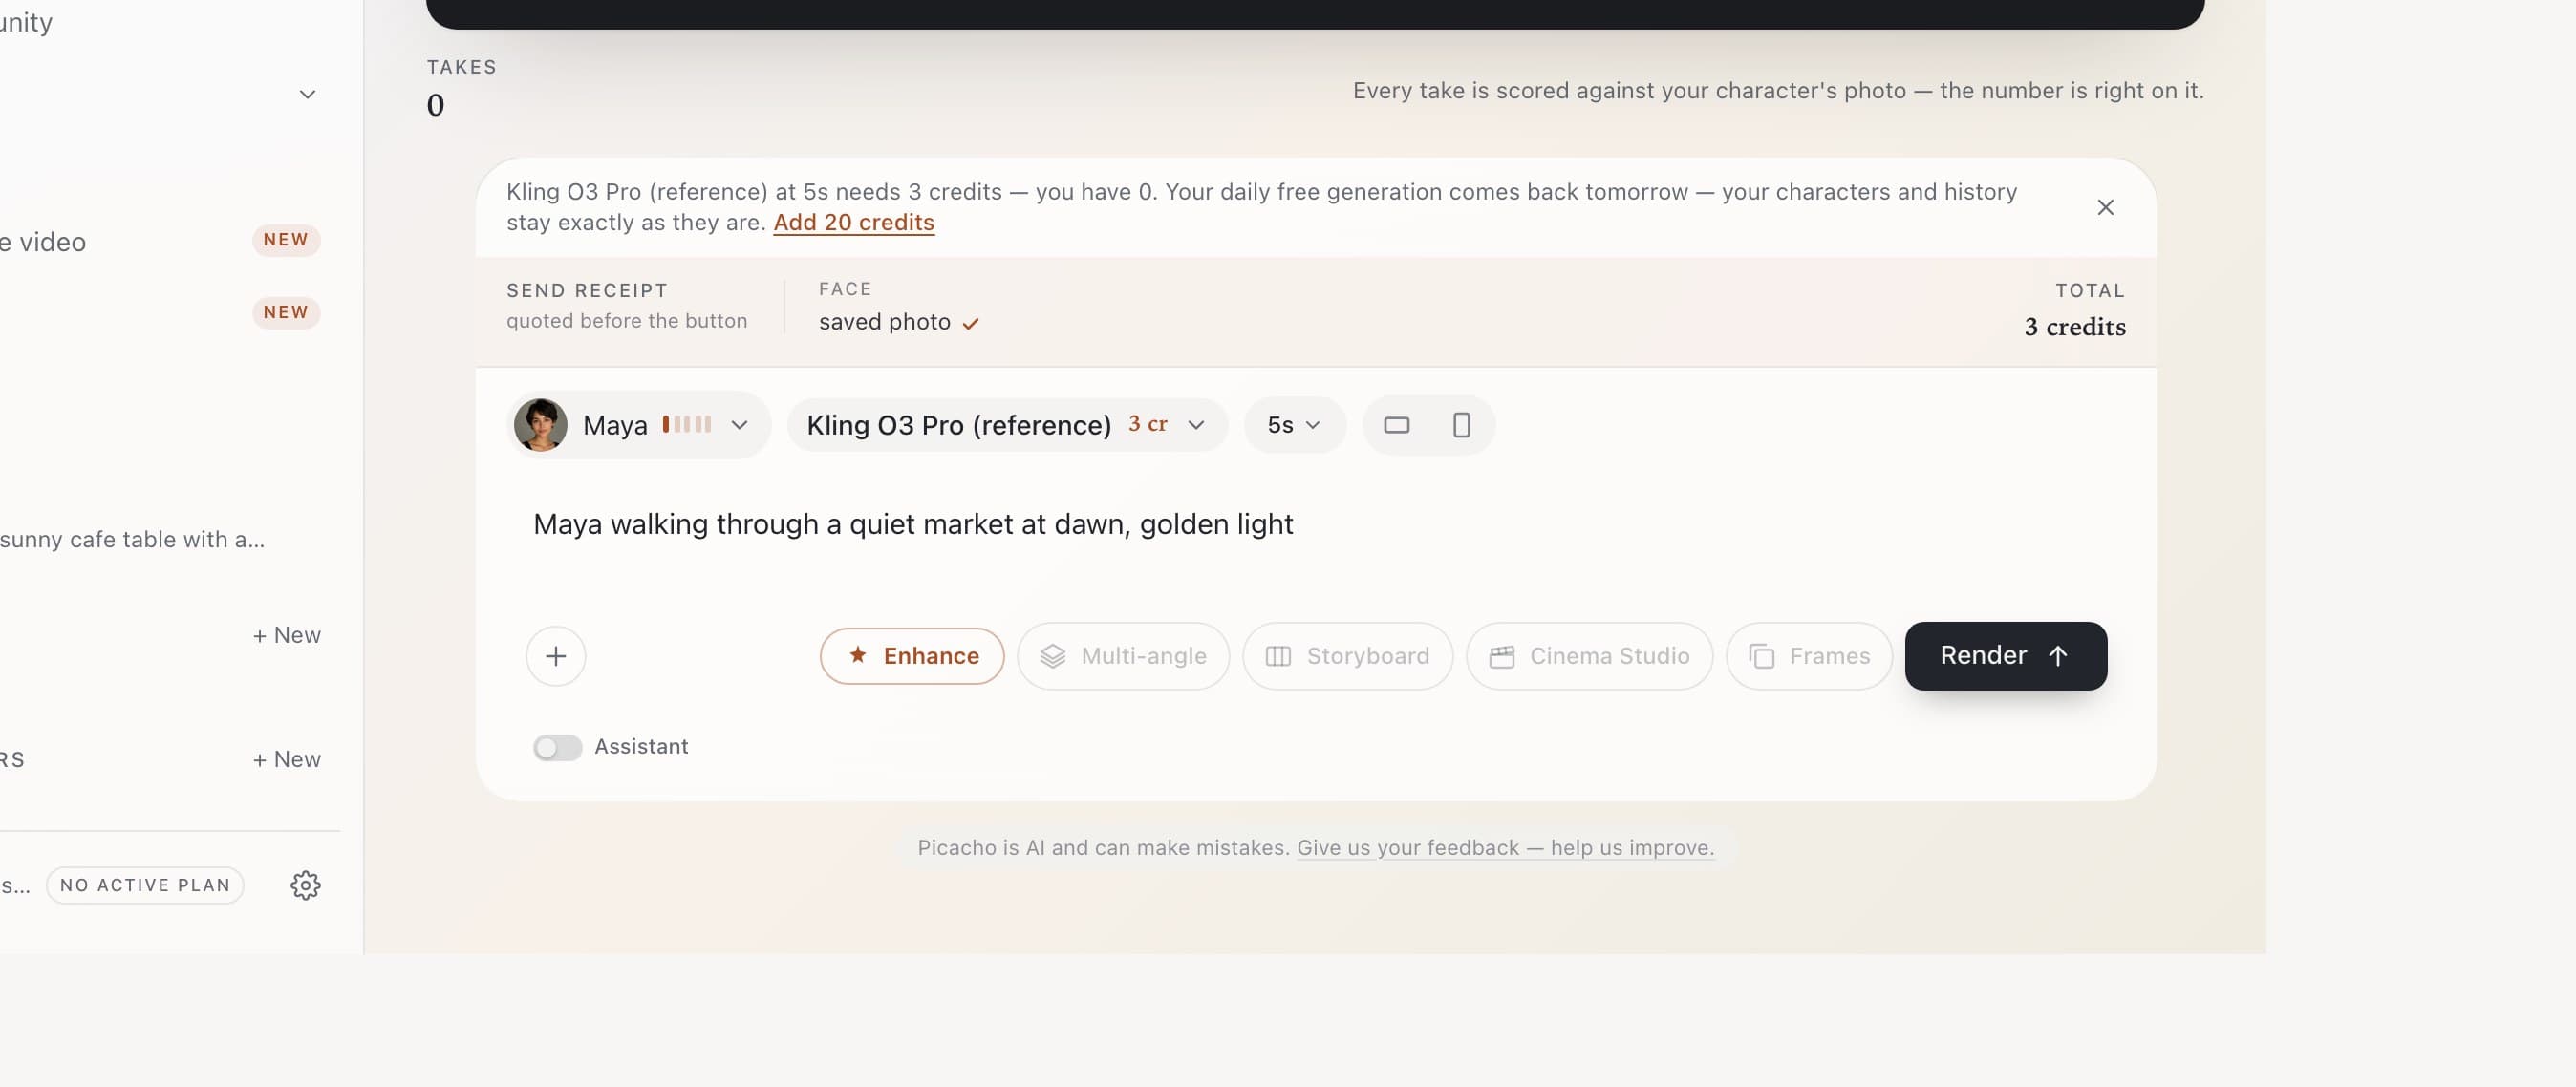
The same + menu has Upload files and Take photo. What Picacho does with an attachment depends on what it is and which engine is selected — and it tells you, in a line above the send button, before you spend anything.
Read the receipt above the button
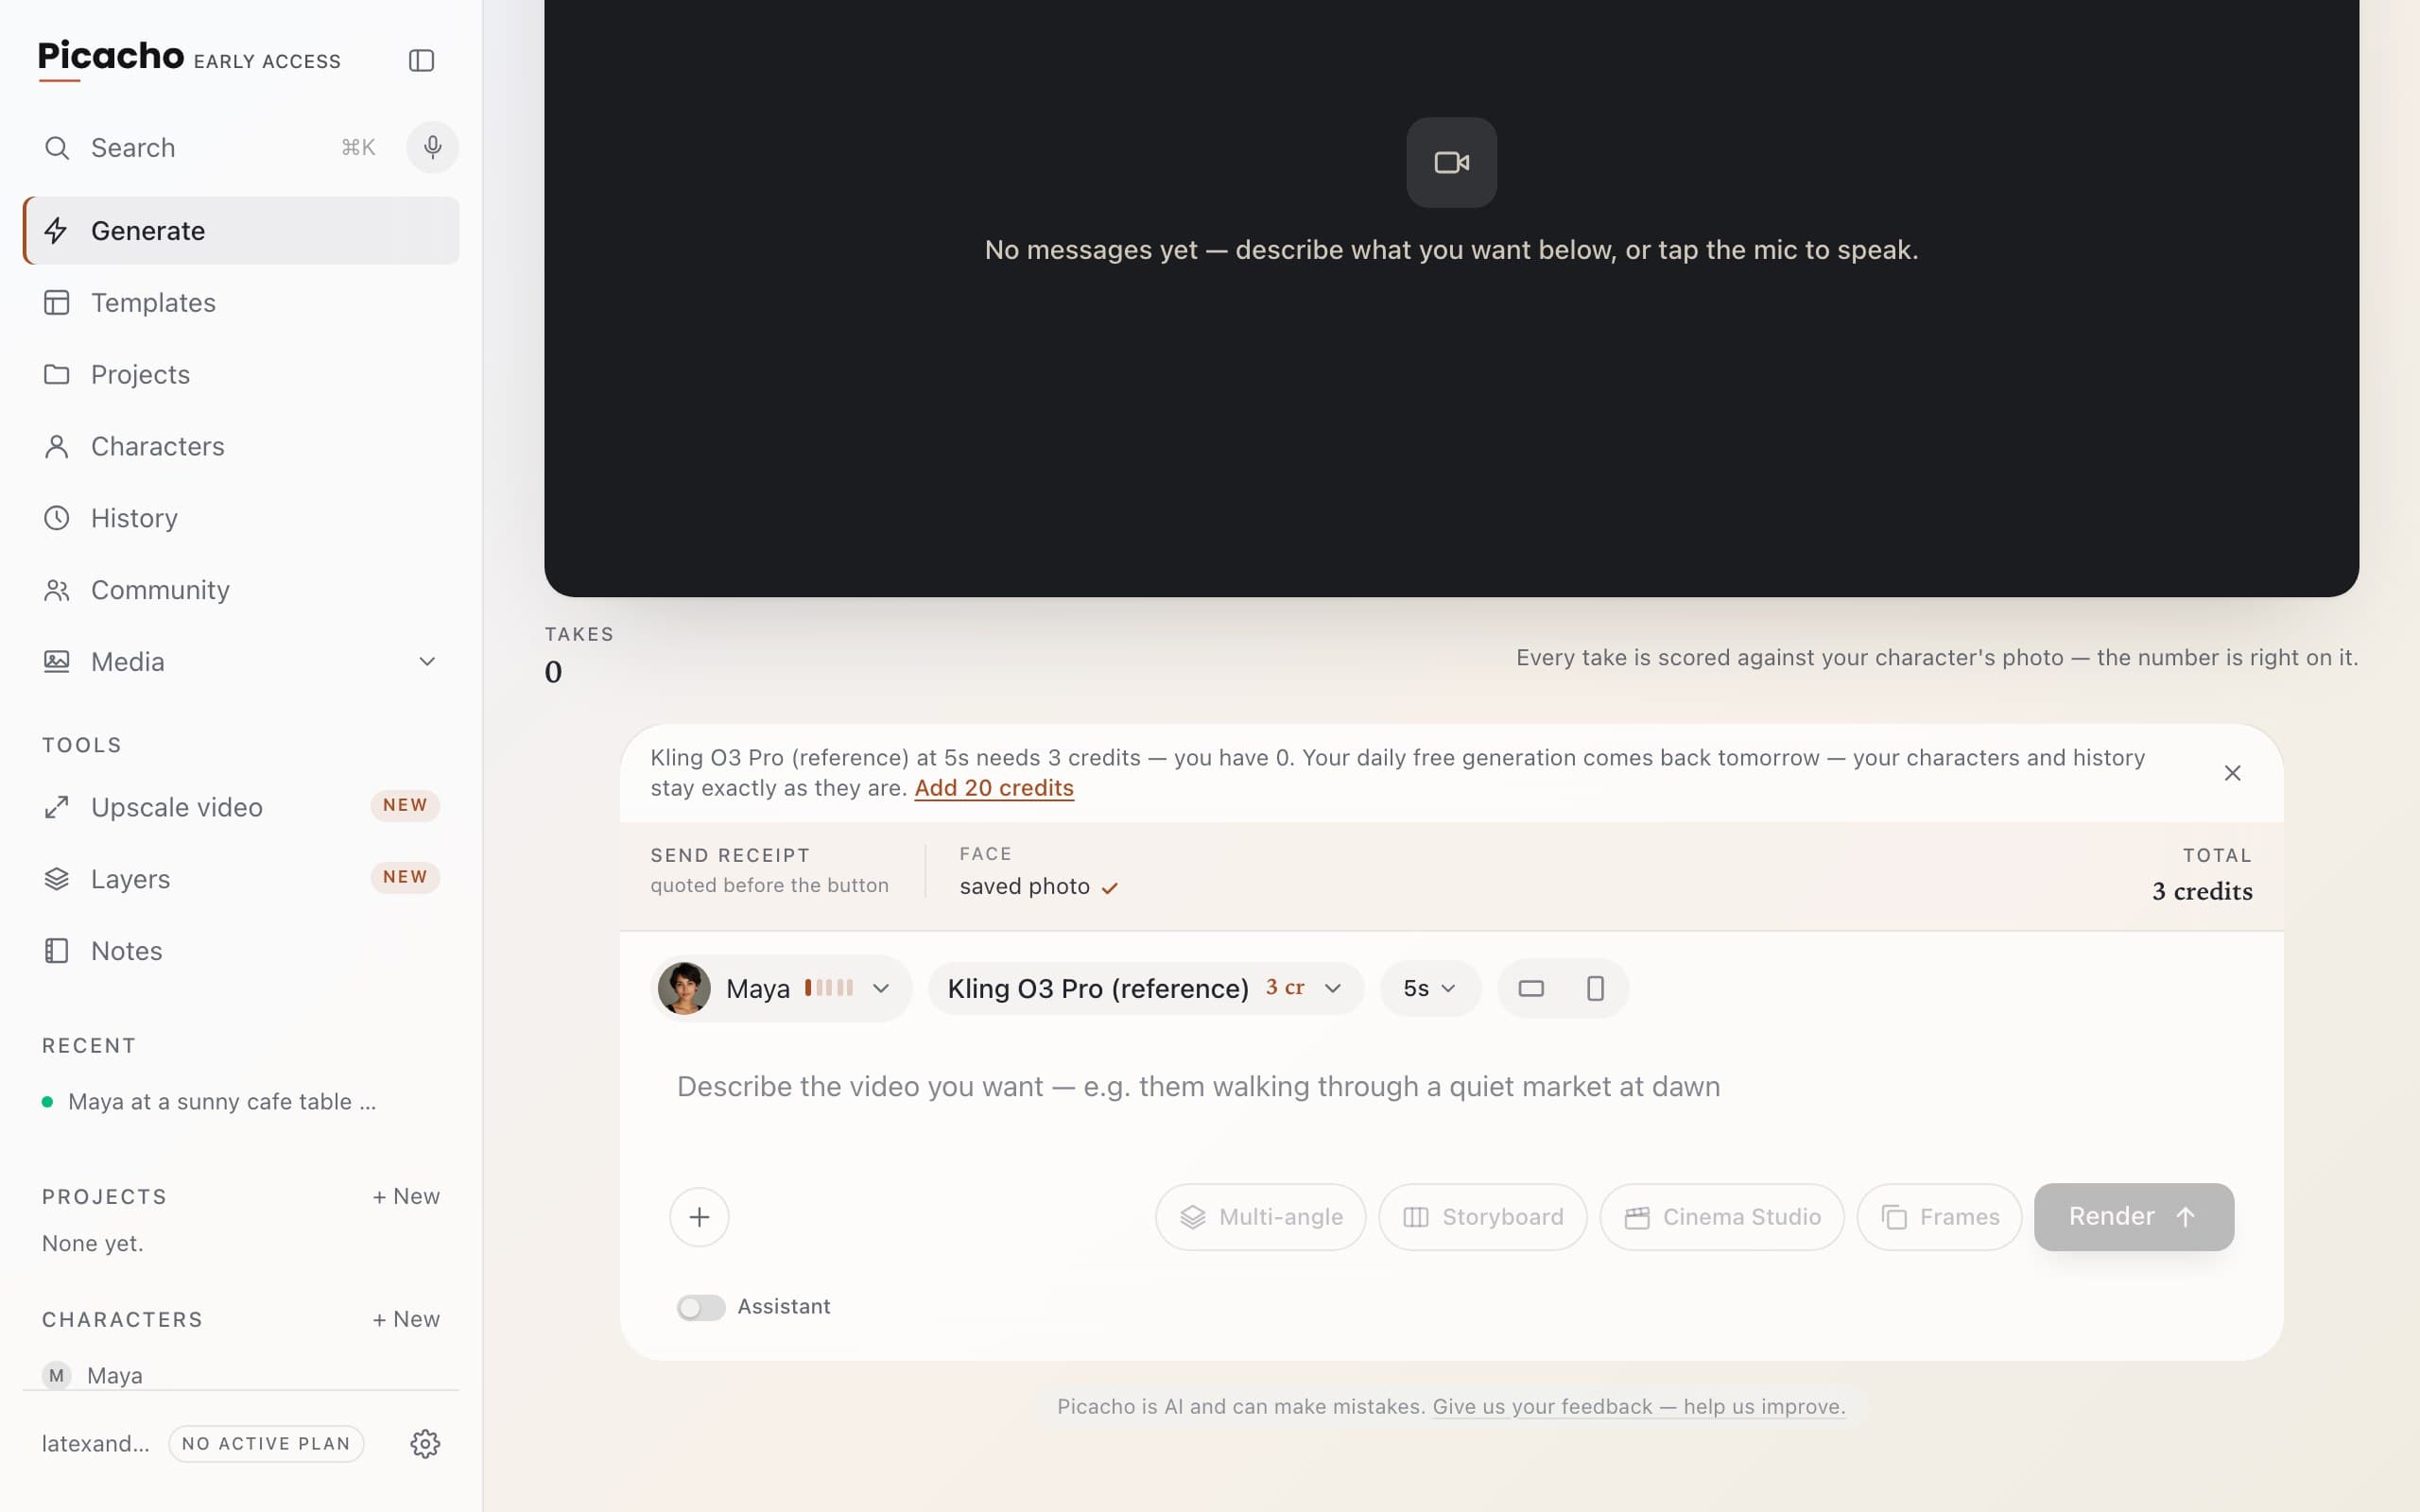
The band is labelled Send receipt — quoted before the button, and it is exactly that: Face: saved photo ✓ if your character's photo is riding along, whatever else you attached, and a Total in credits. If something you expected is missing, it says so here — while it's still free to fix.
Chapter 6
2 minEverything you've made
Nothing you make is only on the stage. Three places keep it.
History
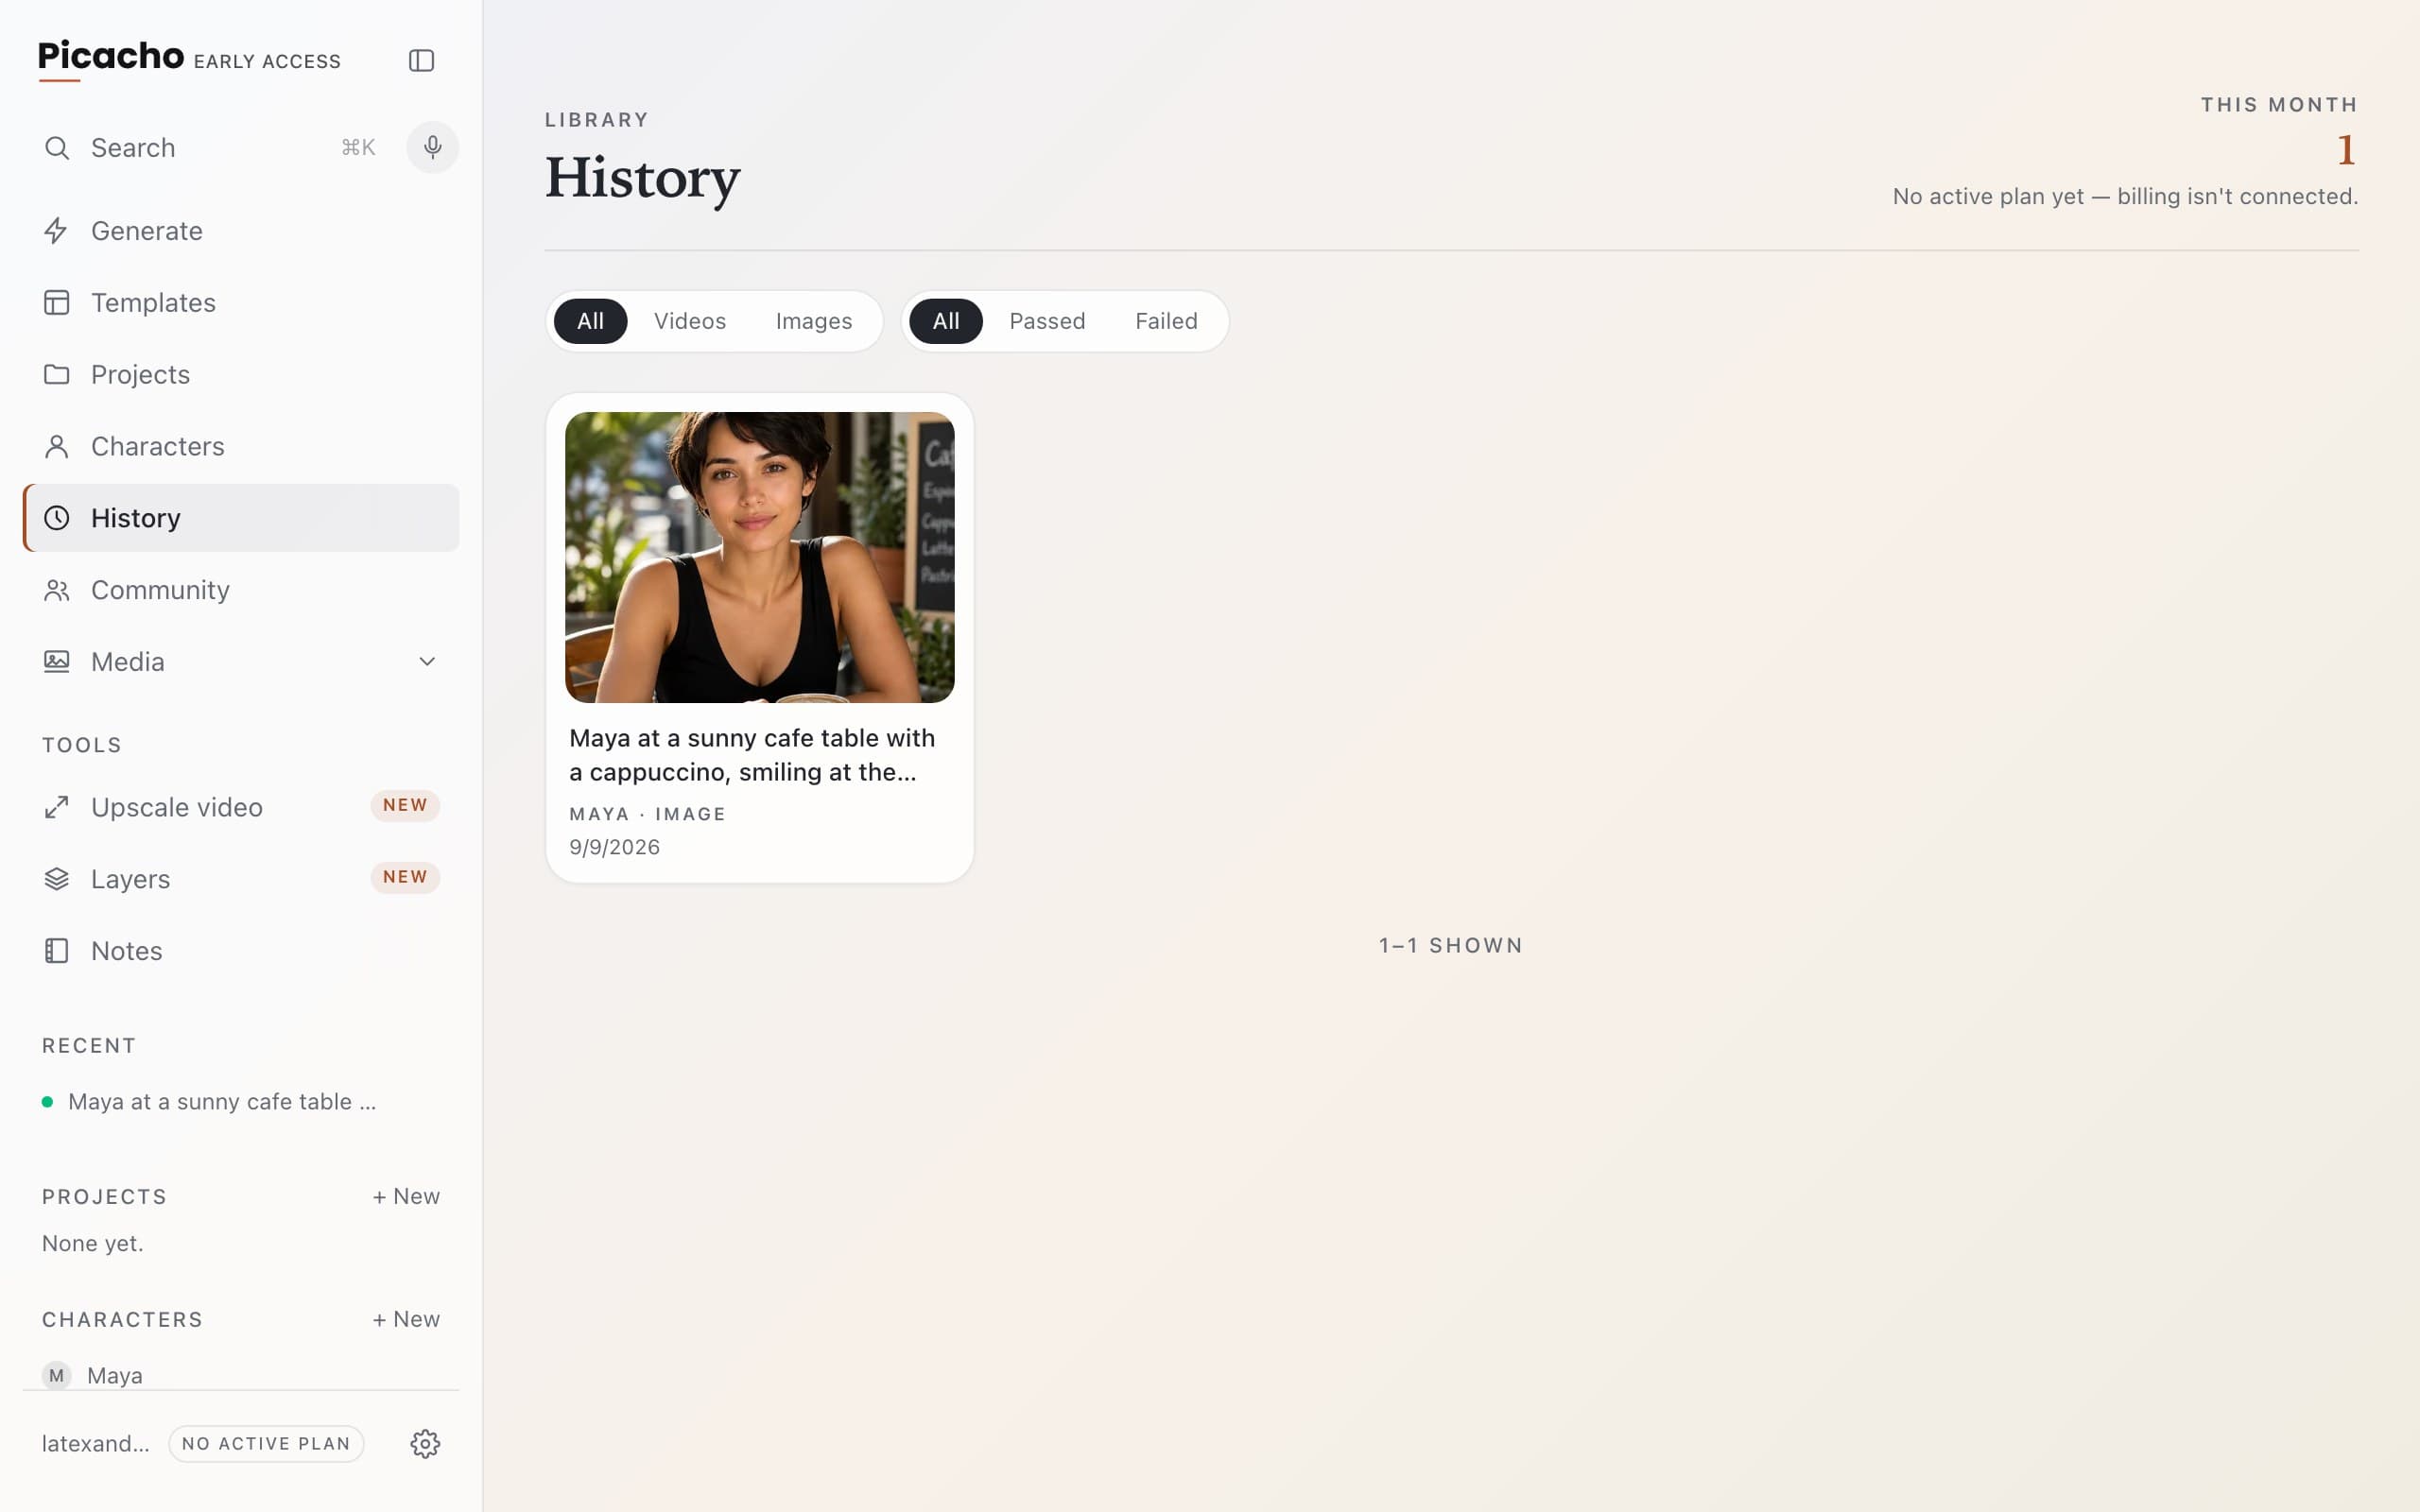
Every take you've made, newest first, with its status and its identity score. Click one to open it.
The take itself
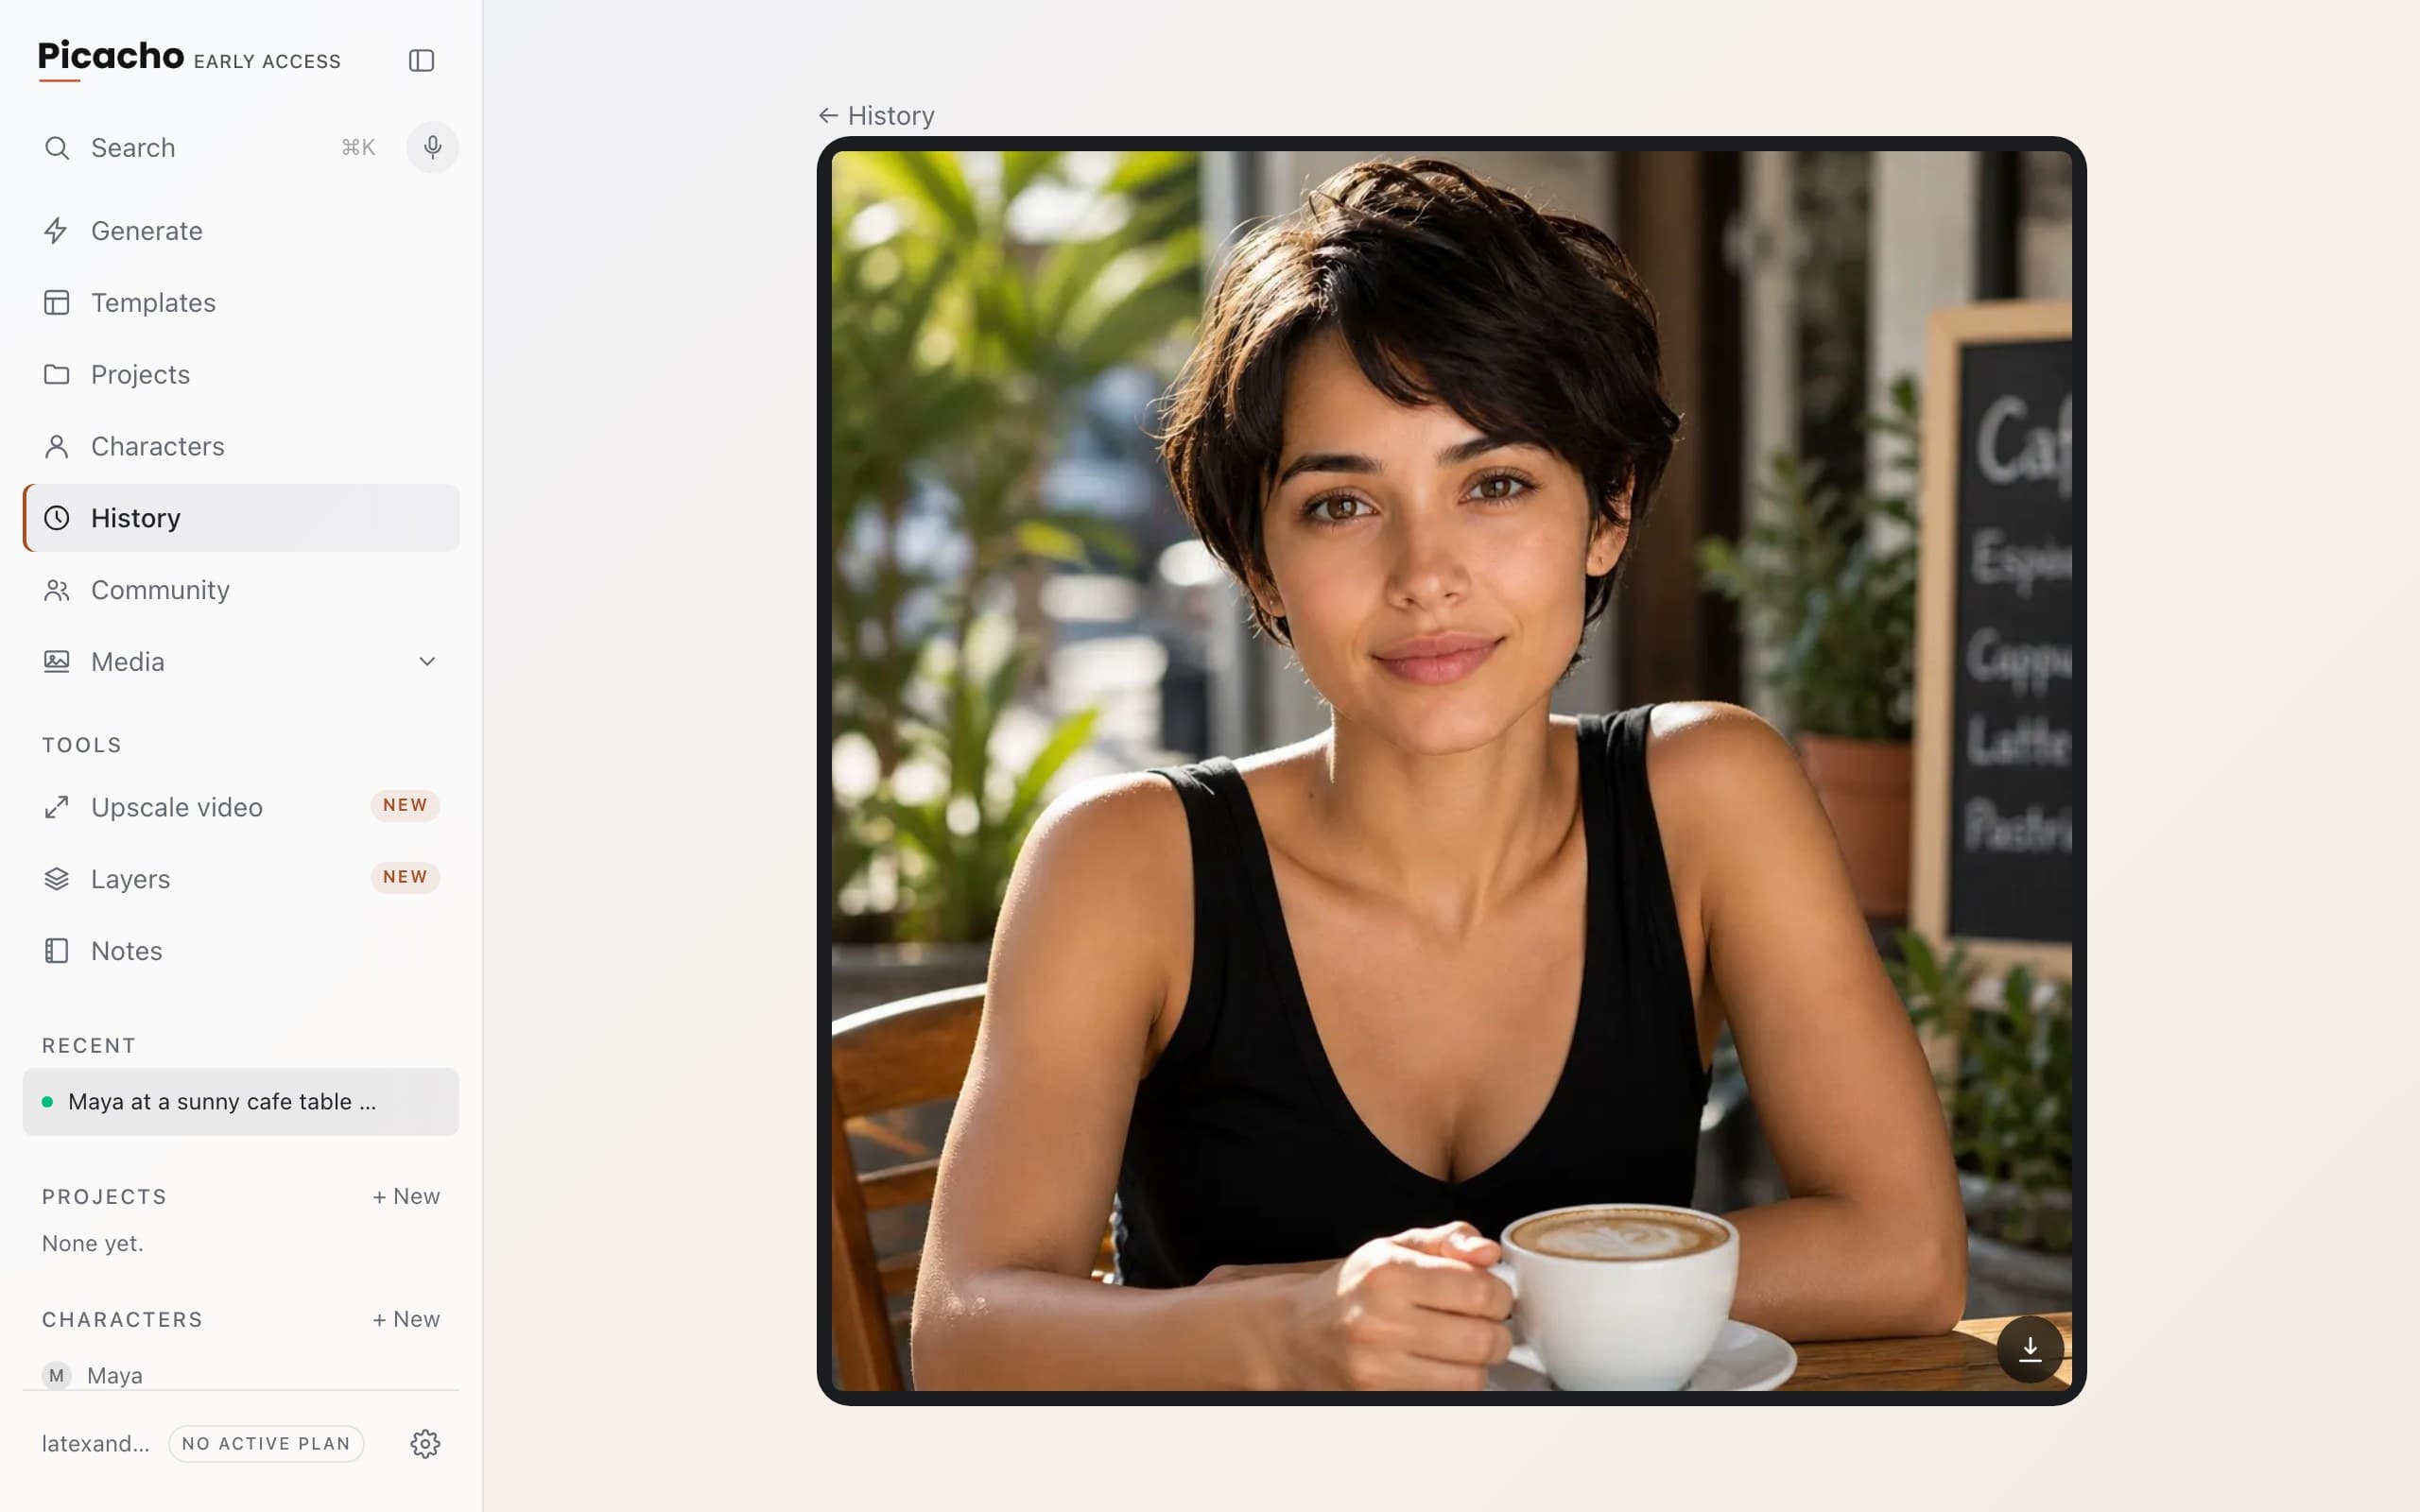
The render at full size, with a download button in its corner and ← History to get back. Scroll down for the rest: the prompt that made it, the engine that rendered it, and the buttons to share it to the community or delete it.
Chapter 7
2 minCommunity
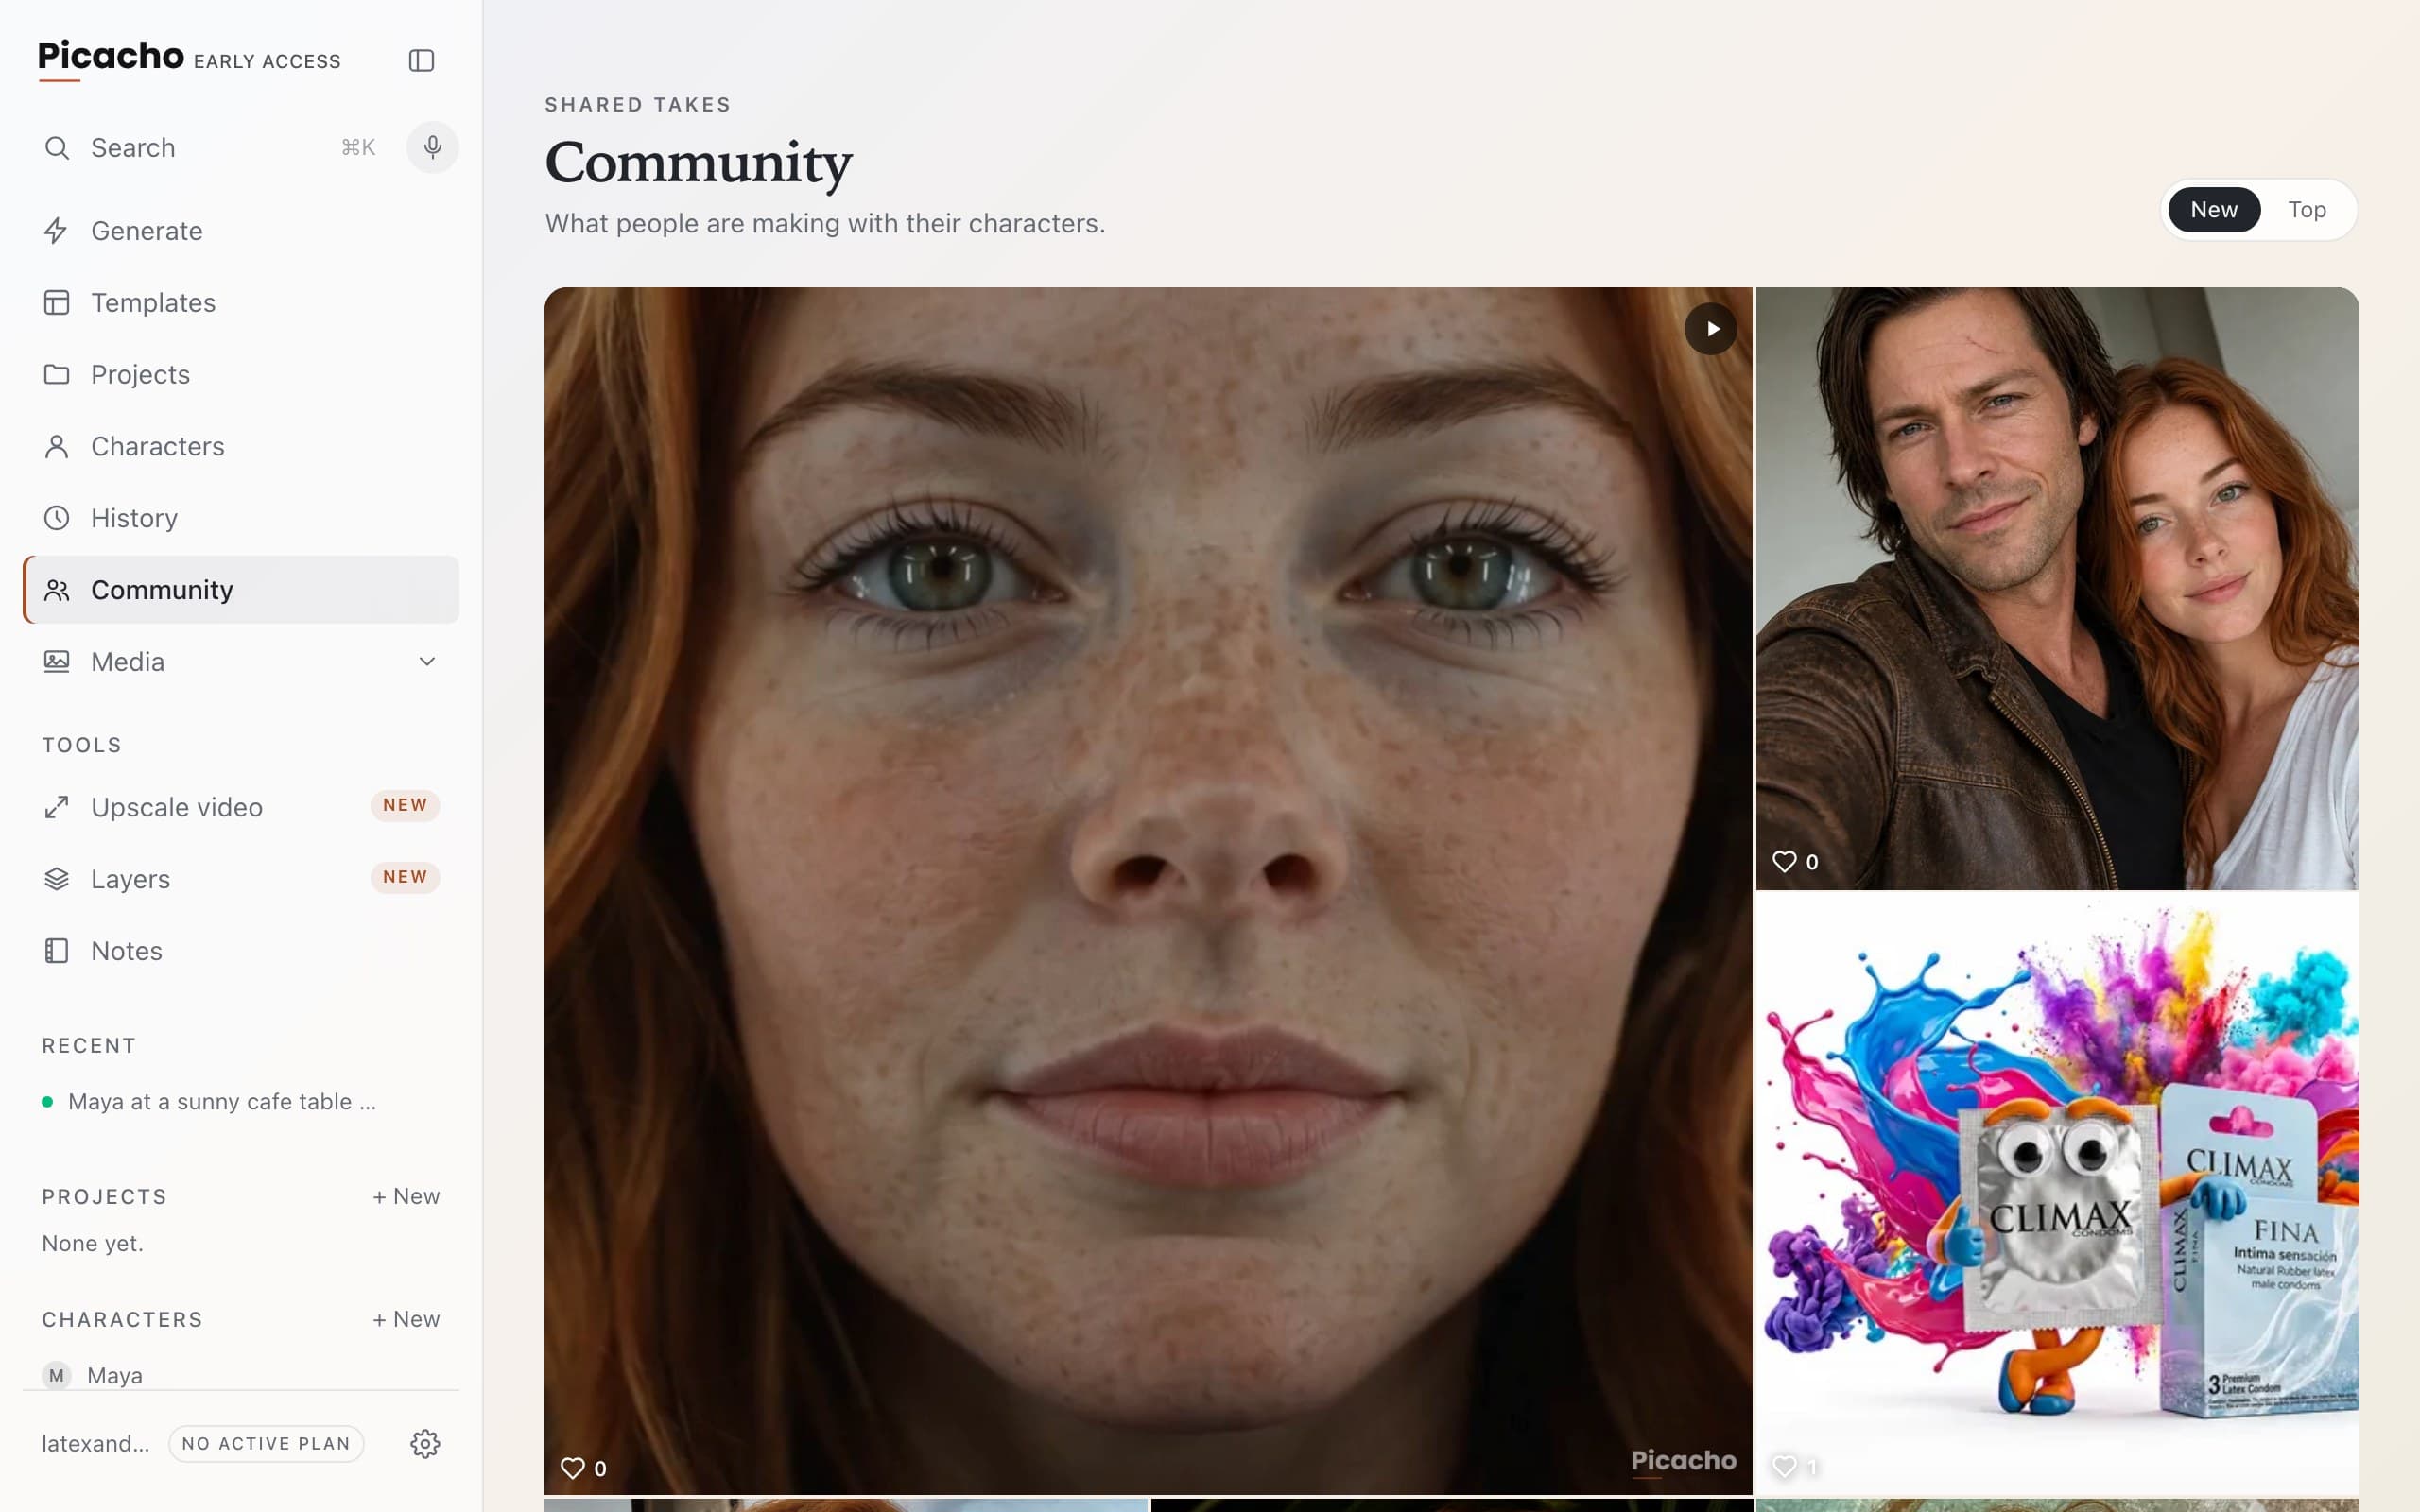
A public feed of takes people chose to share. It's the fastest way to see what a prompt can actually do — and what a well-built character looks like.
The feed
Browse what other people made. Nothing of yours appears here unless you share it yourself.
Chapter 8
3 minCredits, plans and inviting friends
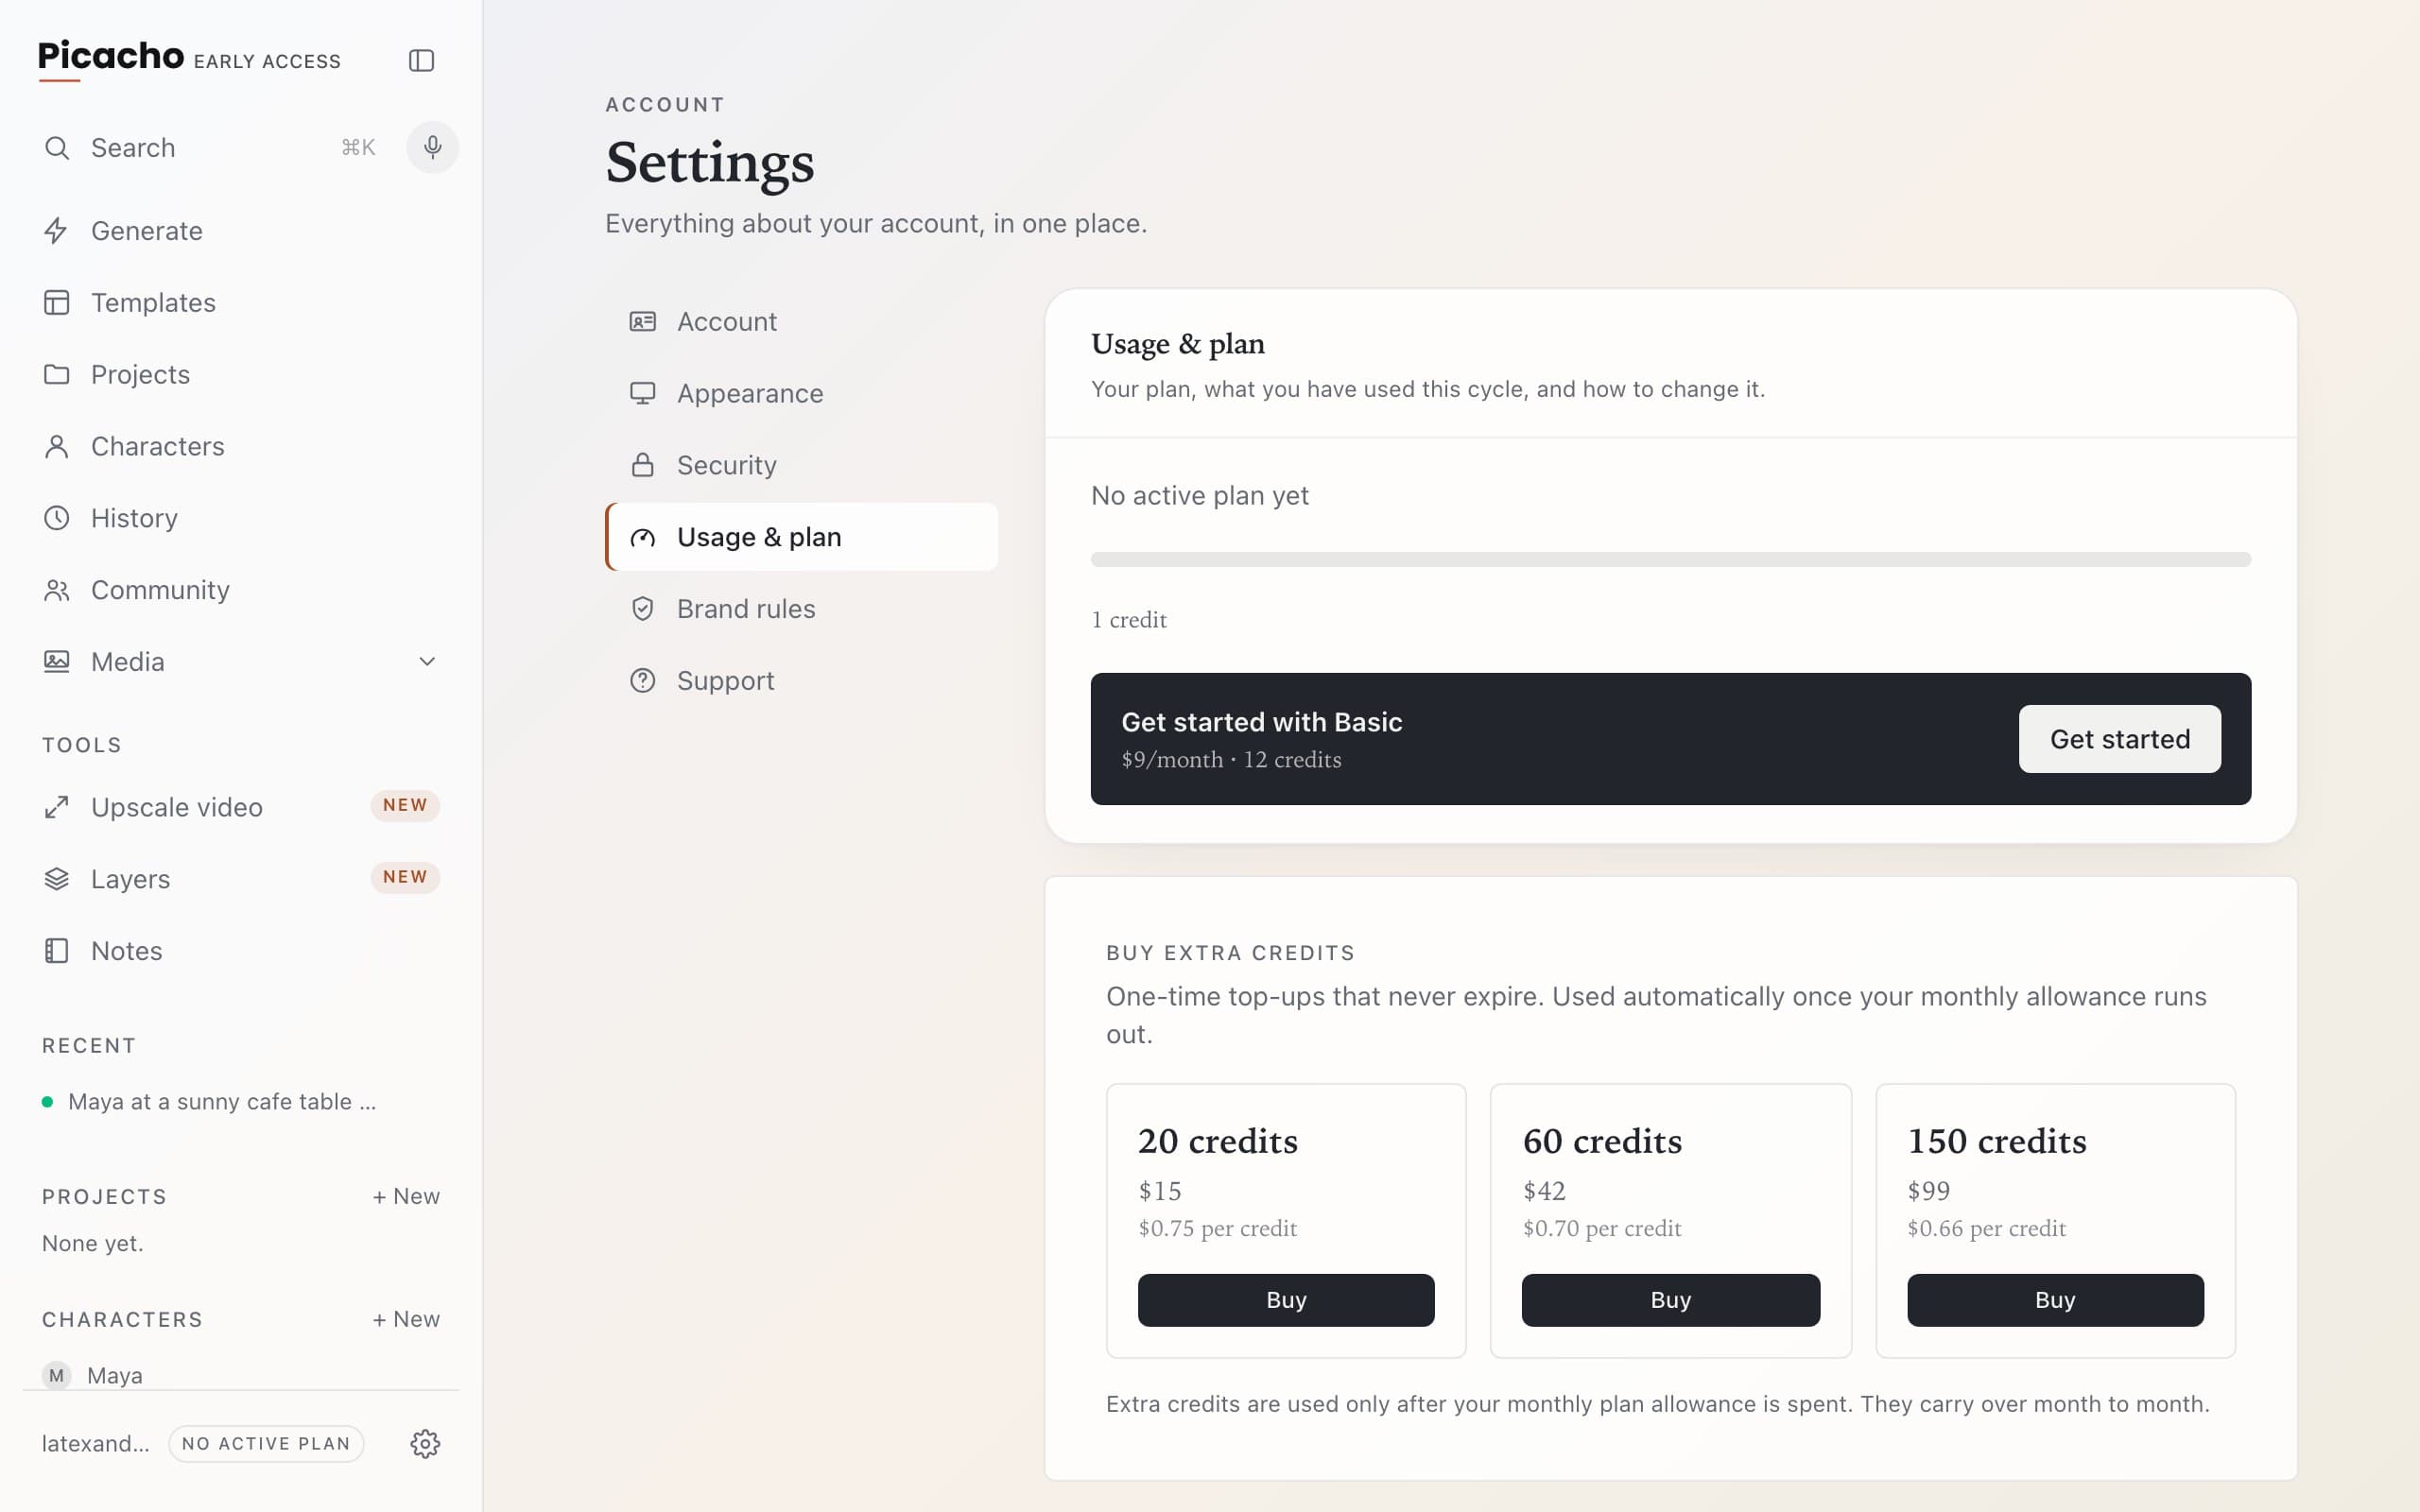
A free account gets one generation a day and two AI character photos, ever. Everything past that runs on credits.
Plan & billing
The gear at the bottom of the sidebar opens Settings; Plan & billing is where your balance, your plan, your spending and your invoices live. Credits are also shown in the top right of the composer, so you always know before you send.
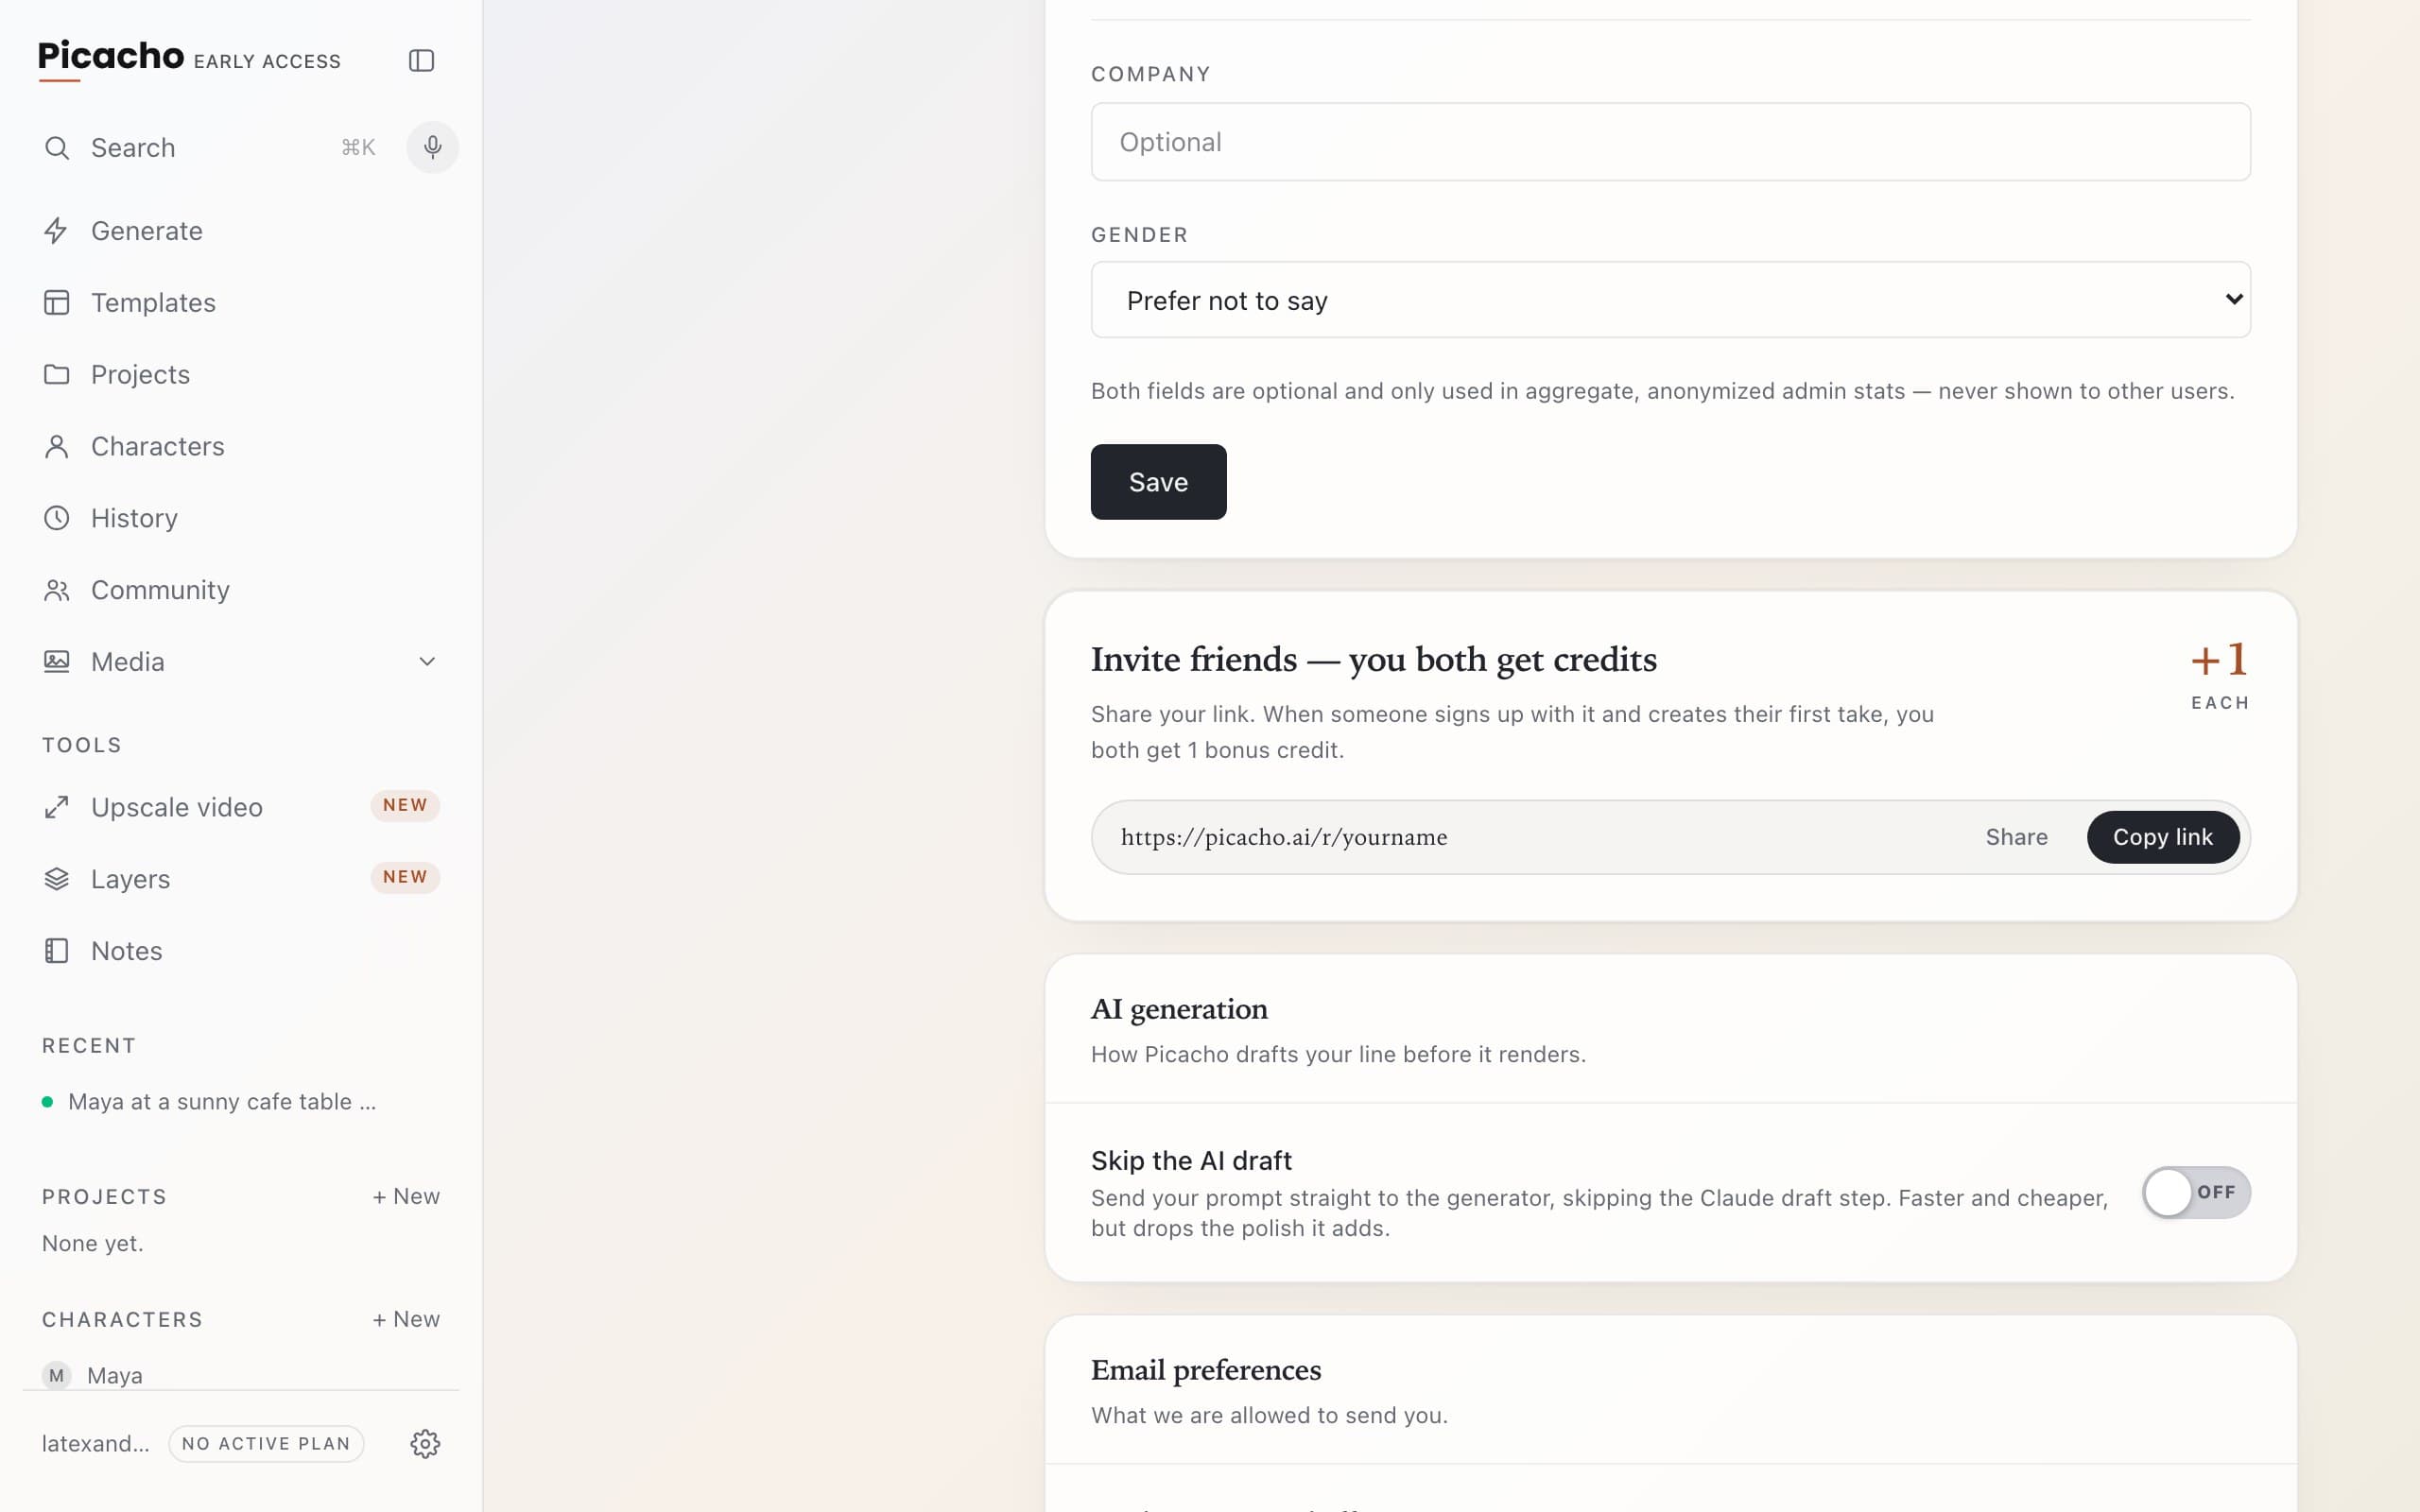
Invite friends
Share your link. When someone signs up with it and makes their first take, you both get a bonus credit. The link is built from your username.
Chapter 9
3 minWhen something goes wrong
Four things account for nearly every disappointing result. All four are quick to fix.
“It doesn't look like my character”
Check a character was selected at all — that's the usual answer. If one was, the face lock is probably thin: one photo is a start, but a three-quarter angle and a full-body shot of the same person are what make it hold. Add them and render again.
“The outfit came out wrong”
Put the clothes in Outfit rather than describing them in the prompt, and make sure the Outfit trait agrees with the photo. Two photos of the same outfit — front and back — beat one photo every time. Two different outfits, on the other hand, give you an average of both.
The warnings are on your side
When Picacho puts a banner in front of you — a photoreal character on an engine that refuses them, a missing voice on a line of dialogue — it's not being fussy. It has seen the combination fail, and it usually offers the fix as a single tap. Take it.
“It says I have no credits”
A free account gets one generation a day. When it's spent, the composer says so plainly and tells you when it comes back — and it's explicit that your characters and your history stay exactly as they are. Add credits, or come back tomorrow.
Still stuck?
Settings has a Support tab, and there's a Send feedback item in the gear menu. Both reach a person.